Styling Your Template

UPDATE TO CUSTOM FONTS:
You can now upload and apply custom font files directly within your Site Styles! This makes updating your fonts much simpler and removes the need for custom code in most cases.
The original guide is still available below if you’re interested in using custom CSS to further refine your typography. However, if you’d prefer a simpler approach and want to apply your custom fonts directly through Site Styles, follow the steps below:
To Upload a Custom Font:
Open the Site styles panel, then click > next to Fonts.
Click a font format, like Headings, Paragraph, or Buttons.
Click the font dropdown menu, then click the upload icon.
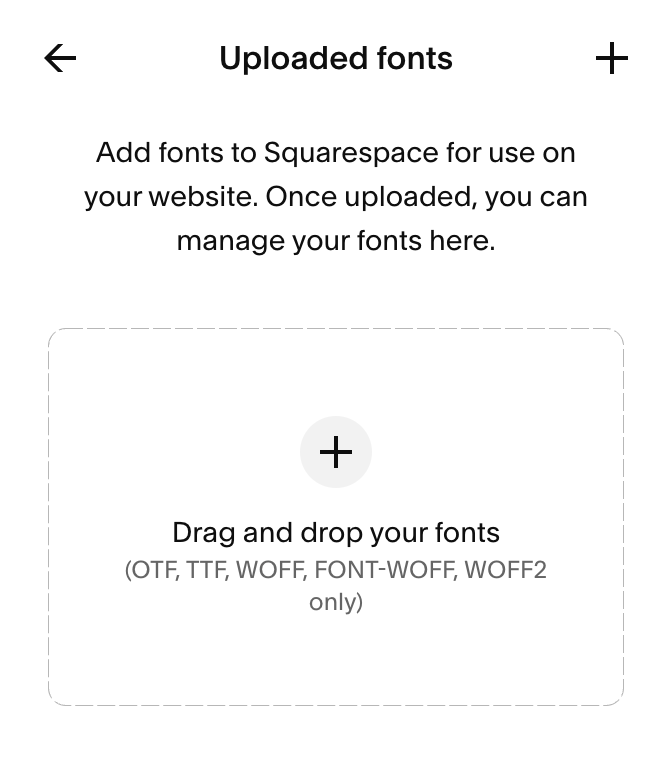
Click and drag the file from your computer into the upload area, or click + and select the file to upload.
Supported file types
Upload your custom fonts as one of the following file types:
.otf
.ttf
.woff
.woff2

Adding Custom Fonts in Squarespace:
Step 1: Prepare Your Font Files
You’ll need the .woff or .woff2 file format (these are best for web).
If you have .ttf or .otf files, you can convert them using a free tool like: https://cloudconvert.com/ttf-to-woff
Step 2: Upload the Font File to Squarespace
In your Squarespace site editor, go to Design → Custom CSS
Scroll to the bottom and click “Manage Custom Files”
Upload your
.woffor.woff2file
Squarespace will generate a link to the font—keep that window open for the next step.
Step 3: Add the CSS to Activate the Font
Paste this code into the Custom CSS box, replacing the FONT-NAME and file URL with your own:
  @font-face {
        font-family: 'FONTNAME';
        src: url('FontURL');
 }
Step 4: Assigning Headers
In Squarespace, each heading size (Heading 1, Heading 2, Heading 3, Heading 4) has its own label and CSS class. This means you can apply your custom font to all headings at once, or just to specific sizes depending on your brand style.
To Style All Headings:
h1, h2, h3, h4 {
  font-family: 'FONTNAME'
}
Style Specific Headings:
Styling specific headings is helpful if you want to use multiple fonts on your website. For example, you may assign one brand font to H1 and h2 and have a secondary brand font you want to use for H3 and H4.
To do this, you can style them like this:
h1  {
  font-family: 'FONTNAME'
}


h2  {
  font-family: 'FONTNAME'
}


h3  {
  font-family: 'FONTNAME'
}

h4  {
  font-family: 'FONTNAME'
}
Step 5: More Customization (Optional)
Once you’ve added your custom font, you can also fine-tune how it appears using additional CSS properties. Want your headings to feel bolder, more spaced out, or want to fine tune them to keep everything totally on-brand?
Here’s an example of what’s possible:
h1 {
  font-family: 'FONTNAME';
  font-weight: 700;
  font-style: italic;
  font-size: 16px;
  letter-spacing: 0.1em;
  text-transform: uppercase;
  line-height: 1em;
}
What Each Line Does:
font-family: Assigns your custom or chosen fontfont-weight: Controls how bold the text appears (e.g. 400 = regular, 700 = bold)font-style: Allows italic or normal stylingfont-size: Adjusts the size of the heading (in pixels, rem, etc.)letter-spacing: Adds space between letterstext-transform: Controls capitalization (e.g. uppercase, lowercase, or none)line-height: Adjusts vertical spacing between lines of text
NOTE: You can use this same structure for any heading size (h2, h3, etc.) or for things like buttons, paragraph text, or navigation links too.
Not Seeing Your Changes?
If you’ve added custom font styles or adjustments and nothing’s changing on your site, don’t panic—it’s a common Squarespace quirk.
Sometimes Squarespace’s built-in styles take priority over your custom CSS. When that happens, you may need to override the default code by adding !important to your CSS rule.
Here’s how:
h1 {
  font-family: 'FONTNAME' !important;
  letter-spacing: 0.1em !important;
  text-transform: uppercase !important;
}
The !important tag tells Squarespace: “No really, use this style instead.”
💡 Only use when necessary. It’s a helpful tool, but overusing it can make future edits harder to manage and slow down your site’s loading speed.
Step 6: Assigning Paragraph Text
So assign a custom font for your paragraph text use this code:
p {
font-family: 'FONTNAME' !important;
}
Step 7: Add Custom Fonts to Buttons
To change the font used in your site’s buttons, you’ll need to apply your custom font to Squarespace’s button classes. This will ensure all buttons—regardless of size or style—use the same consistent typography. There are three classes of buttons as shown below:
Primary Button:
.sqs-button-element--primary {
font-family: 'FONTNAME';
}
Secondary Button:
sqs-button-element--secondary {
font-family: 'FONTNAME';
}
Tertiary Button:
 .sqs-button-element--tertiary {
font-family: 'FONTNAME';
}
Step 8: Customizing Your Site Navigation
If you’d like to will update your logo (if you're using a text-based site title) and your main menu links to reflect your brand font you can use the following code:
Site Title:
.header-title-text a {
font-family: 'FontTitle';
}
Navigation on Desktop:
.header-nav-item a {
    font-family: 'FONTNAME';
}
Navigation on Mobile:
.header-menu-nav-item a {
    font-family: 'FONTNAME';
}
Button in Desktop Navigation:
.header-nav-item a,  a.btn {
    font-family: 'FONTNAME' !important;
}
Button in Desktop Navigation:
.header-menu-nav-item a,  a.btn {
    font-family: 'FONTNAME' !important;
}
Step 9: Customizing Your Contact Form
If you’re using the built-in contact forms on your site you can target each section with the following:
Form Field Headings:
.form-wrapper .field-list .title {
  font-family: YOURFONTFAMILY;
Form Field Captions:
.form-wrapper .field-list .field .caption {
  font-family: YOURFONTFAMILY;
Form Field Description:
.form-wrapper .field-list .description {
  font-family: YOURFONTFAMILY;
Form Button:
form-wrapper .sqs-button-element--primary {
font-family: Cunia!important
}
Step 10: Apply Your Custom Font to Newsletter Forms
Some of the sections on your newsletter forms are not impacted by Heading or paragraph tags so require a little custom coding.
This includes both the form fields (like name and email) and the submit button. Use the code below to apply your custom font to those areas:
Newsletter Title:
 .newsletter-form-header-title {
font-family: 'FONTNAME';
}
Newsletter Description:
.newsletter-form-header-description p {
font-family: 'FONTNAME';
}
Newsletter Form Fields:
 .newsletter-form-field-element {
font-family: 'FONTNAME';
}
Newsletter Button:
      .newsletter-form-button {
font-family: 'FONTNAME';
}
Newsletter Footnote:
 .newsletter-form-footnote {
font-family: 'FONTNAME';
}
Step 11: Apply Your Custom Font to Blogs
Lastly, change the font for your blog post titles and body text, you can target the blog elements with this CSS:
Blog Page Post Title:
 .blog-title {
 font-family: 'FONTNAME';
       }
Blog Page Post Descriptions:
      .blog-excerpt p {
 font-family: 'FONTNAME';
}
Blog Page Read More Link:
.blog-more-link {
font-family: 'FONTNAME';
}
Blog Post Entry Titles:
.blog-item-title h1.entry-title {
font-family: 'FONTNAME';
}