Header & Navigation
Your site header controls what visitors see at the very top of your website, including your logo, navigation menu, and key actions. In Squarespace 7.1, headers are edited globally, meaning changes apply across your entire site.
Editing Your Header:
You can access and edit your header on any page of your website. Because your header is used on every page of your website, keep in mind that any changes you make will be applied site-wide.
To edit your header:Click Edit in the top-left corner of any of your site pages
Hover your mouse over the header area at the top of your site.
Click Edit site header when it appears.
This opens the header editor where you can adjust your logo, elements, and layout.
When you’re finished, click Save to publish your changes.

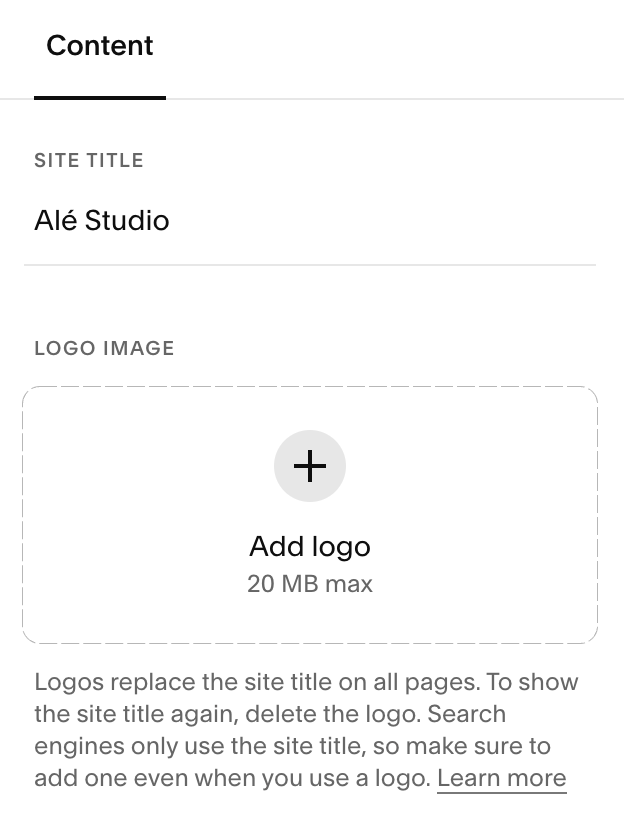
Adding a Logo to Your Header:
If you don’t upload a logo, Squarespace will show your site title in the header instead. Even if you’re using a logo, it’s still a good idea to have your site title filled out because Google uses this for Search Engine optimization so your website can be easily found online.
To Add or replace your logo:Enter Edit site header.
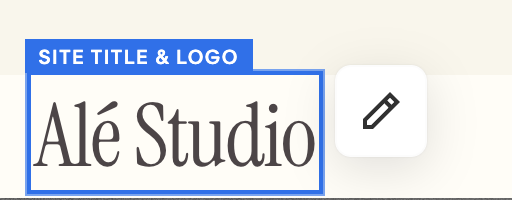
Click directly on your site title or logo area, then click the pencil icon.
Under Logo Image, click the + icon to upload your logo.
You can upload a new file or select one from your existing image library.
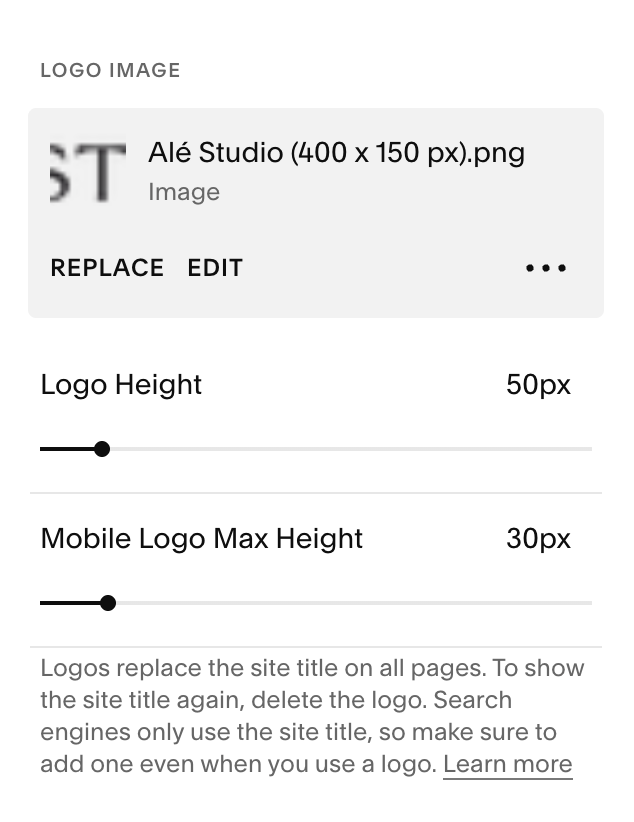
If you want a different logo on mobile, upload a Mobile Logo Image as well.
Adjust the logo size using the height controls until it looks right on desktop and mobile.
Click Save when finished.
→
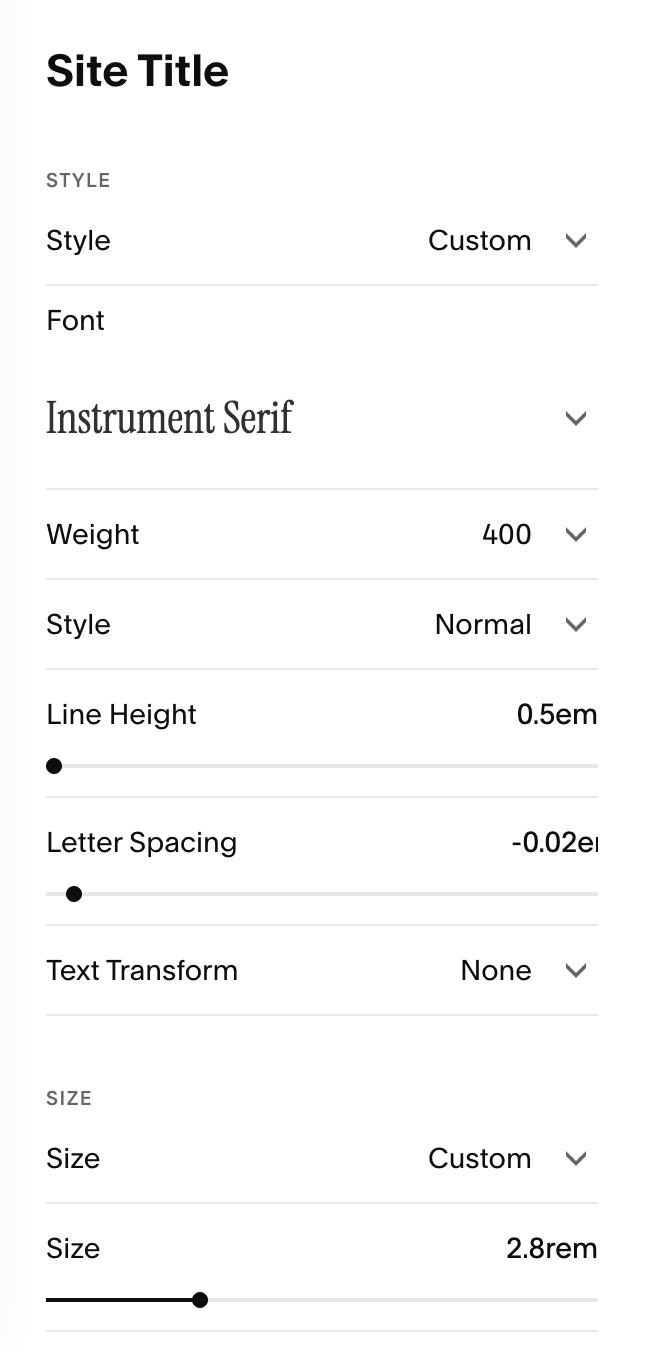
Editing Your Site Title:
If you don’t have a logo to use yet but want to launch your website, don’t worry! You can style and customize your site title the work as a logo. To do this, you’ll be using the Site Styles section of your website.
Important Note: We’ll go over your Site Styles and how to make changes to your fonts in more detail later on. So don’t panic if this step makes you feel like you’ve jumped from 0 to 100, you’ll be totally comfortably navigation all of this stuff after you’ve completed the ‘Site Styles Intro’ and ‘Changing Fonts Lessons’.
You may prefer to wait until you learn how to change the fonts on your website, but it you want to tackle changing your site title now, just follow these steps:
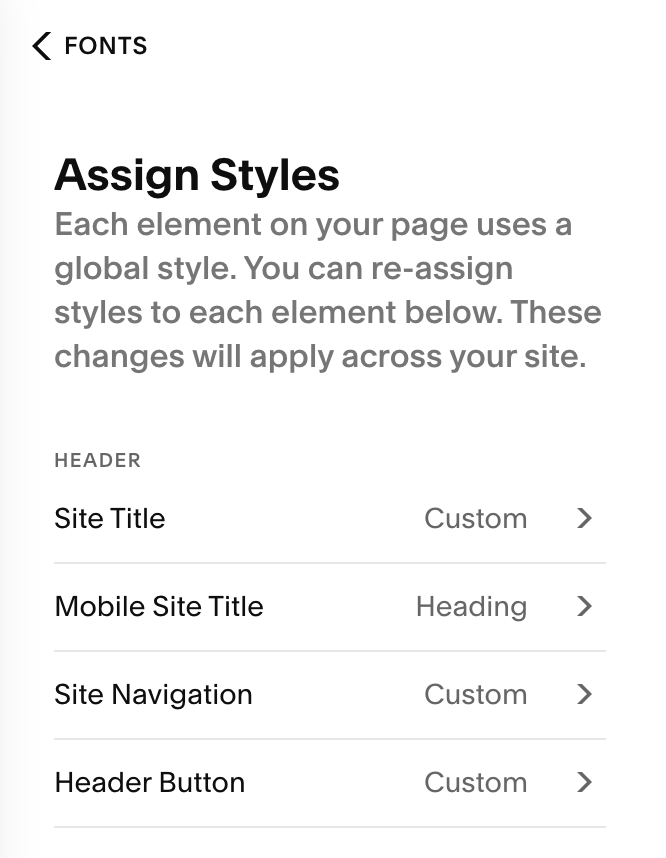
On any page of your site, click the paint brush icon in the top right of your screen.
Select Fonts > Assign Styles > Site Title.
From here you can edit the font and styling of your site title.
To edit how your site title looks like on mobile, choose Mobile Site Title in your Assign Styles.
Click Save in the top right corner of your screen to save changes.
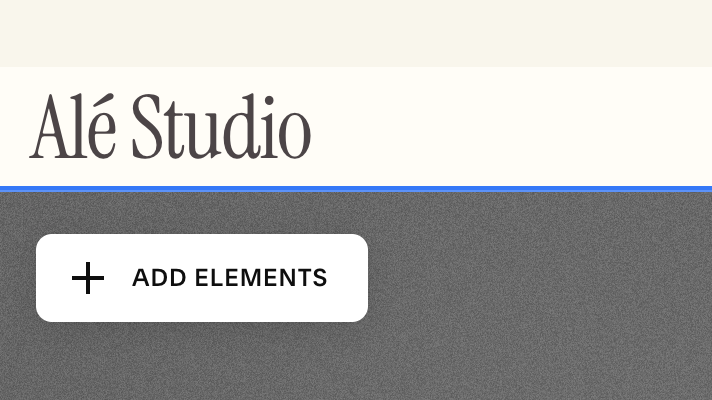
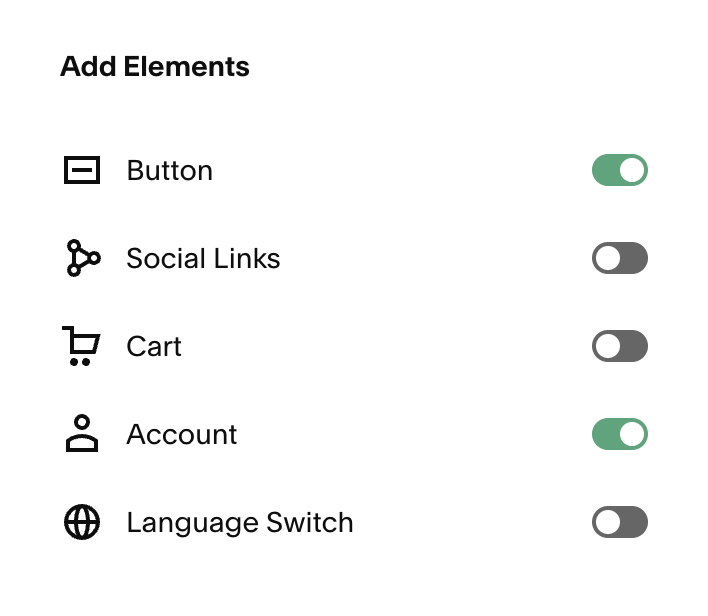
Adding Elements to Your Header:
Squarespace lets you toggle common header features on or off using the Add elements panel.
Enter Edit site header.
Click Add elements.
Use the toggles to enable the elements you want. These include:
A button (great for “Book Now,” “Join,” or “Shop”)
Social icons
Shopping cart icon (for stores or digital products)
Customer account login (if enabled on your site)
Language options (for bilingual or multilingual sites)
Click Save to apply your changes.
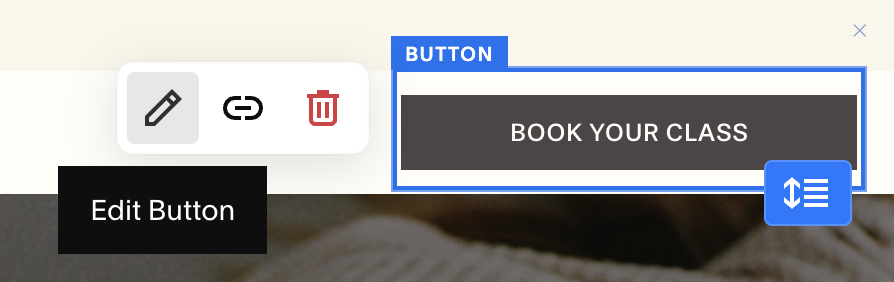
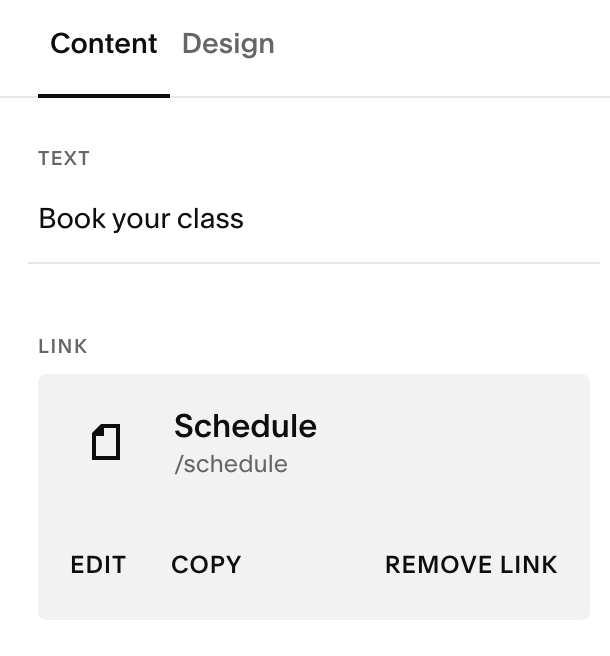
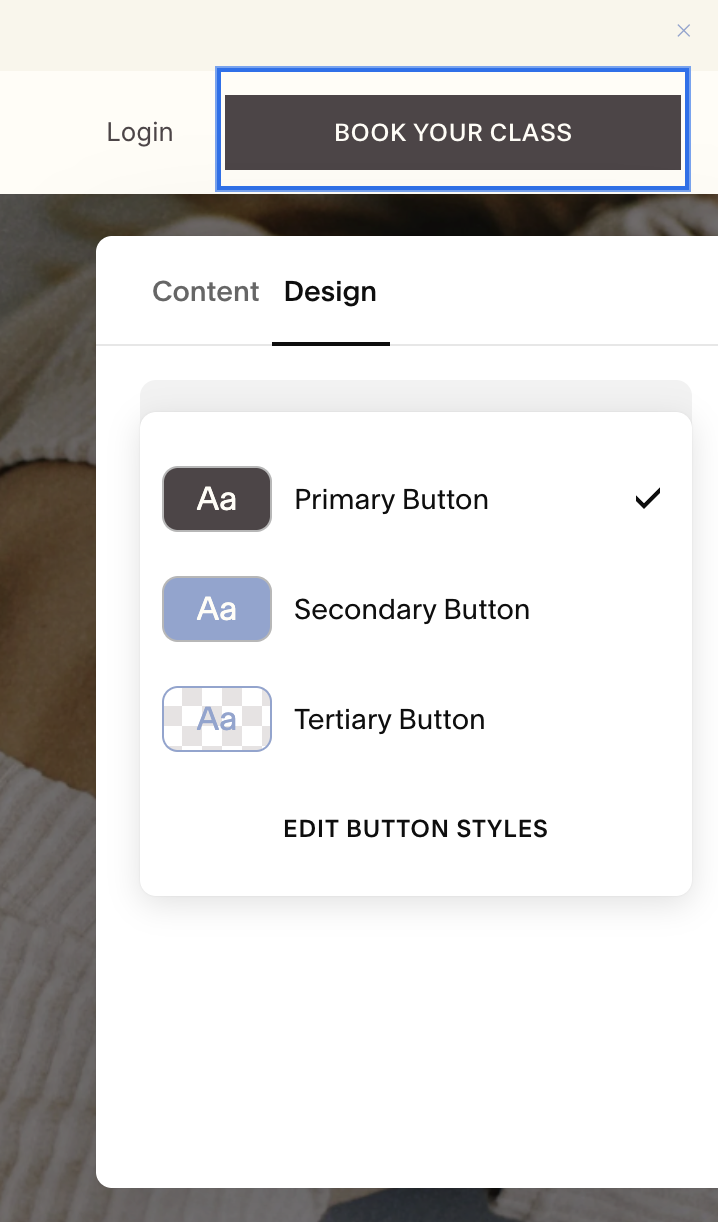
Editing Your Navigation Button:
Helpful Note: Before editing your navigation button I’d recommend completing the ‘Changing Button Styles’ and ‘Button Block’ lessons to give you all the information you need on how to add a link to your button and style how it looks!
Making Changes to your Navigation Button:While in edit mode for your Site Header
Click directly on the button in your navigation.
Use the settings panel to update:
Button text (what the button says)
Link (where the button goes when clicked)
Button Style (Primary, Secondary or Tertiary)
To remove your navigation button, click on your button and then select the trash can icon.
Styling Your Navigation Button:
Helpful Note: You’ll learn more about this and how to change the style of your buttons in the ‘Changing Button Styles’ lesson .
Your navigation button styling is connected to your site’s global button styles. If you want to change things like colors, corner rounding, or hover effects:
Go to Site Styles
Scroll to the Buttons section.
Adjust the style settings for your buttons
IMPORTANT: These changes will update the buttons across your entire site, not just the site header.
Editing Your Social Links:
Your social icons pull from your site-wide social links. To learn how to add and edit this, click the button below to go to the ‘Adding Social Links’ lesson:
Adding Bilingual Options to Your Site:
Squarespace doesn’t automatically translate your site by default, but there are two common ways to offer bilingual navigation.
Option A: Add a language switcher using Weglot (recommended)
This option creates translated versions of your site and adds a language switcher to your header so visitors can easily change languages.
How it works:Go to Settings → Site Languages (this is where Weglot connects).
Connect Weglot and choose your languages (Weglot opens in a new tab for translation management; translations aren’t edited directly inside Squarespace).
Customize the language switcher appearance in Squarespace:
Settings → Site Languages → Style your language drop-down
Choose display style (text/icon/flag), sizing, and toggle it on/off
To learn more CLICK HERE.
Option B: Manually build a bilingual site structure
If you prefer full manual control, you can create separate pages for each language and link them together using navigation menus.
Common setup options include:A landing page where visitors choose their language
Duplicate page sets for each language
A navigation drop-down that links to each language version
Important limitations:
Some system-generated content (like checkout text or certain labels) can only display in one language at a time.
This method requires more manual upkeep, especially if you update content often.