Editing Your Template
Blocks are, quite literally the building blocks your Squarespace site. Every piece of content on your Squarespace page is build using different blocks. In this guide you’ll learn how to add, move, resize, and edit blocks so you can confidently add and layout your content.
Adding a Block:
Enter your page editor
Go to the section you want to add your block
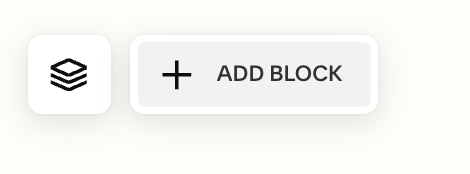
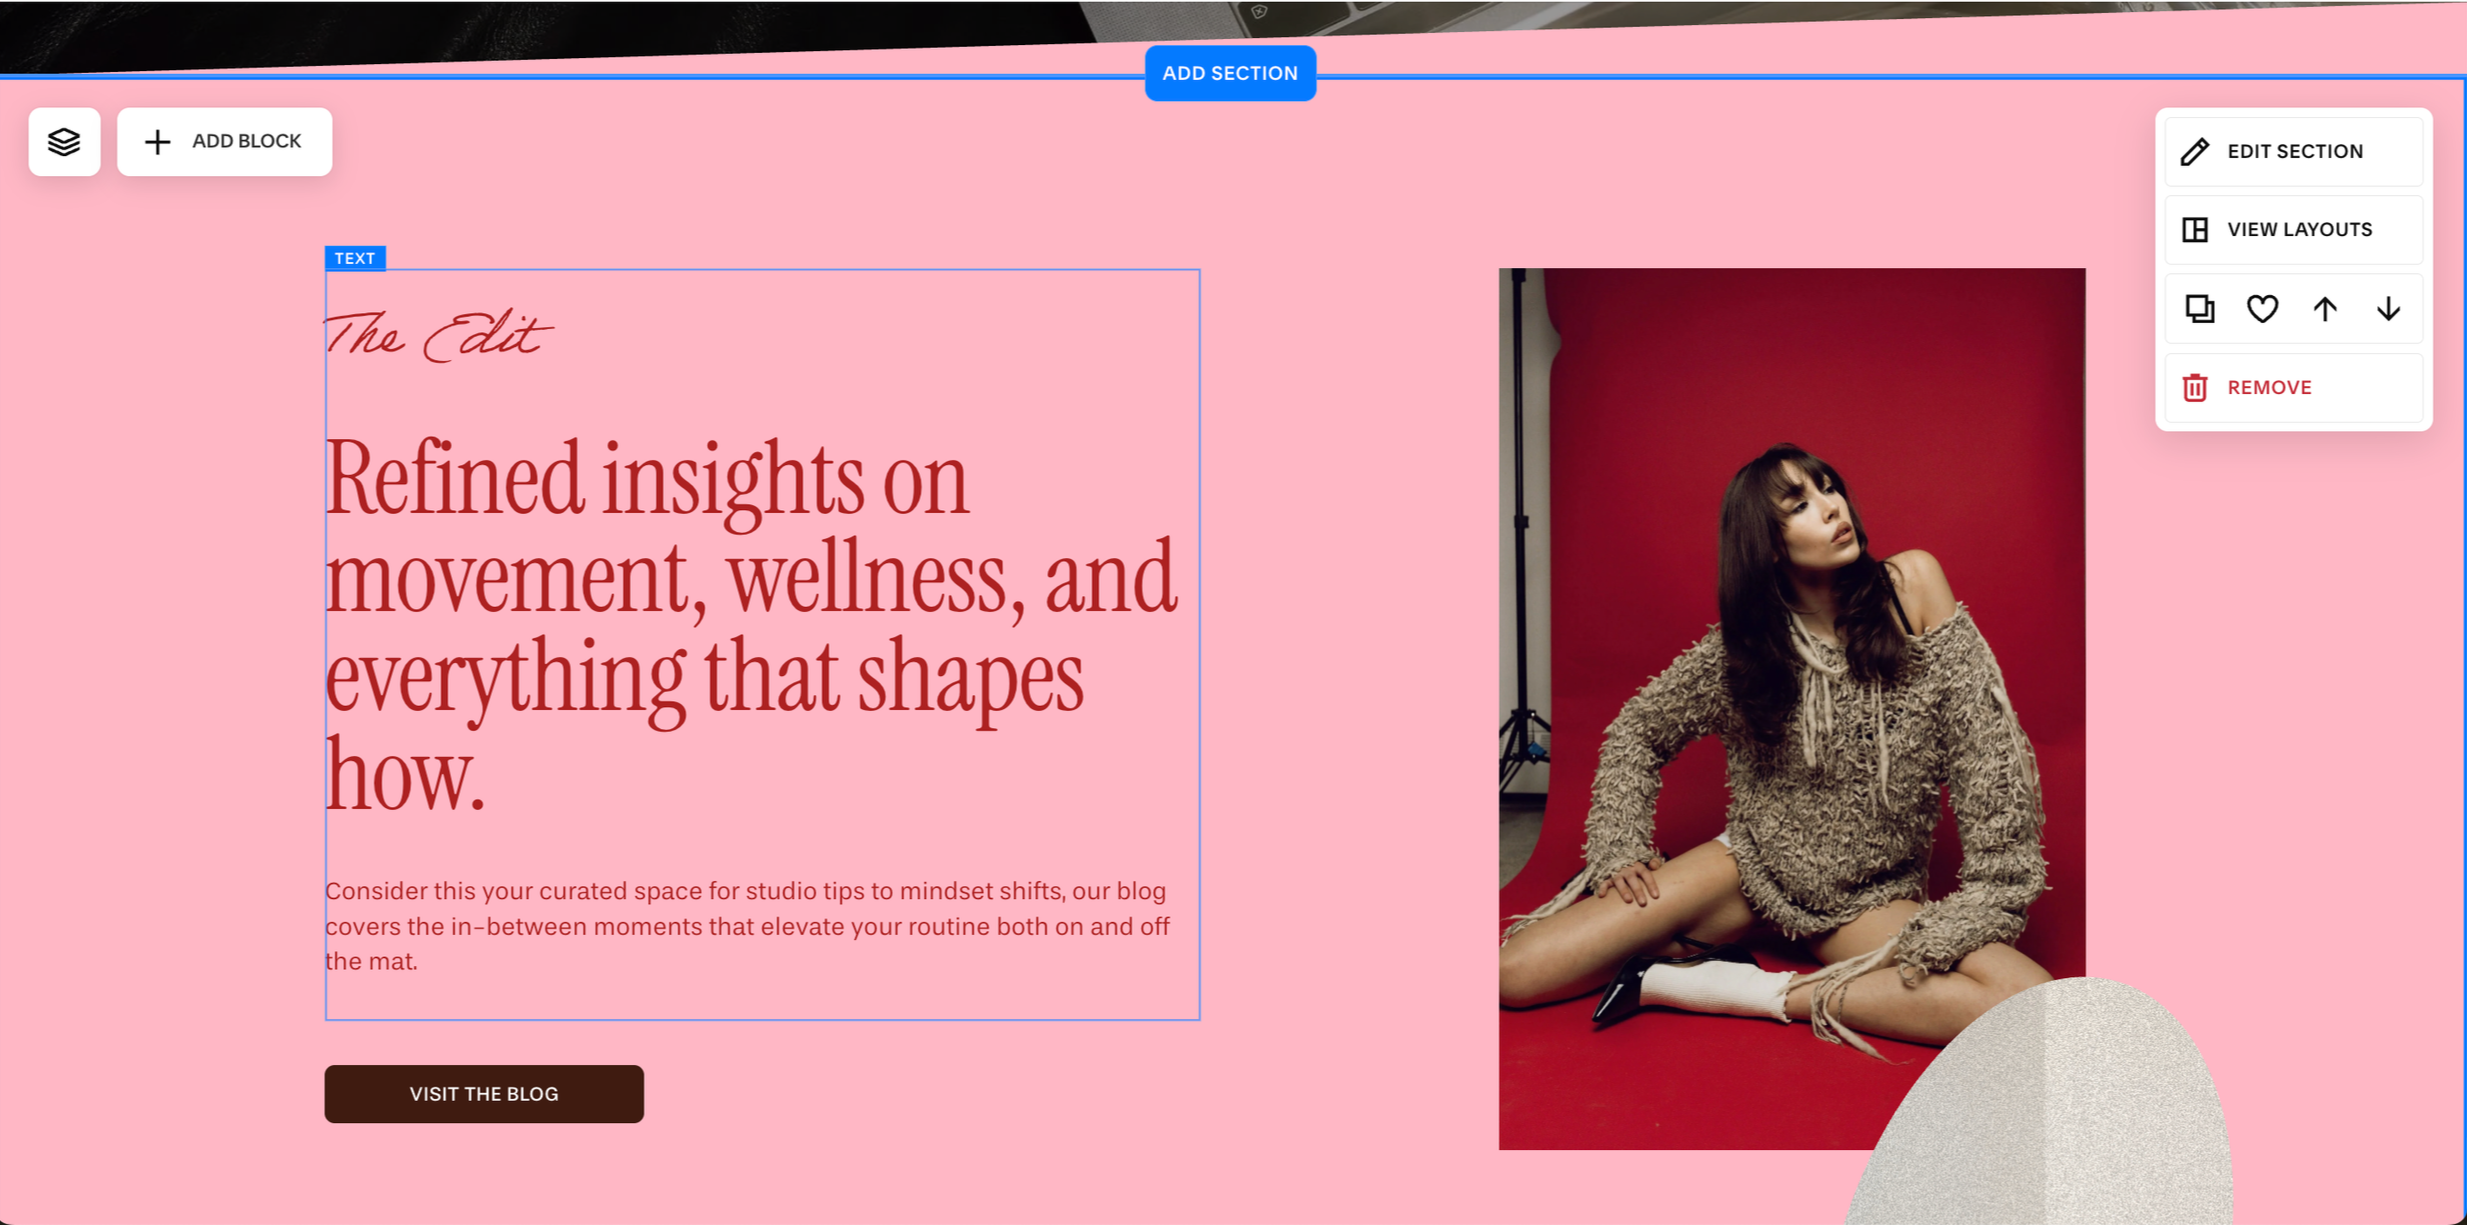
In the top left corner hit “+ Add Block”
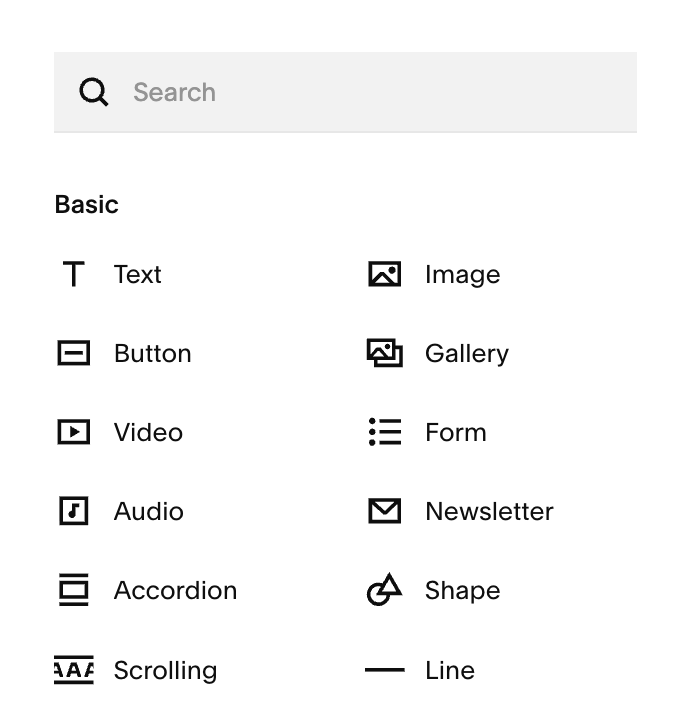
From the pop-up select the block type you want to add
To Move a Block:
Hover the block you want to move. When your cursor becomes a hand, click and drag the block. (If the hand doesn’t appear, click the block first.)
While dragging, use the grid to choose the new placement, then release.
Moving Blocks to Customize Layouts:
You can drag and drop your blocks across your screen to customize and create your own layouts. As you move a block, your grid will automatically appear to show exactly where you can place your block(s).
Because Fluid Engine is grid-based, moving one block can cause nearby blocks to shift slightly to keep the section balanced. This can be slightly frustrating but is easily fixed by quick adjustments.
Helpful Tip:
If you’re having issues with a set of block shifting when you’re putting in your own text or photos, hit the undo arrow at the top of your page until you get back to what the original section looked like:

From there, you can duplicate the section and use it as a reference when you are putting your own content to make sure everything is formatted properly.
Centering a Block:
Drag your block toward the middle of the section and release when a yellow vertical line appears through the center of the grid. The block may resize slightly to sit perfectly centered

Make a Block Full-Bleed:
To drag blocks to the very edge of your section, you’ll need to make sure that your section is set to full width mode first. To do this:
Edit Section > Background > Background Width > Full Bleed
Once you’ve done this can can move a block outside the Fluid Engine grid (into the empty edges) and it will resize to meet the section’s content width, creating a full-bleed effect.
Setting Content Alignment and Overlap:
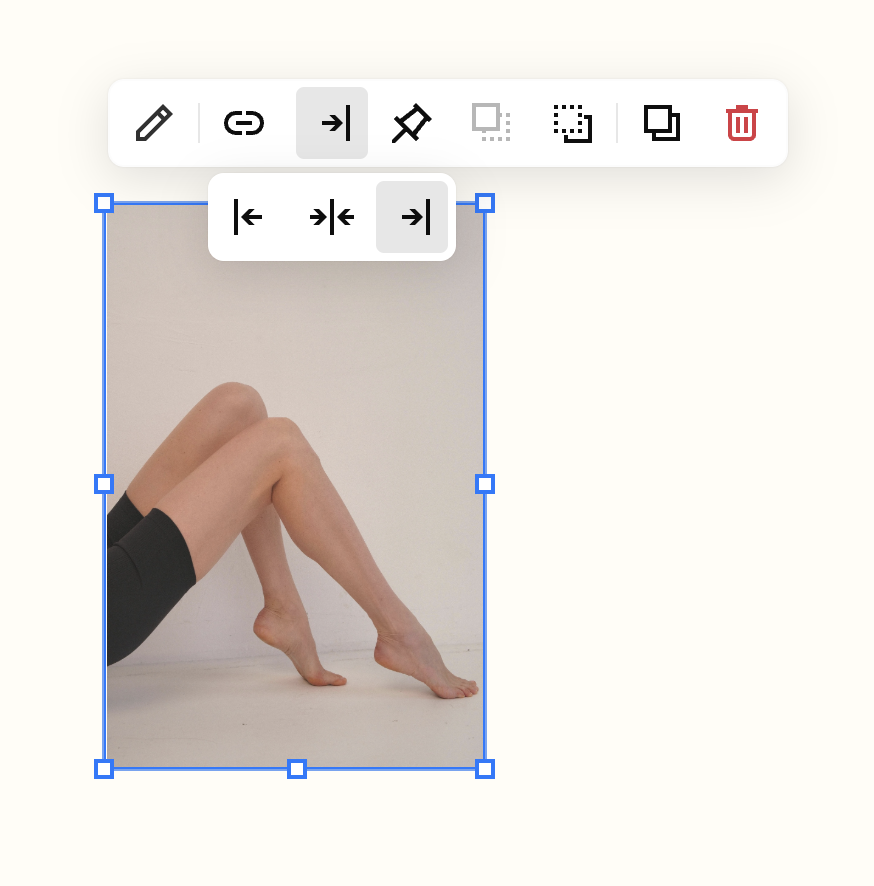
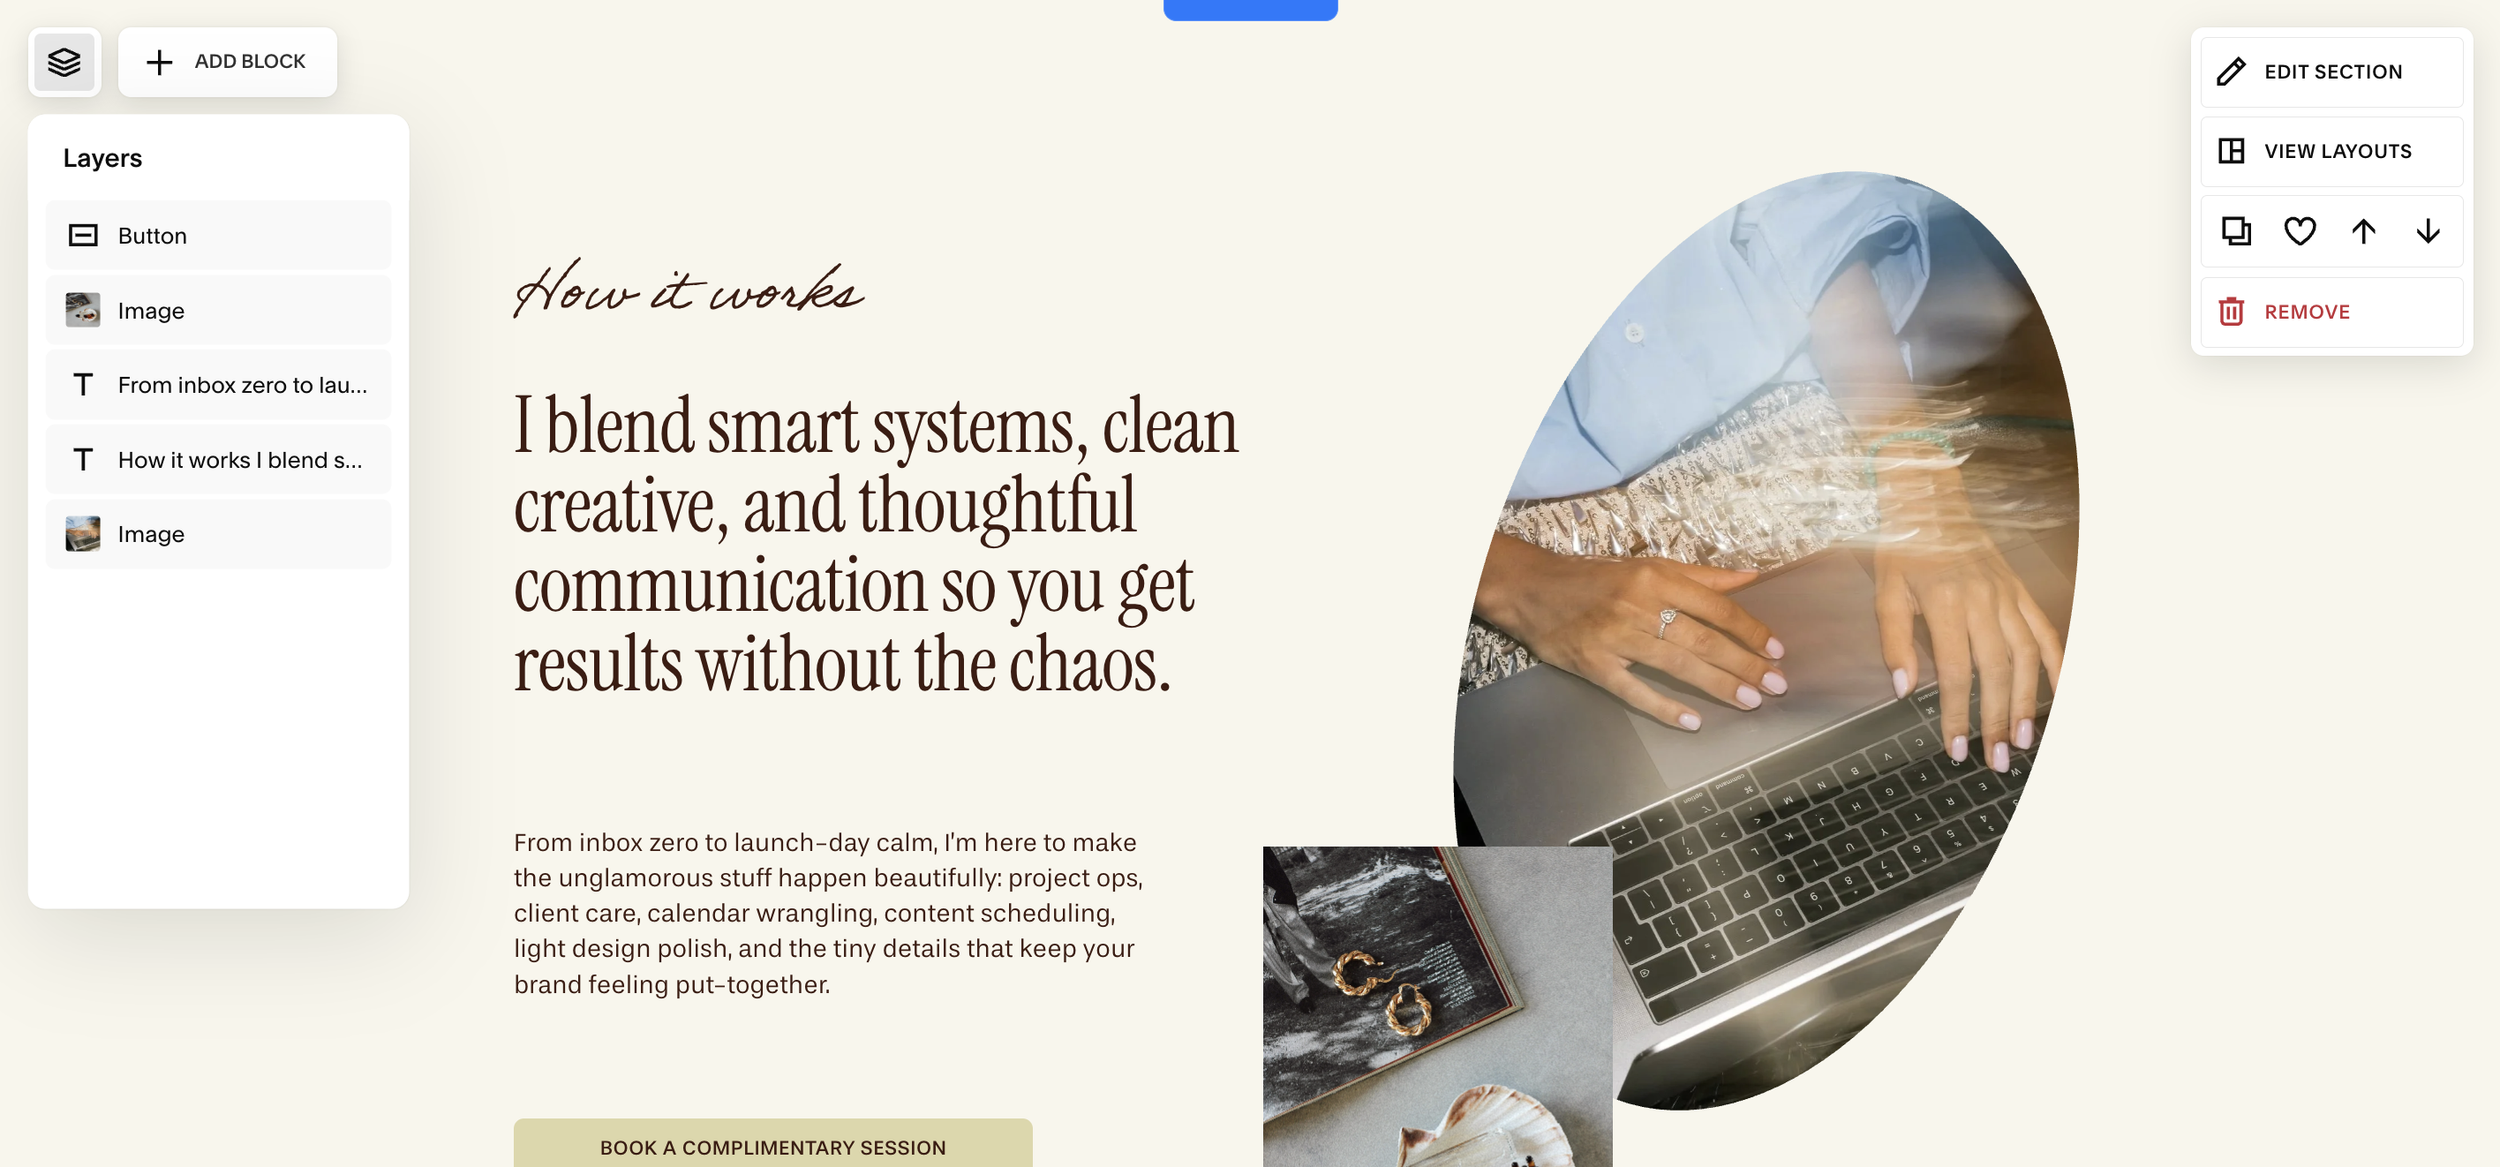
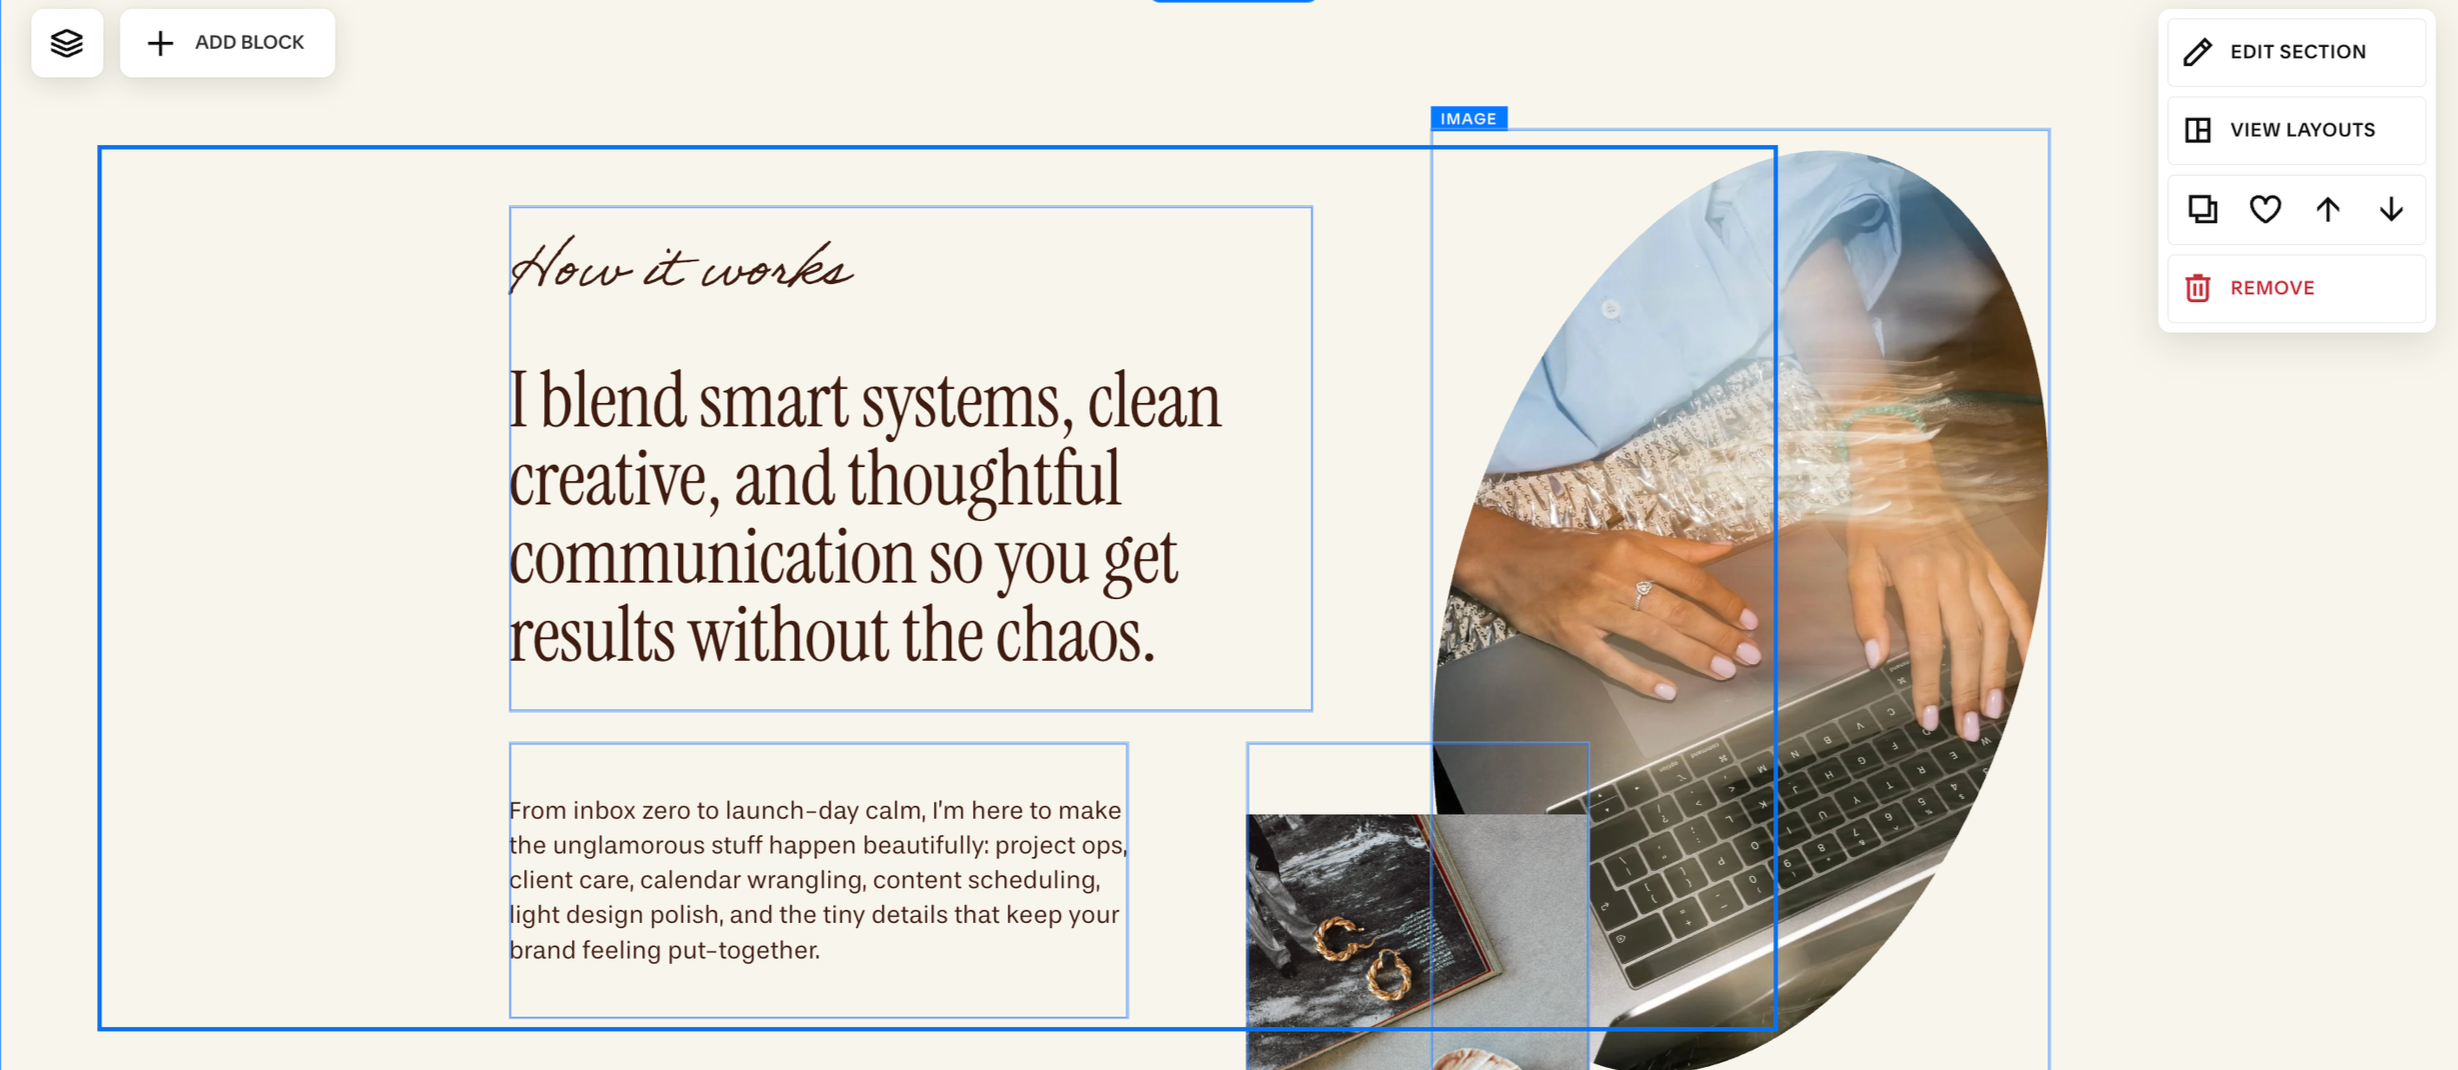
After you move a block to a new place in Fluid Engine, the block's toolbar will appears.
To align the content of the block horizontally, vertically, or centered in the borders of the block, click the alignment icons in the block's toolbar. Keep in mind, some blocks, like image blocks and button blocks set to fill, don't have alignment options.
Overlapping & Layering Blocks:
If you want your blocks to overlap, you can use the Move Forward and Move Backward icons to decide which block is in front. If you have several blocks in a section, you may have to click a few times bring the block all the way forward or back, or use the layers panel to quickly move blocks to the front or back of your layout.

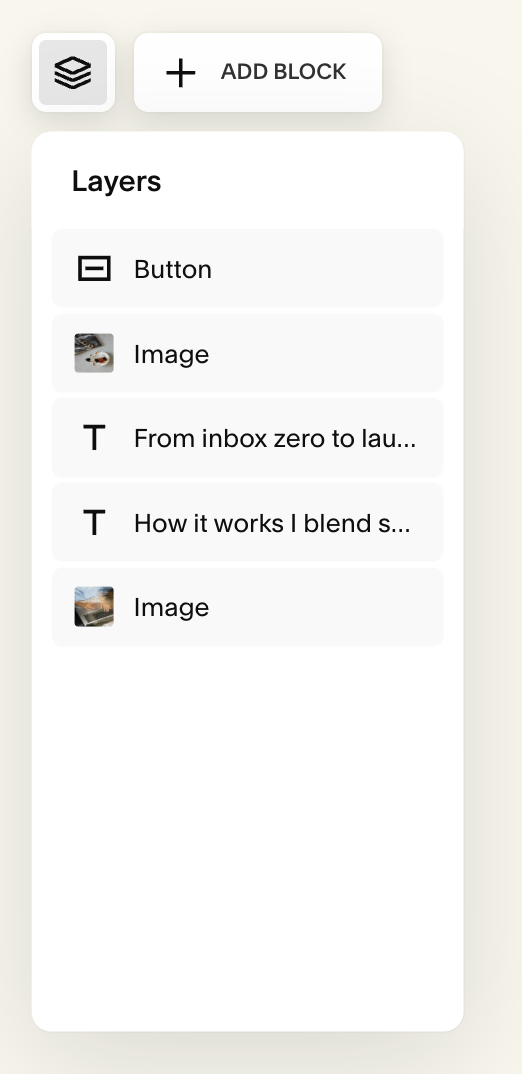
Using the Layers Panel:
You can also arrange your blocks by using the Layers icon in the top left corner or your page section. When you hover over a block in the list, it's highlighted in your site content.
To change a block's position in the layout, click and drag it up or down in the list. You can also use the list to hide blocks on one screen size (i.e. keep a block visable on desktop, but hide it on mobile or vice versa).
Selecting Multiple Blocks At Once:
You can highlight multiple blocks at once by clicking and dragging across the section background.
As you drag, a solid blue box will appear. Drag that blue box over all the blocks you’d like select.
Arranging Multiple Blocks:
To move multiple highlighted blocks at the same time, click and drag any of the highlighted blocks. This moves all of the highlighted blocks at the same time, preserving their current layout.
To align all highlighted blocks at the same time, click the Align Group button that appears in the toolbar. Then, select one of the alignment options:
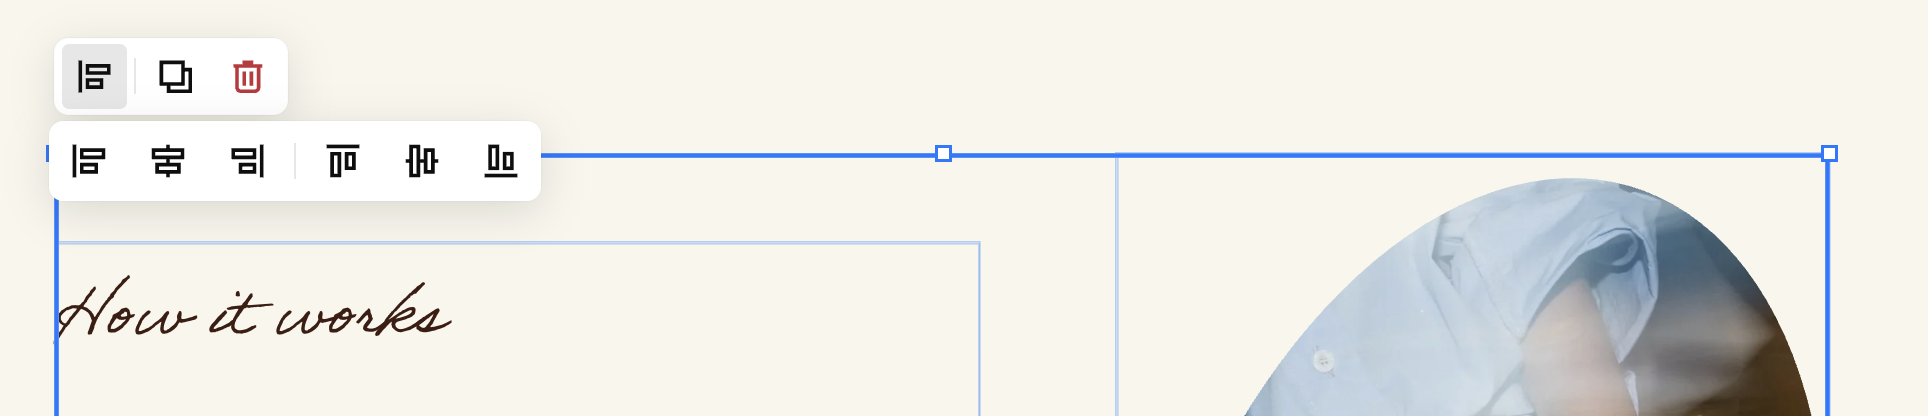
To resize all highlighted blocks, hover over one of the squares in a block's outline until it becomes an arrow, then click and drag the blocks larger or smaller.
To duplicate all highlighted blocks, click the duplicate icon in the toolbox:

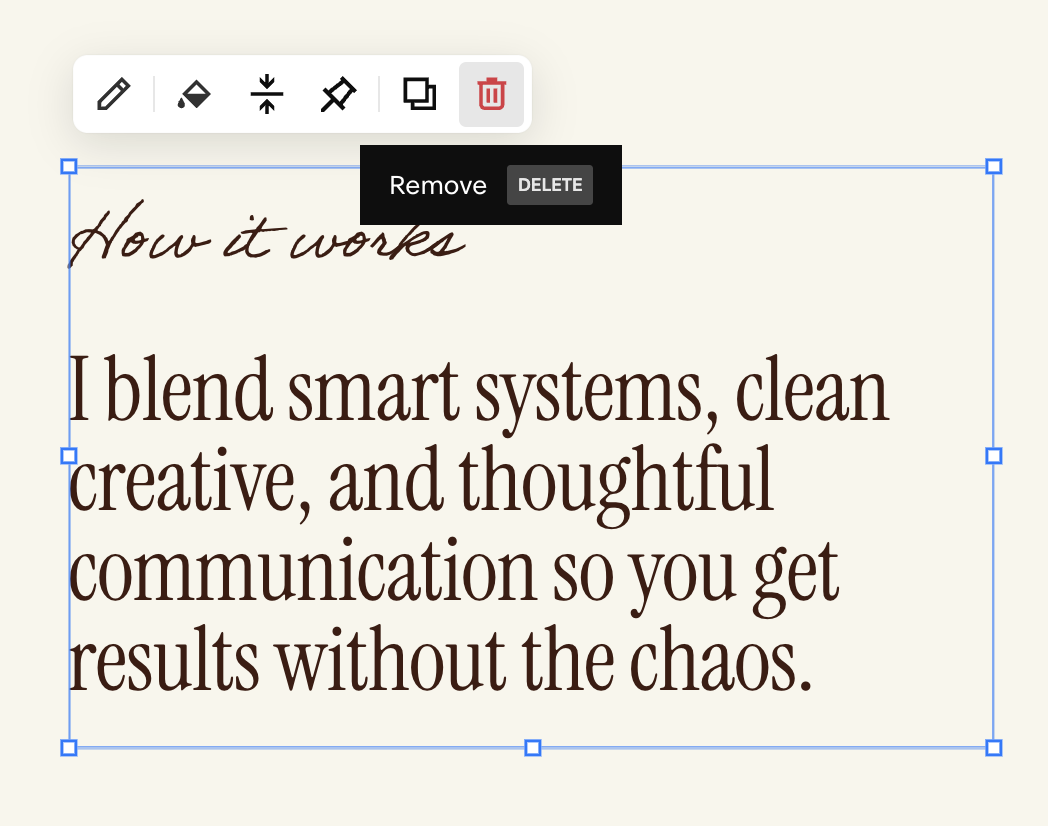
Deleting Blocks:
Hover over the block you want to remove to reveal its small toolbar.
Click the trash can icon.
Confirm to delete.
Important Notes:Deleting a block only removes that one block and won’t change anything else in the section. The only time you’ll notice the section shift is if you delete the block at the very bottom. When that happens, the bottom of the section moves up to meet the next block above it, making the whole section shorter
If you delete something by accident, use Undo (top-left arrow) immediately while still in Edit Mode.
Once you click Save, deleted blocks cannot be recovered.
Deleting Multiple Blocks:
Select the blocks you’d like to deleted, by clicking and dragging on your section background. Once you’ve highlighted your blocks, click the trash icon in the toolbox:
