Editing Your Template
Image Blocks are how you display photos throughout your site. They control how your images look and interact with your layout. In this guide, we’ll cover everything you need to know to edit, edit, replace and style your image blocks sitewide.
Uploading Images to An Existing Image Block:
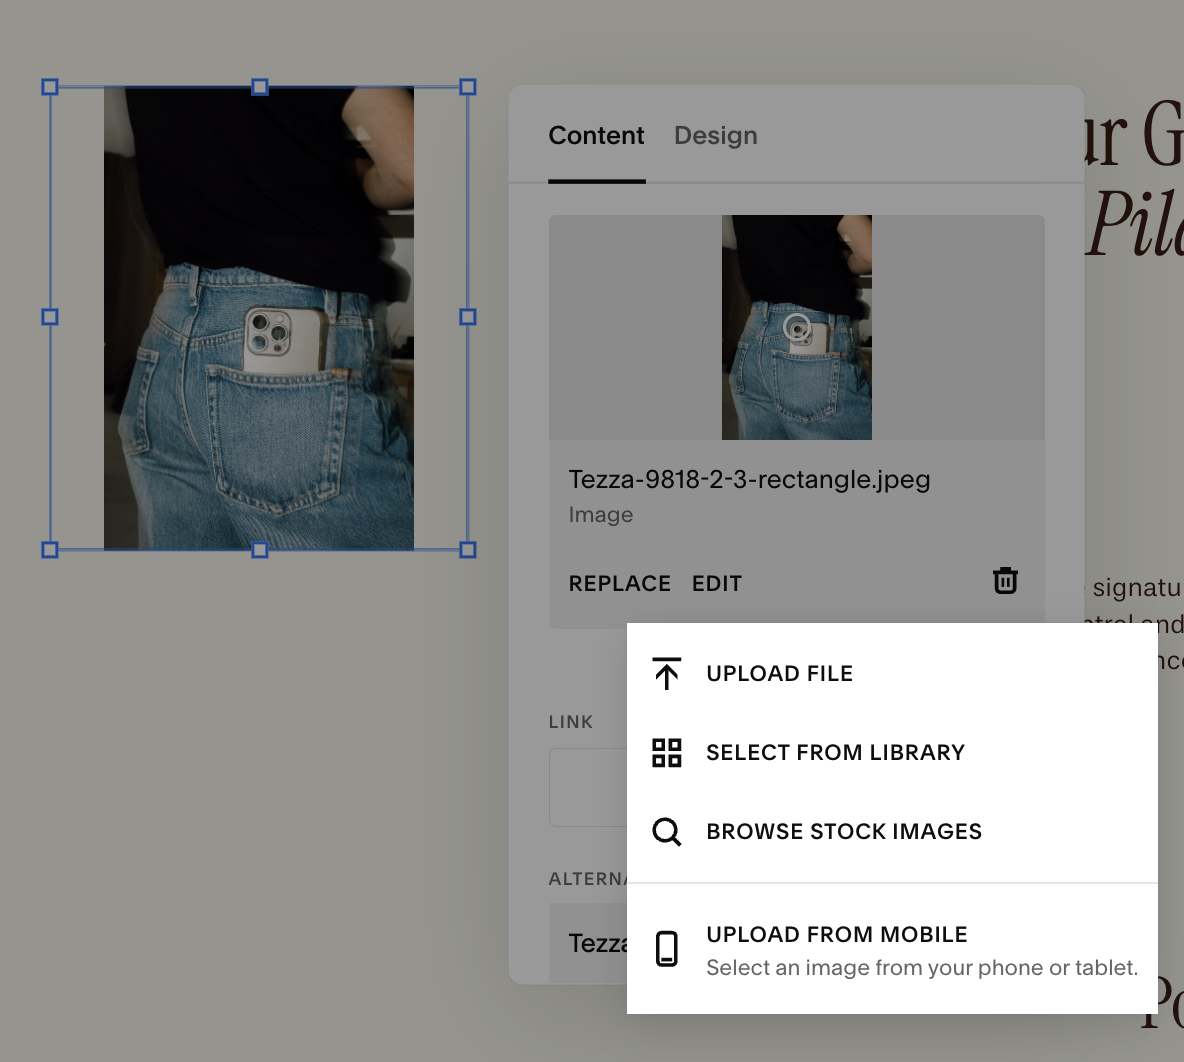
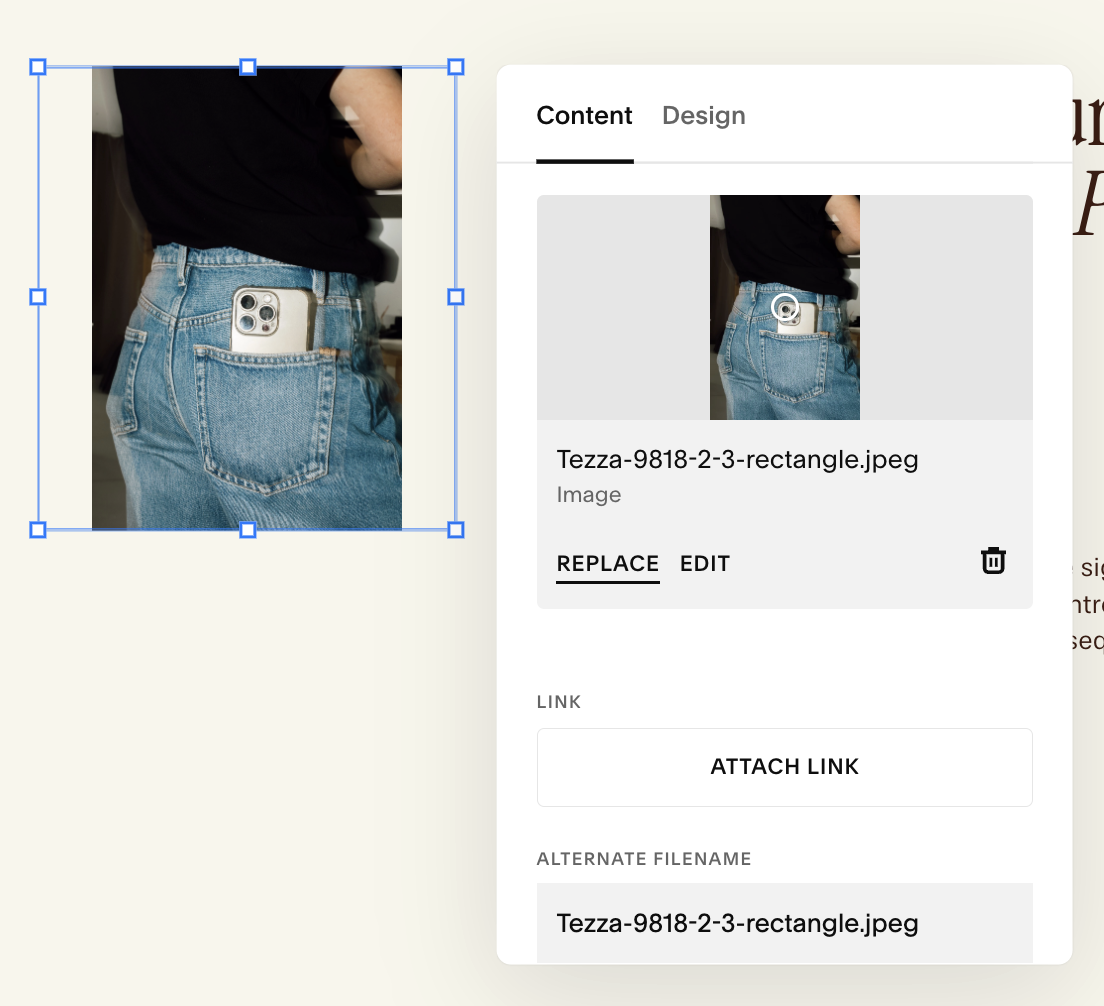
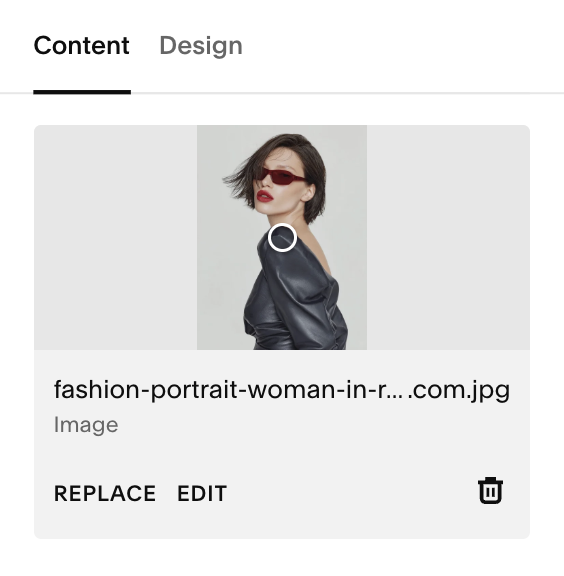
When you edit an existing Image Block, you can replace or add an image under the content tab. To access this:
Hover over the image you want to update.
Click Edit.
Click Replace.
From here you’ll have the following options for uploading your image:
From your computer
Select it from your Library
Browse from a selection of stock images.
Drag & Drop (drag an image file straight from your desktop into the Image Block)
Once you’ve uploaded or selected your image, click Save in the top left corner of the page.
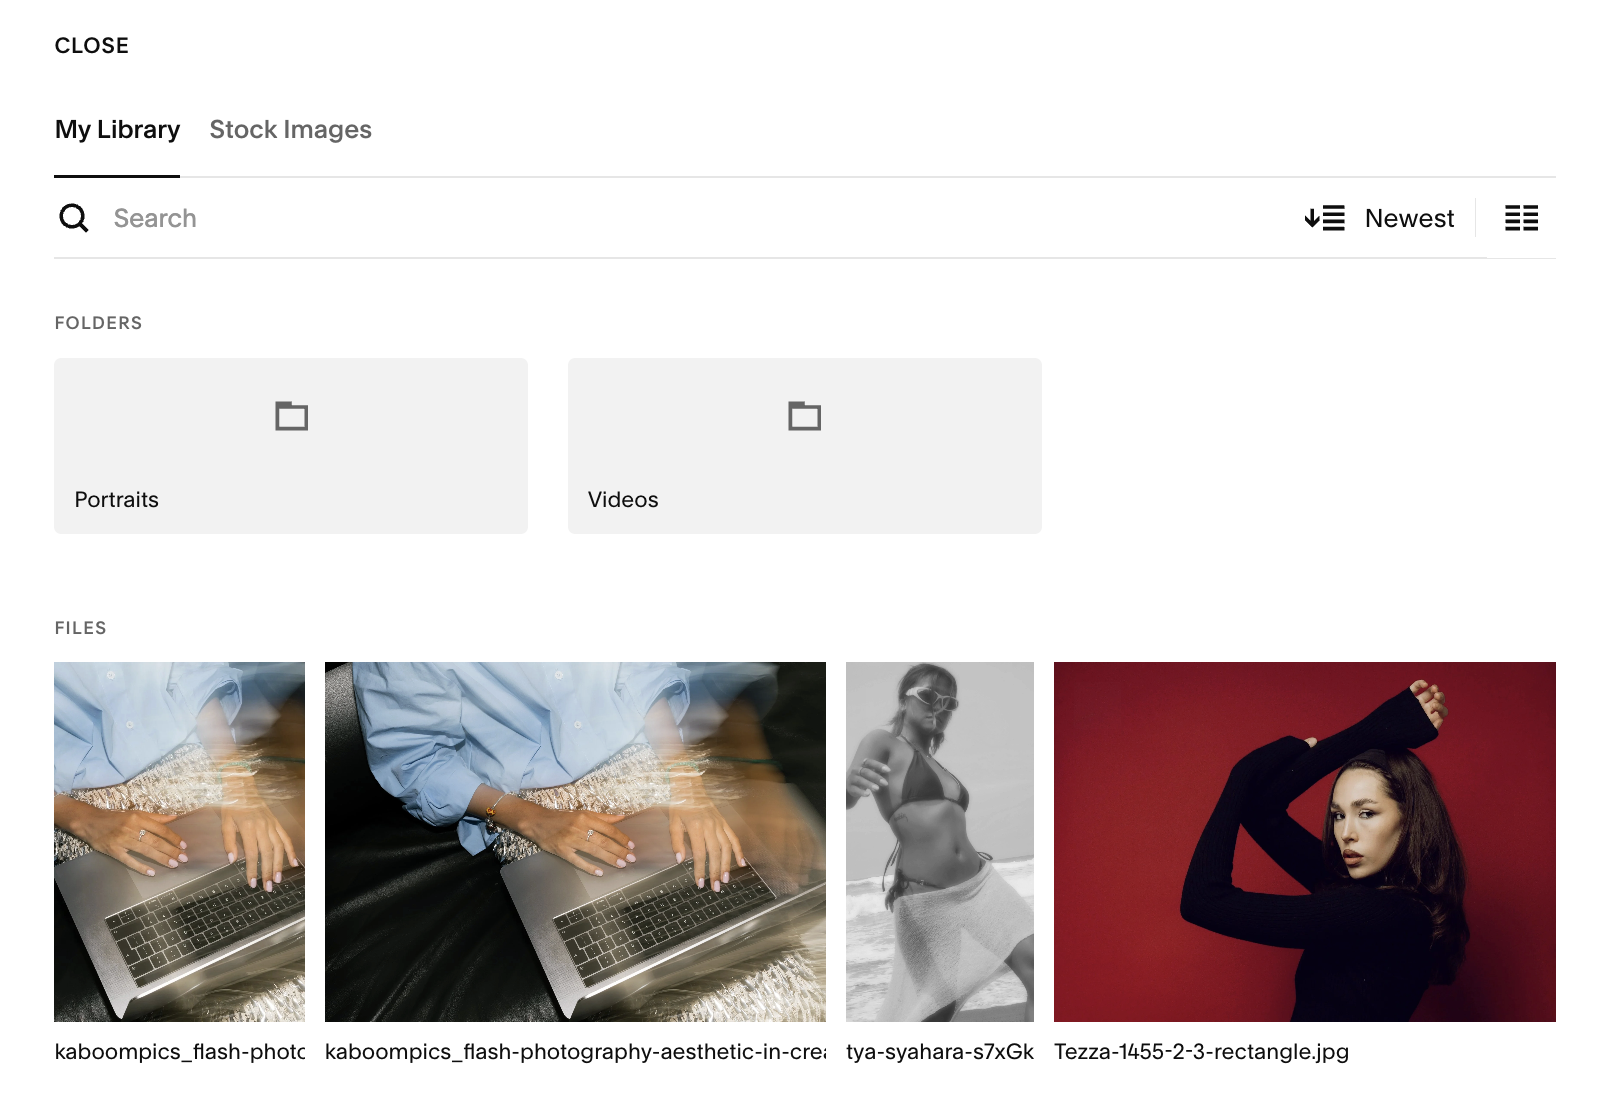
Selecting Images From Your Library:
Your image library is where all the images from your Asset Library live and let you add them to your image blocks. Any image you’ve uploaded to Squarespace (whether to to your asset library first, or directly from your computer) will be available for you to choose from here.
This is a great option if you want to swap what images go where so that you don’t have to keep uploading the same images.
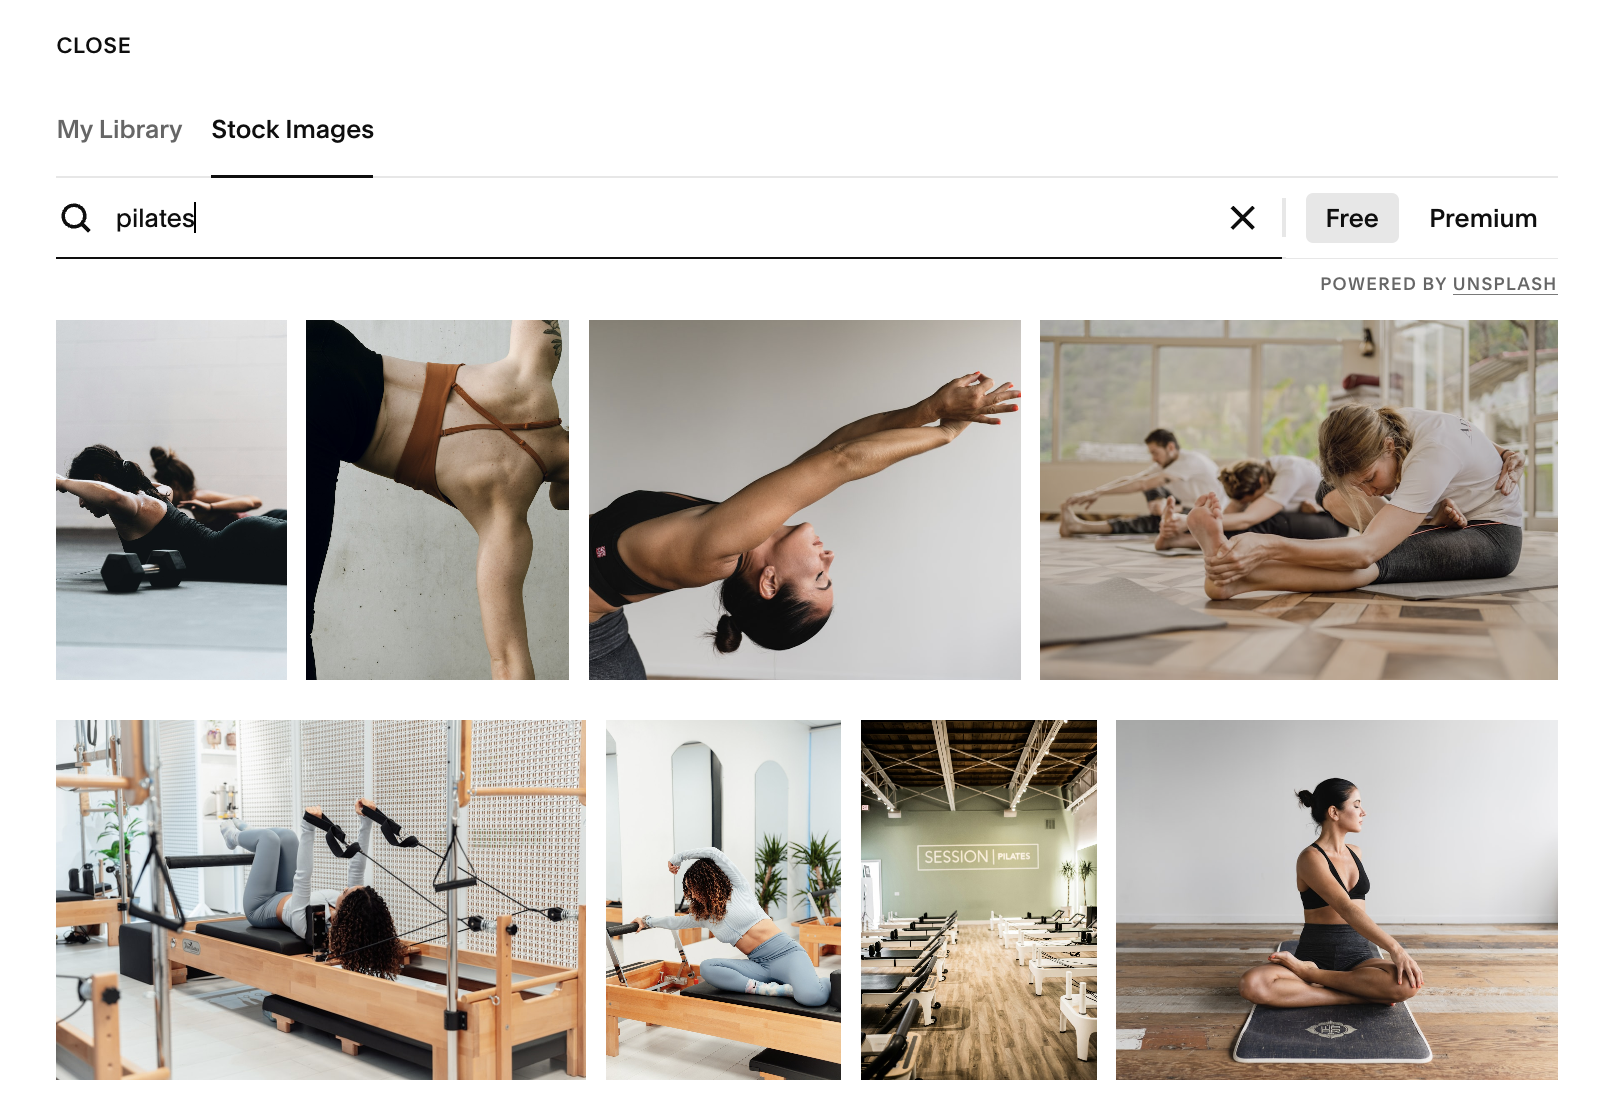
Using Stock Images:
Unsplash:
Squarespace has a free built-in integration with Unsplash, which lets you add high-quality, royalty-free stock images directly into your Image Blocks. This is a fast way to fill placeholders or build out pages while you’re still gathering final brand photos.
Just type in a keyword, browse the results, and click any image you like. Squarespace will automatically place it into your Image Block for you."
Getty:
If you’re having trouble finding a free stock image that you like, Squarespace also gives you access to premium stock photos from Getty Images directly inside your Image Block settings.
To access it, click into the Stock Images tab and select Premium. You can search by keyword the same way you do with Unsplash. When you find a photo you like, click it to preview, then select Buy to license it. Once purchased, the image is immediately placed into your Image Block.
You can filter premium images by:
Popularity
Image Family
Image Style
Orientations
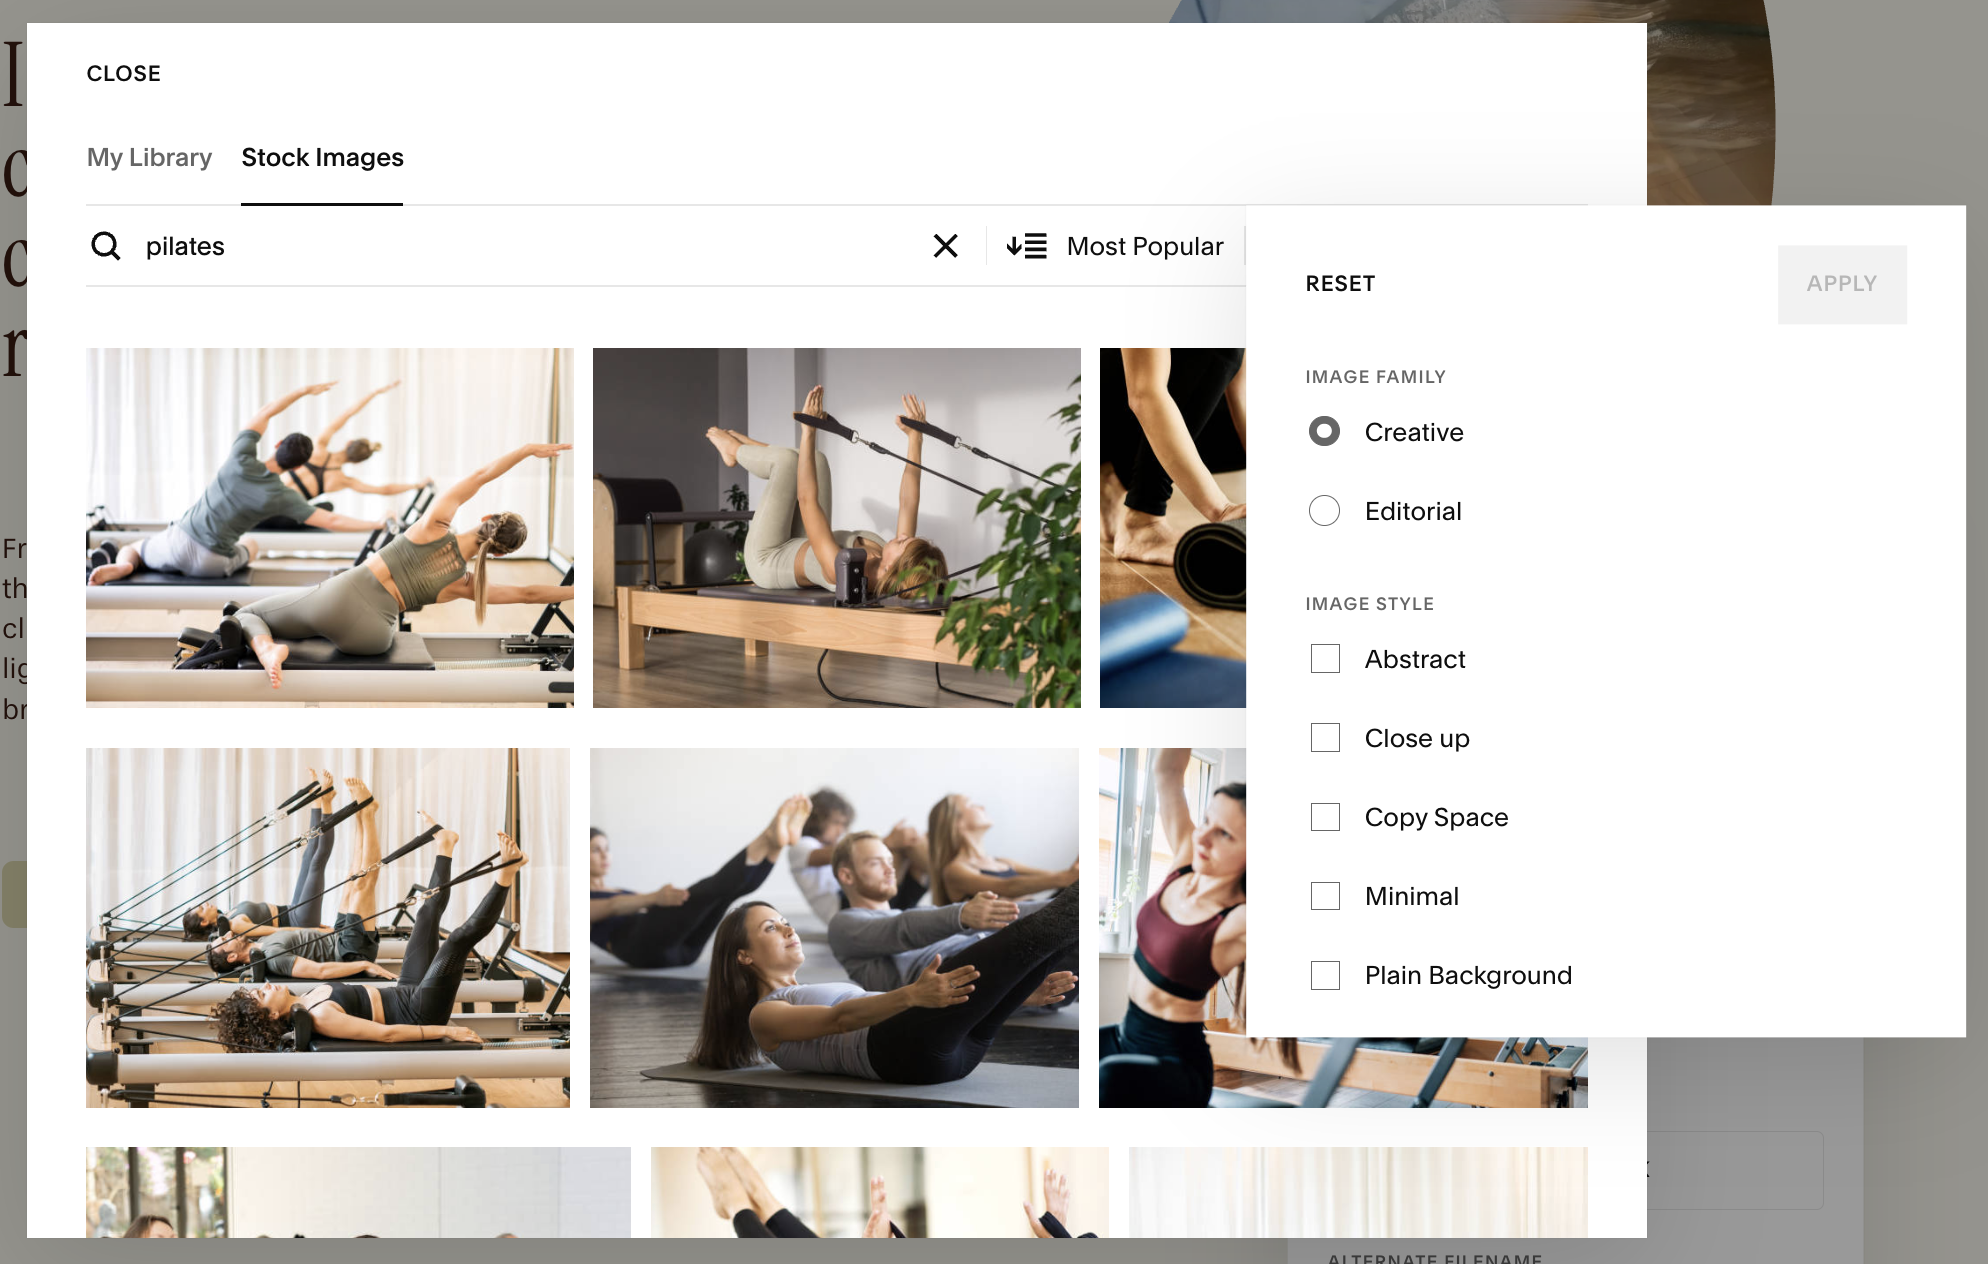
Image Formatting & Resizing:
Squarespace gives you several ways to control your image blocks and how your image sits inside its frame and how it scales on the page.
Resizing Your Images on Your Grid:
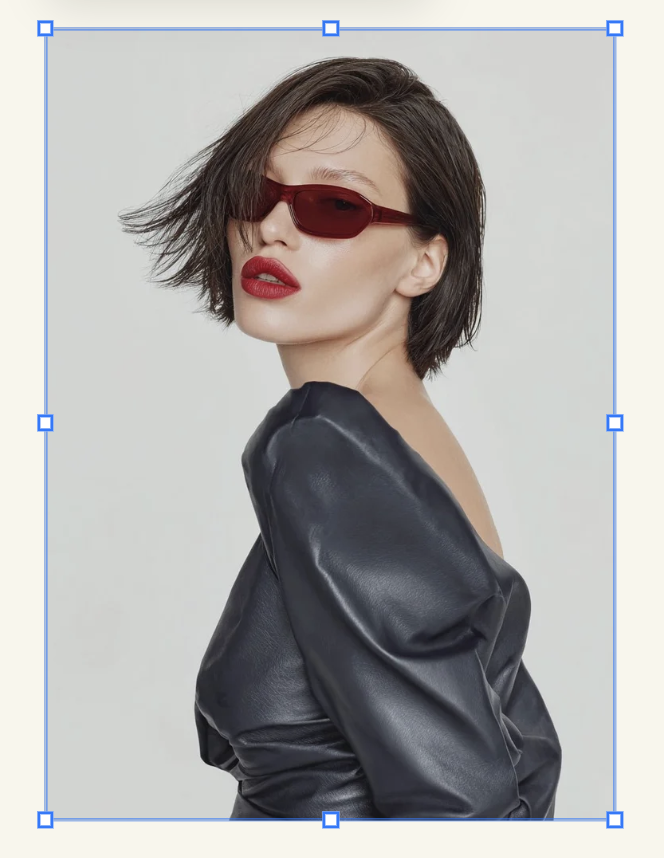
In Fluid Engine sections you can resize images directly on the page:
Click the image while in Edit mode.
A blue box with square handles will appear around your image
Drag the corner or side handles to make the image larger or smaller within the grid.
As you resize, Squarespace snaps the image to the underlying grid, helping keep alignment clean.
You can resize in two ways:Drag corners → scales the block proportionally
Drag sides → stretches the block horizontally or vertically to change its shape
Important Notes:
Resizing the block doesn’t change the size of the actual photo file, just how much space it takes up.
If Fill is on, resizing the block may change how much the image is cropped (you’ll learn more about this in just a second!)
If Fit is on, resizing may create more or less empty space around the edges.
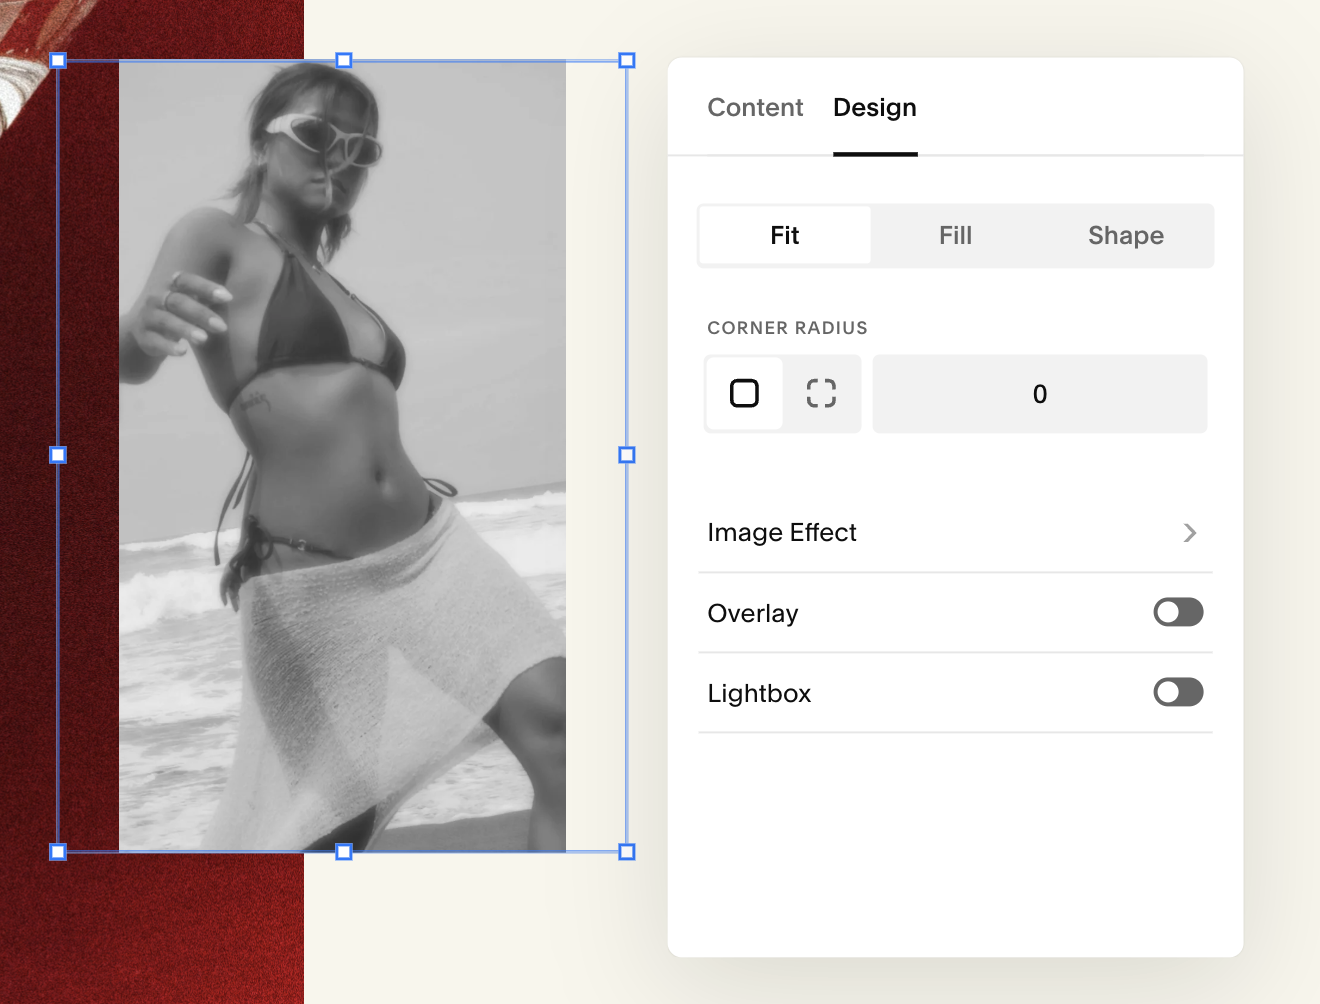
Understanding Fit vs. Fill:
Fit:
The entire image stays visible inside the frame.
Squarespace won’t crop the image—it shrinks or expands it to make sure the whole photo fits.
Best for graphics, screenshots, logos, or any image where important edges shouldn’t be cut off.
Fill:
The image expands to fill the frame completely.
Squarespace may crop parts of the image, depending on the aspect ratio.
Best for photography, hero images, and anything where you want a clean, full frame without empty space.
Use this is you want an image to go to the very edge of your page
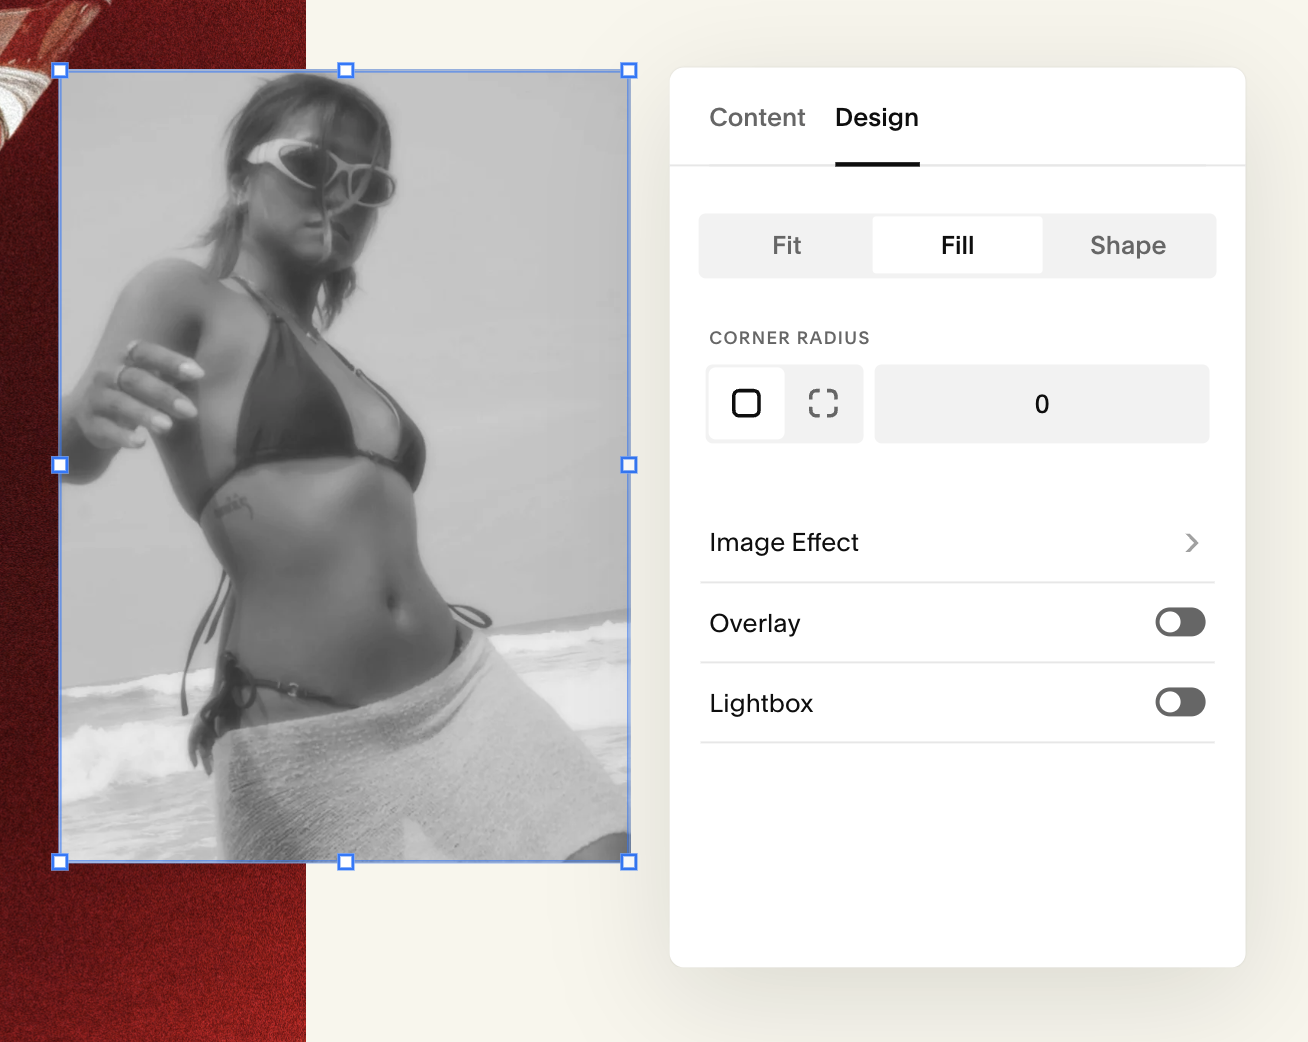
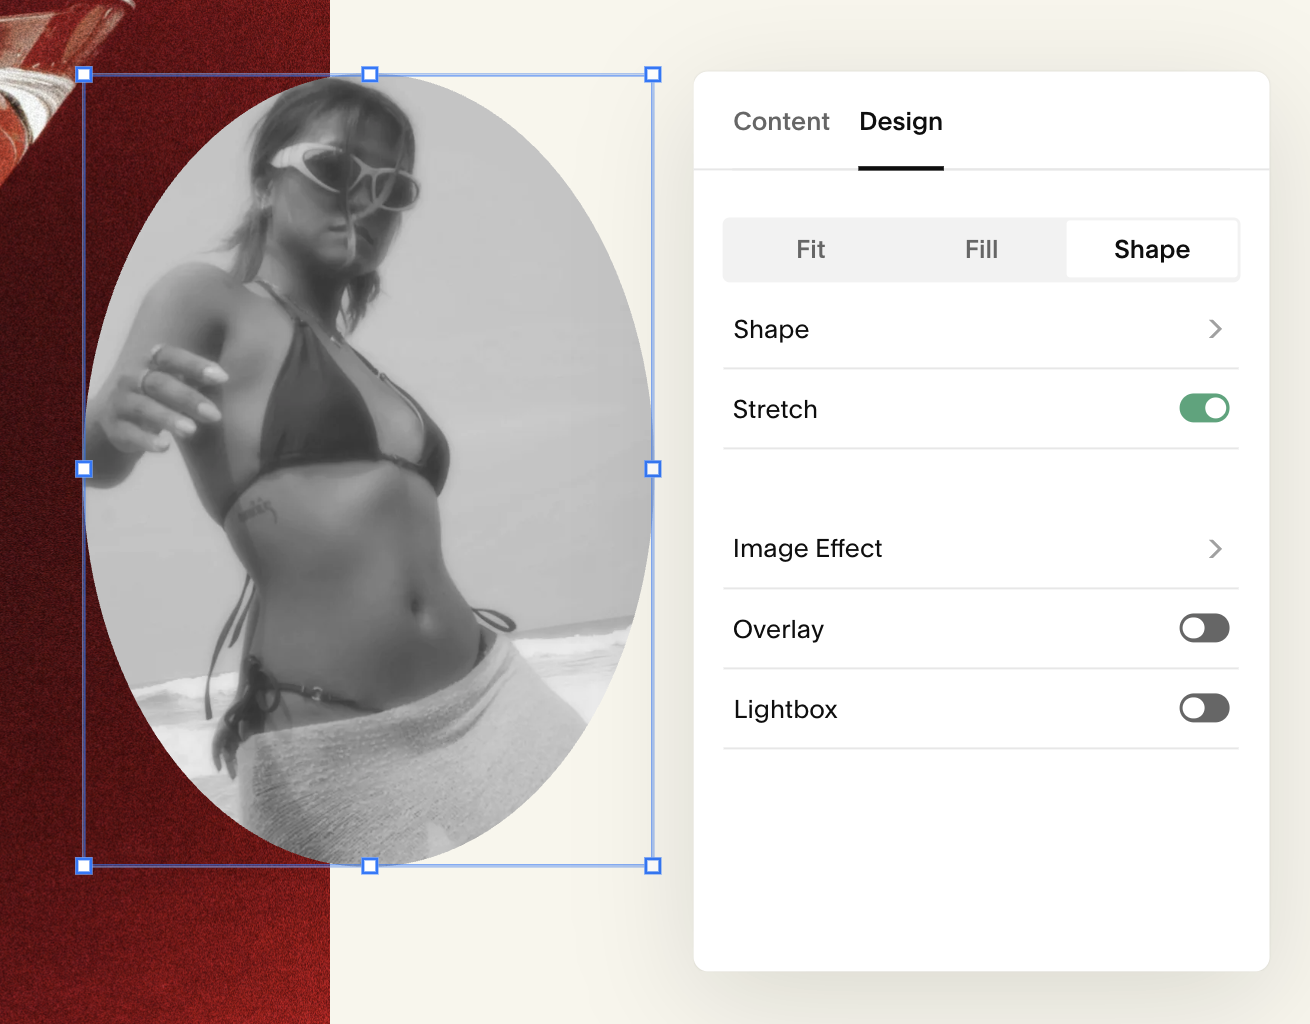
Image Shapes:
In Squarespace, the Shape setting creates a shaped frame for your image sits inside.
Inside the Shape settings you can choose from three crop dimensions:
1:1
2:3
3:2
Each crop dimension has several different shapes you can choose from
1:1

2:3
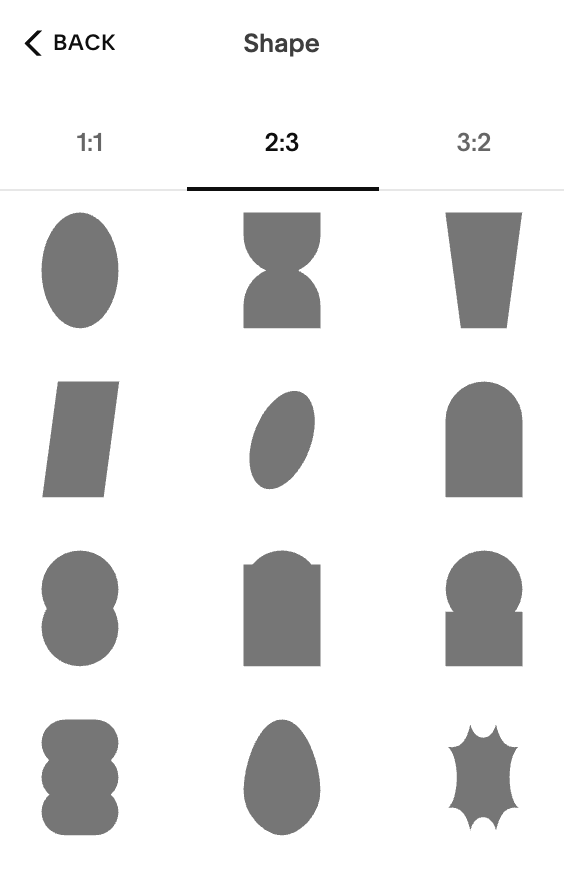
Stretch Off:
3:2
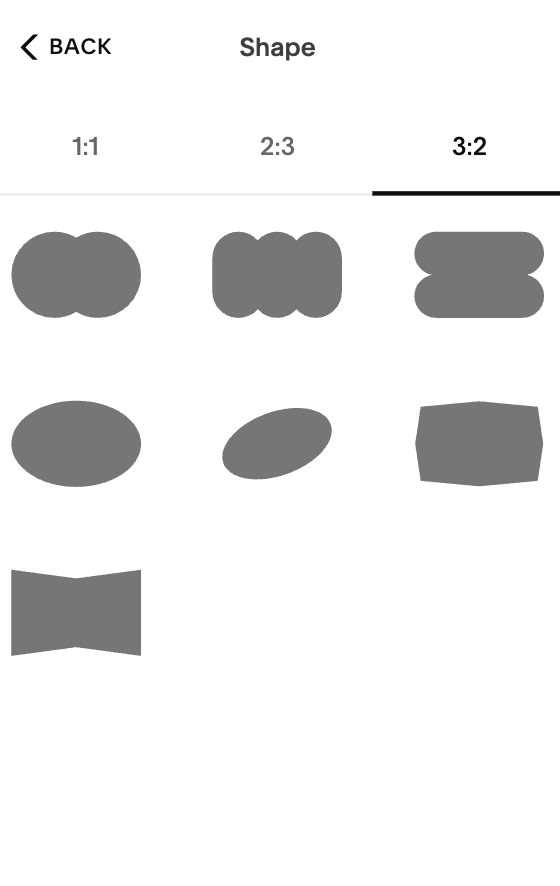
By toggling on the Stretch option, it will stretch your option to fit the of your image
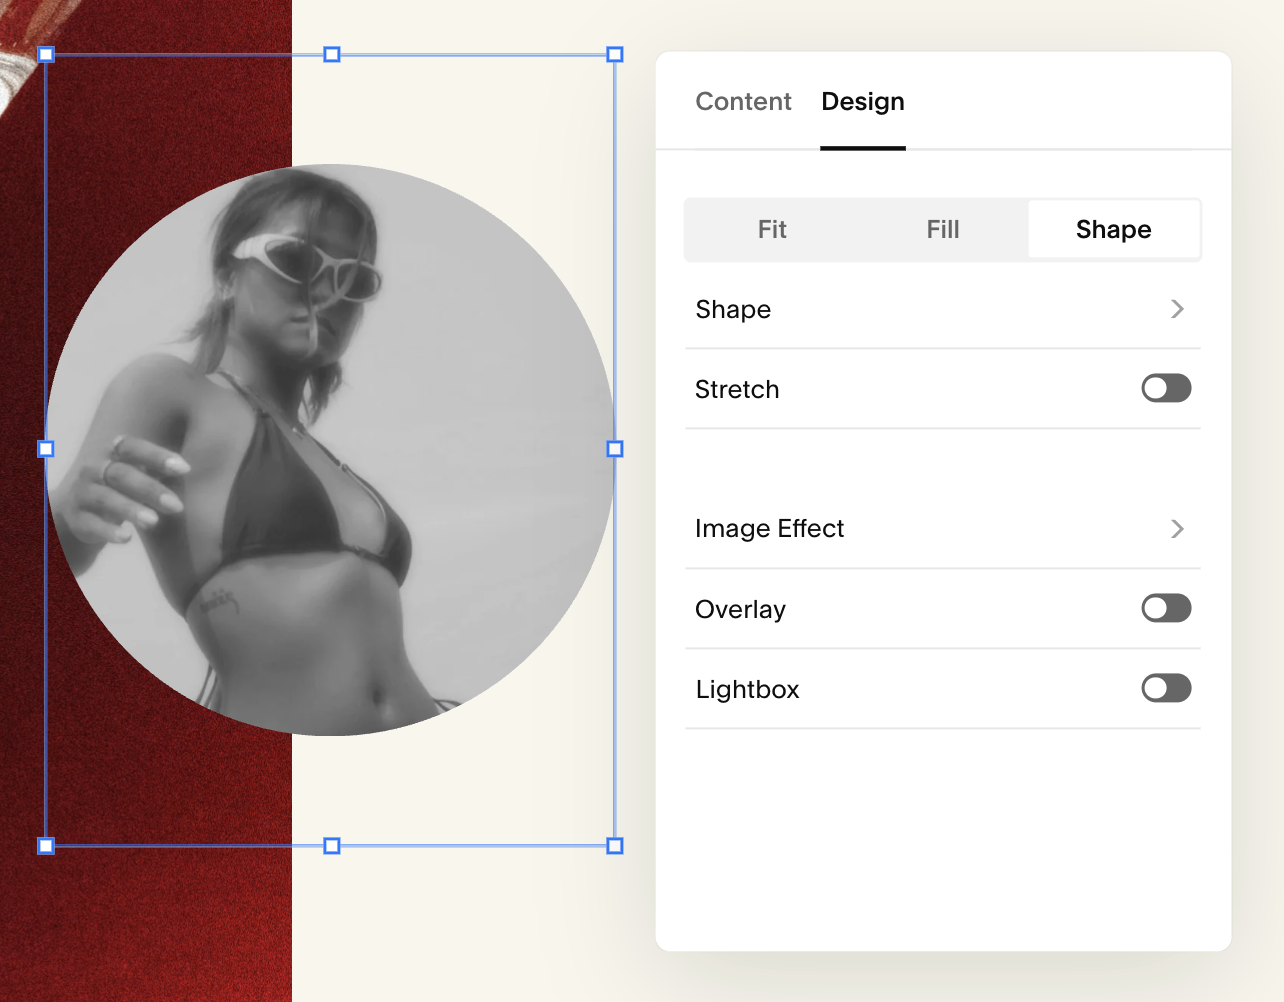
Stretch On:
Setting Your Focal Point:
The focal point tells Squarespace which part of your image is most important, especially when the image is cropped by an aspect ratio or responsive layout.
Click the image to open settings.
Under the Content tab, you’ll see a hollow circle on the image
Drag that circle to the spot you want to be the focal point (usually a face, product, or subject).
Squarespace will then adjust the crop around this point across all screen sizes.
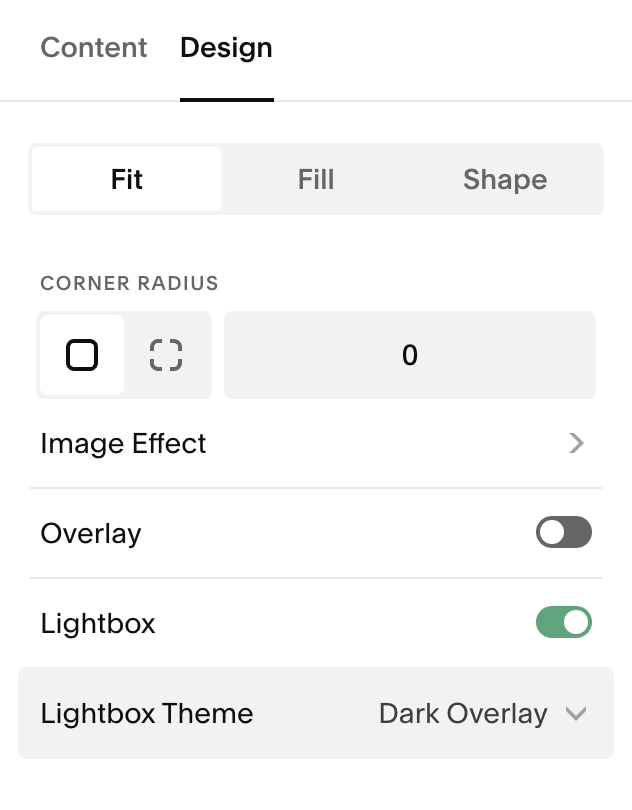
Corner Radius:
Corner settings let you control how sharp or rounded the edges of your image block appear
Open the Image Block → Design tab.
Set your corner radius
Higher numbers = more rounded corners.
Lower numbers (including 0) = square corners.
By selecting the solid square it will make all your corners the same.
To change each corner individually, choose the unlinked square.
Linked Corners: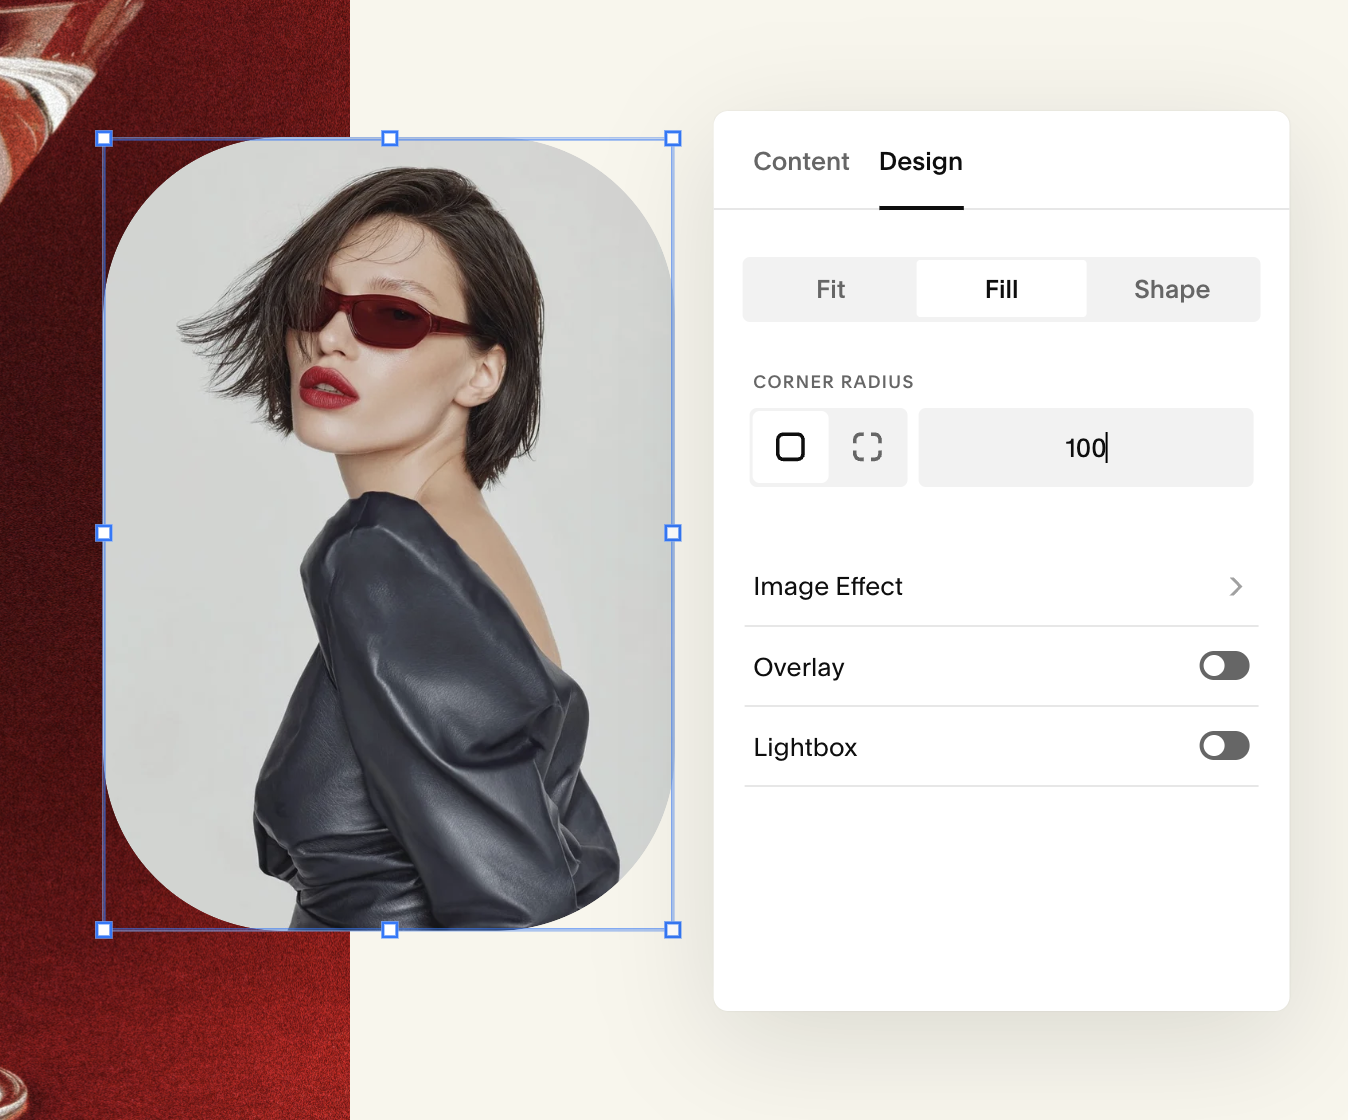
UnLinked Corners: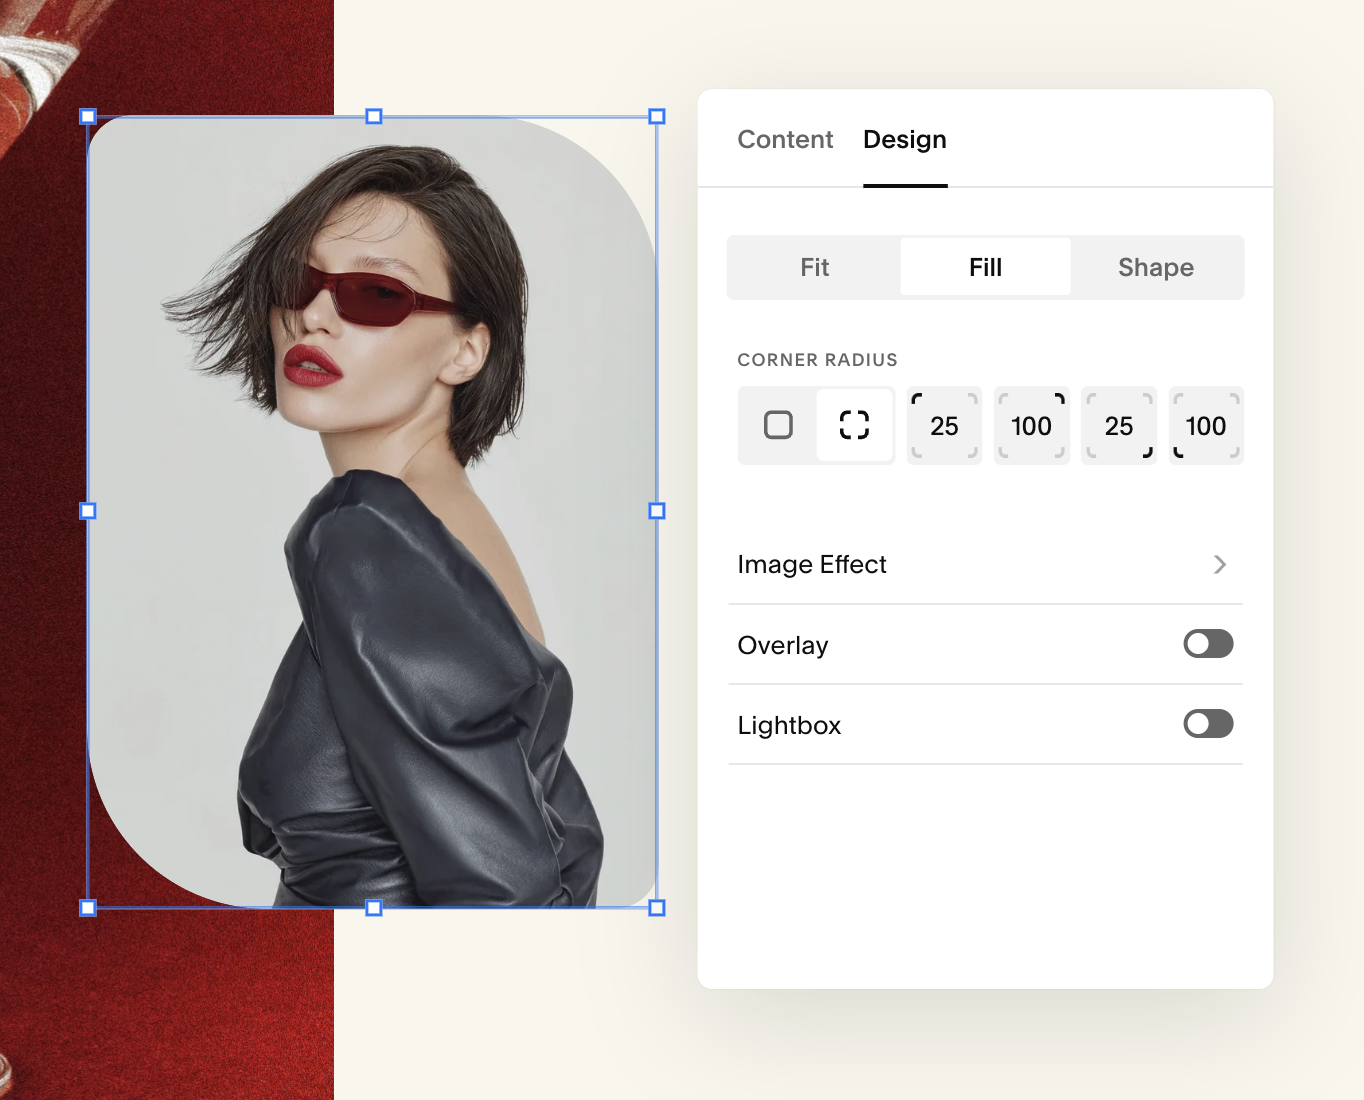
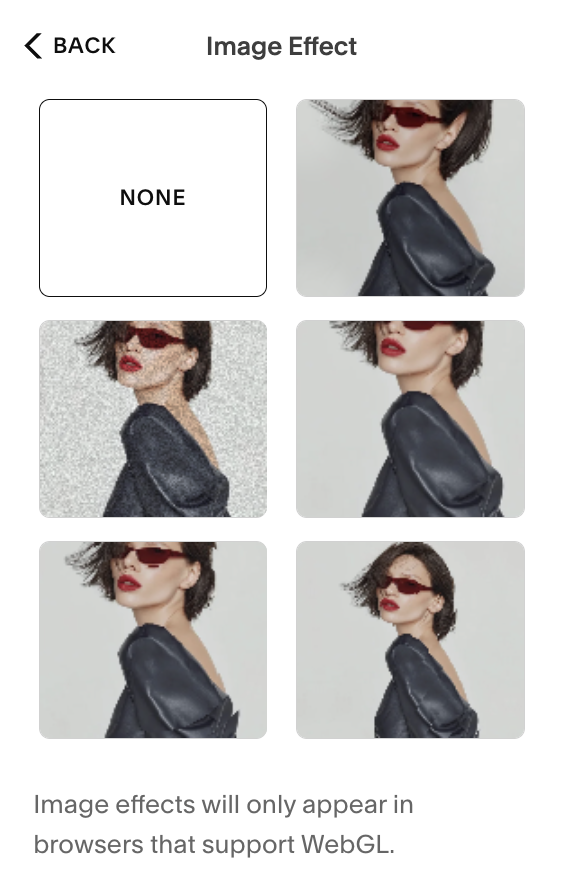
Image Effects:
You can apply visual effects to Image Blocks to give your photos a more polished, dynamic feel. Some effects animate the image, while others activate only when the visitor scrolls to that part of the page.
You can choose from:None - No effect, aside from overlay opacity setting
Liquid - Gives image a rippling effect
Film grain - Adds an animated static overlay to the image
Parallax - Image moves as visitors scroll
Refracted lines - Refracts image through a pattern of straight lines
Refracted circles - Refracts image through a pattern of circles
Effect Example: Grain

Effect Example: Lines
Adding Image Effects:
Click Design, then click Image effect.
Choose an effect from the menu. Any changes you make to the effect will appear in your site preview.
Click Save to save your changes and keep editing, or click Exit then Save to close the editor.
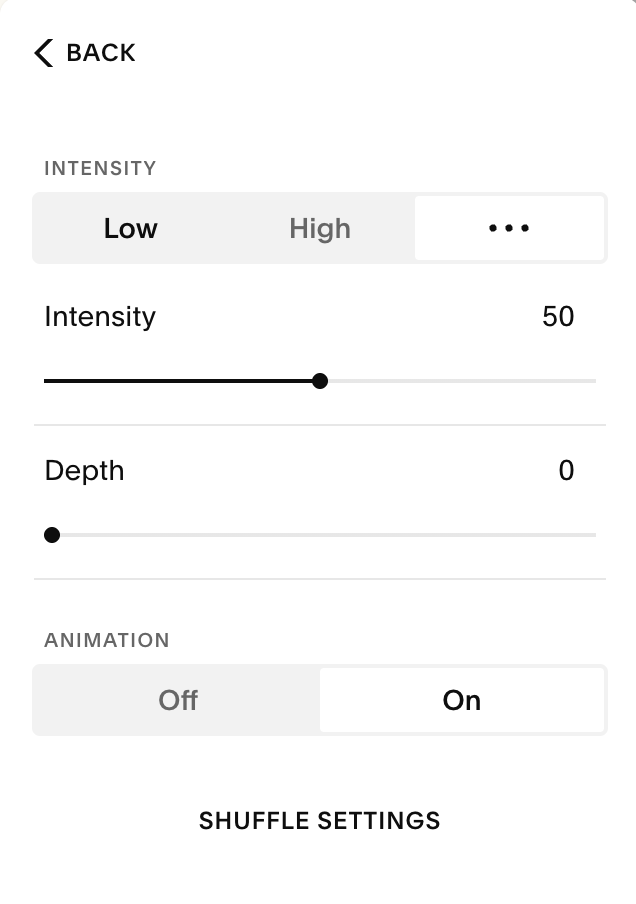
Customizing Effects:You can customize your effect in the details panel by clicking an image effect, then clicking the settings icon. Each image effect will have different details that you can customize.
The example below is the customization options for the grain effect:
Click any category in the details panel to open it and see more settings.
These options let you adjust things like the size and shape of the effect or, for motion-based effects like Liquid, the speed and direction of the movement.
Each effect comes with its own set of controls, so the options you see will change depending on which one you select.
If you want to try a completely new variation, click the shuffle icon when choosing an effect or select Randomize inside the details panel.
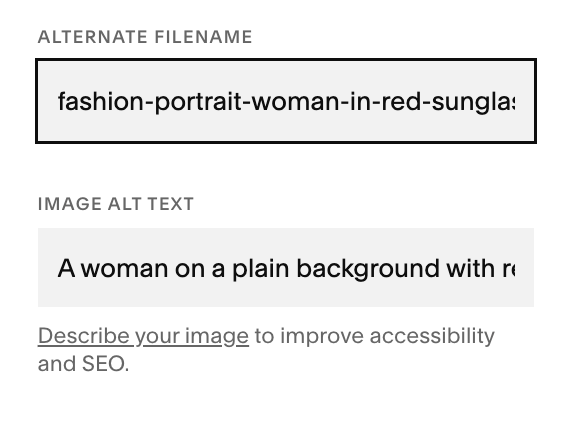
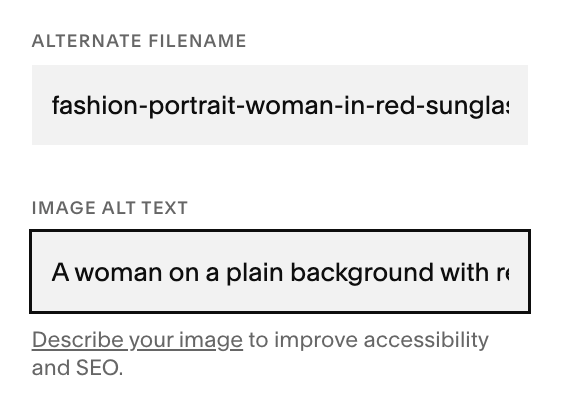
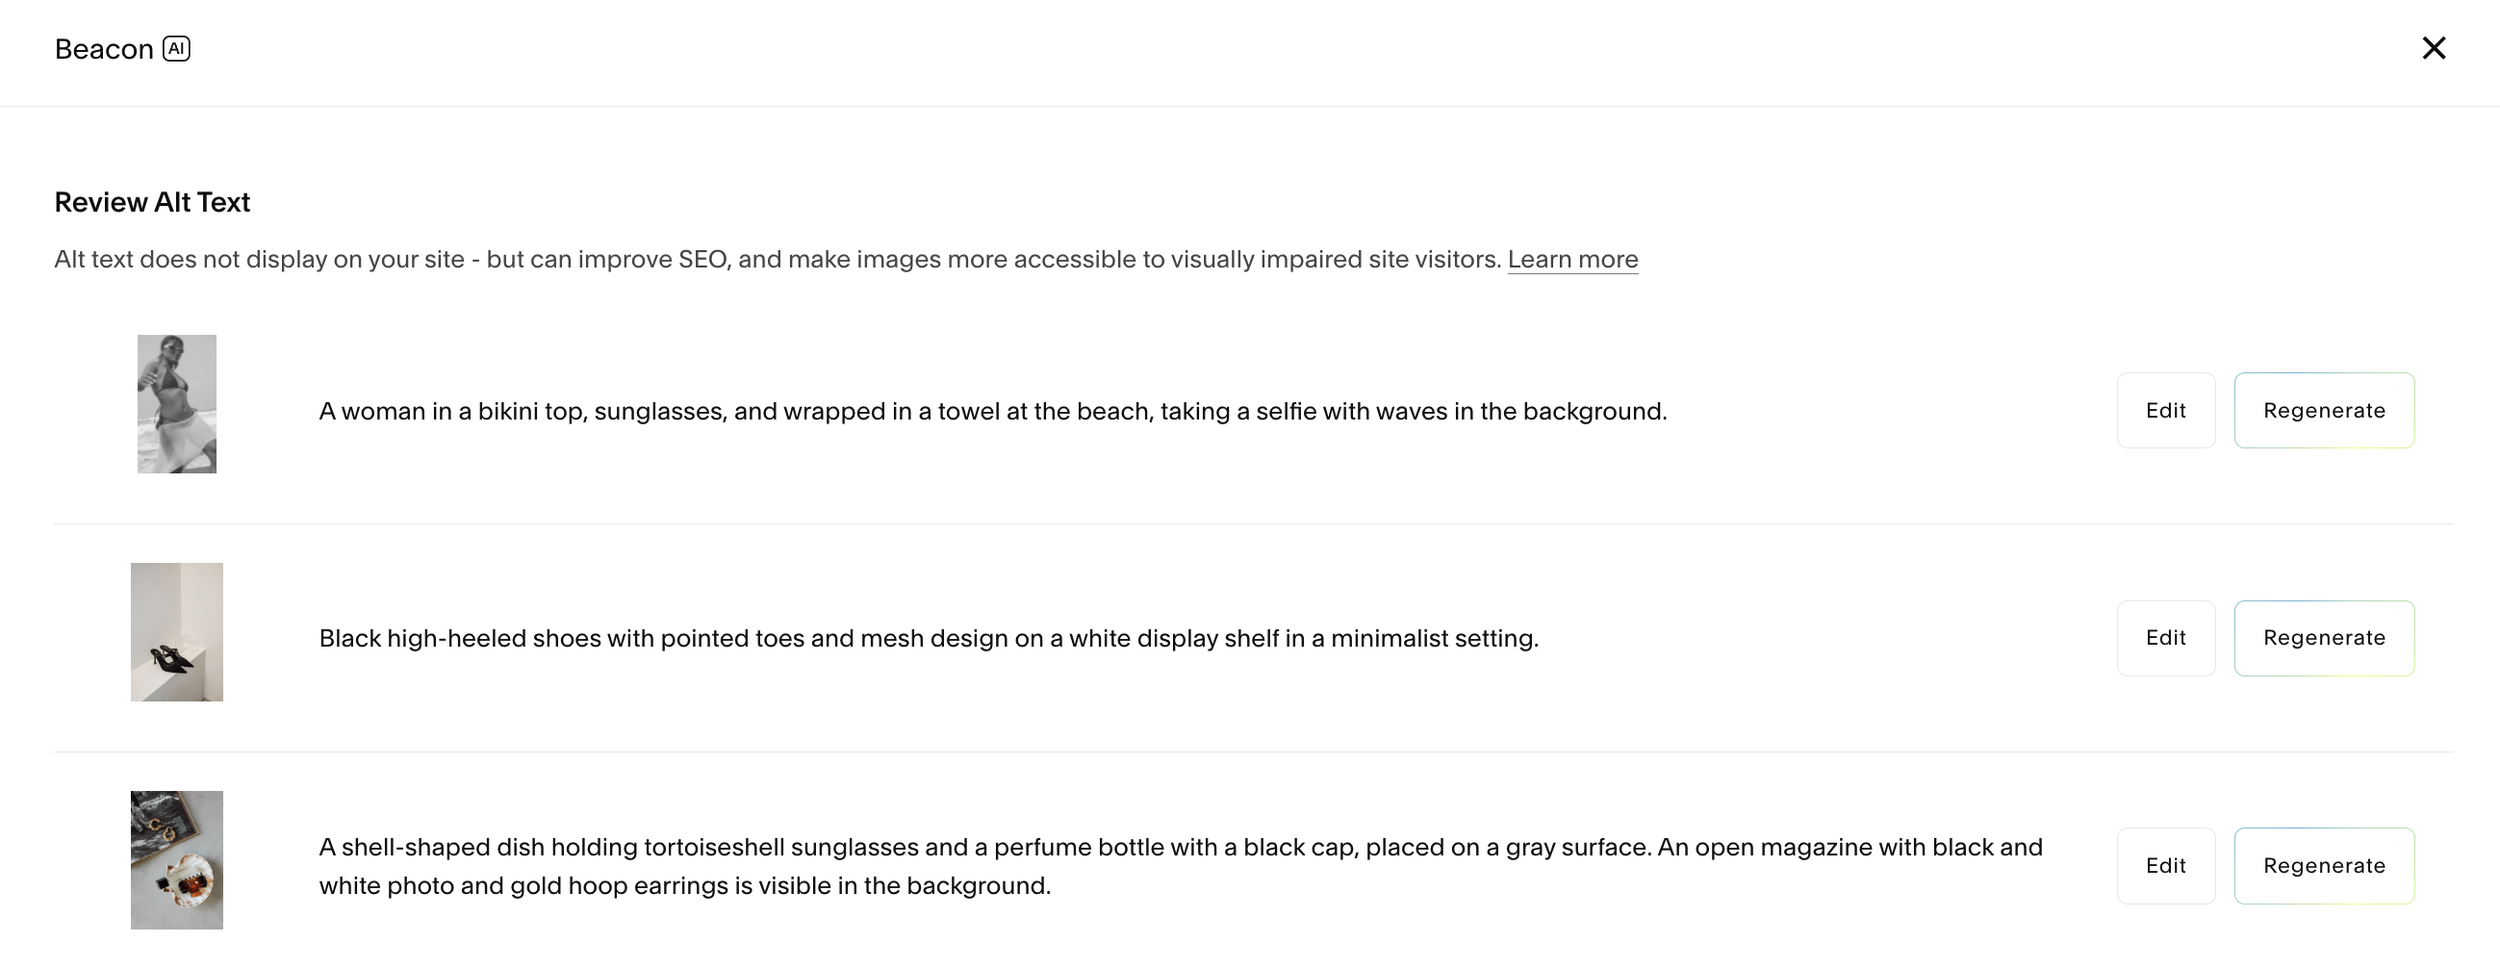
Image Accessibility & SEO:
Under the content tab, you’ll see an option to add an Alternate Filename and Image Alt Text. Both of these help improve your SEO ranking and your Image Alt Text is used to help screenreaders describe the image.
For each of these sections, just click the corresponding box and type in your text.
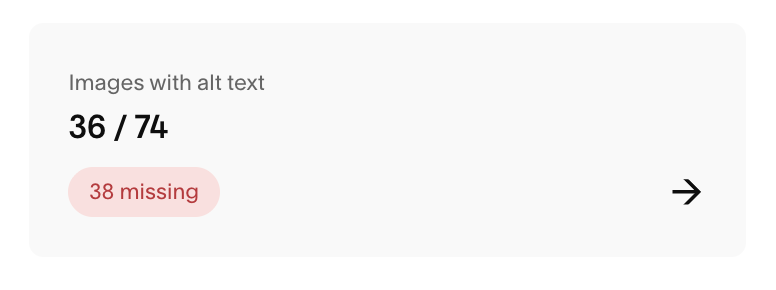
Helpful Tip:
You can use the AI feature in Squarespace to generate your Image Alt Text. To do this go to your side panel → Website → SEO/AIO → Images with Alt Text.
In this section Squarespace will generate automatic descriptions on your images. You can save these as is, get Squarespace to regenerate them, or edit them.
Delete an Image (But Keep the Block):
If you’d like to delete an image but keep the block where it is on your page:
Click Replace → Remove.
The Image Block will stay on the page as an empty container
(Note: this can be helpful when you’re filling out your template if placeholder images clashes with your branding and you’re finding it difficult to visualize what you want to replace it with!)
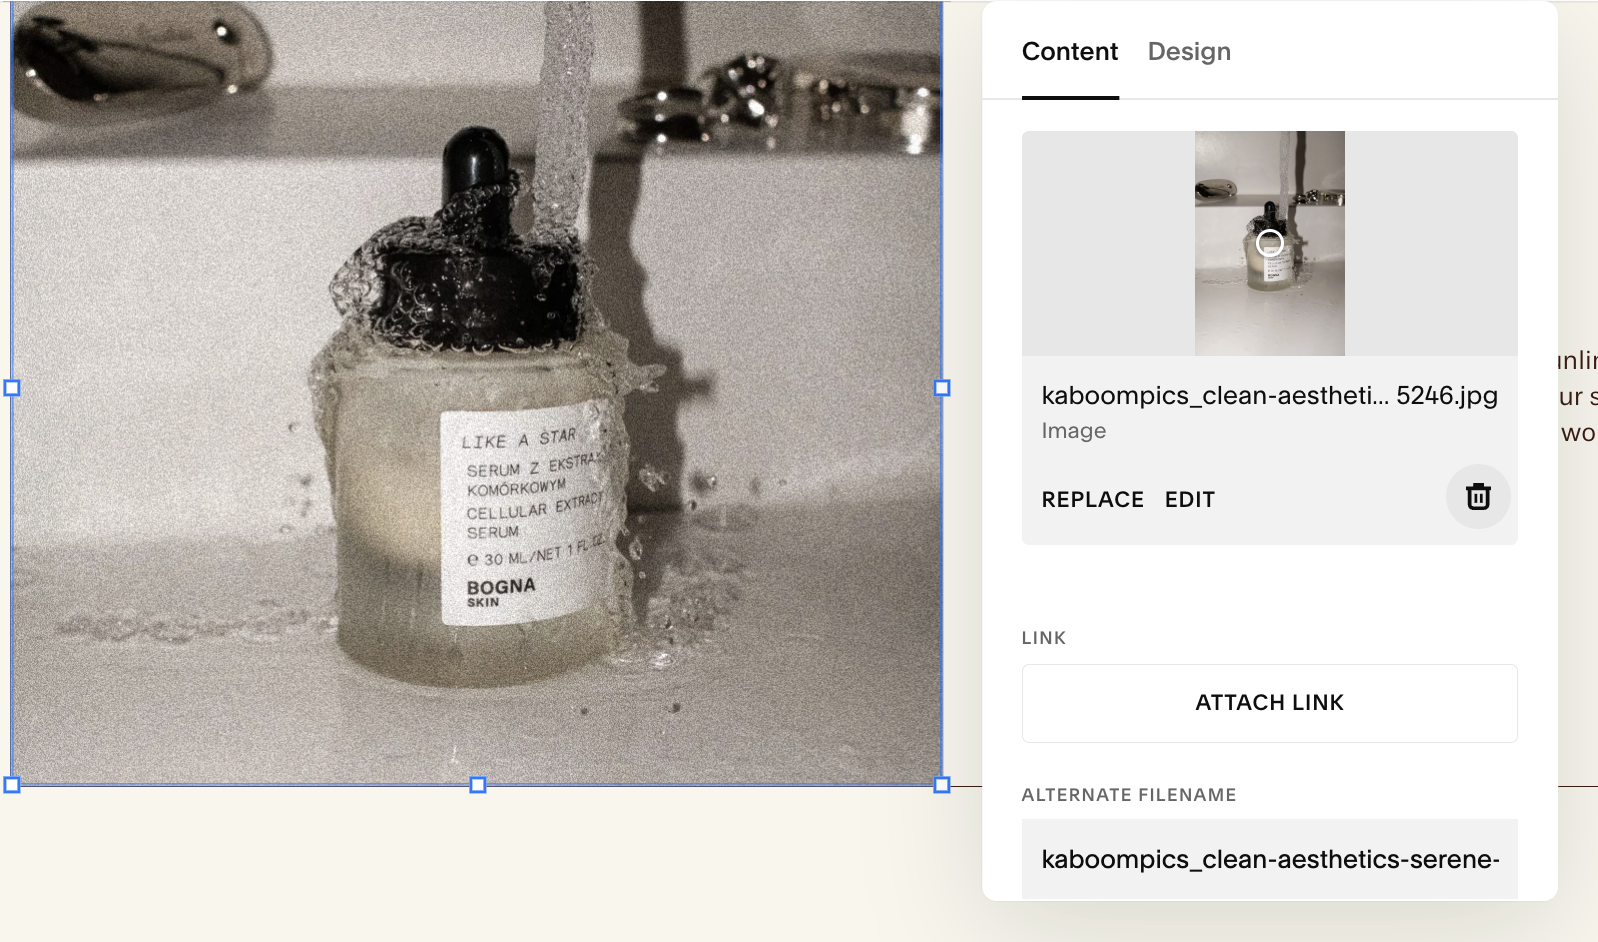
How to Add an Image Link:
You can turn any image block into a clickable link under the content tab. This is especially useful for featured images, portfolio tiles, or CTA graphics. To make your image a link:
Scroll down to Attach Link
Add the type of link you want:
Page on your website
URL/External website
File download
Email
Phone
Choose if you’d like the link to open in a new tab.

→
Adding a Lightbox to Your Image:
A lightbox opens the image in a larger overlay when clicked.
How to toggle it:Open the Image Block → Design tab.
Look for Lightbox and toggle it on or off.
From here you can choose Dark or Light Overlay
Dark Overlay: makes the screen behind your image dark.
Light Overlay: makes the screen behind your image light.
Note: Lightbox does not work if the image already has a clickthrough URL.