Editing Your Template
Forms help you collect inquiries, bookings, surveys, and more. In Squarespace 7.1 you’ll use the Form block, then connect it to one or more storage destinations so submissions don’t get lost.
Adding a Form Block:
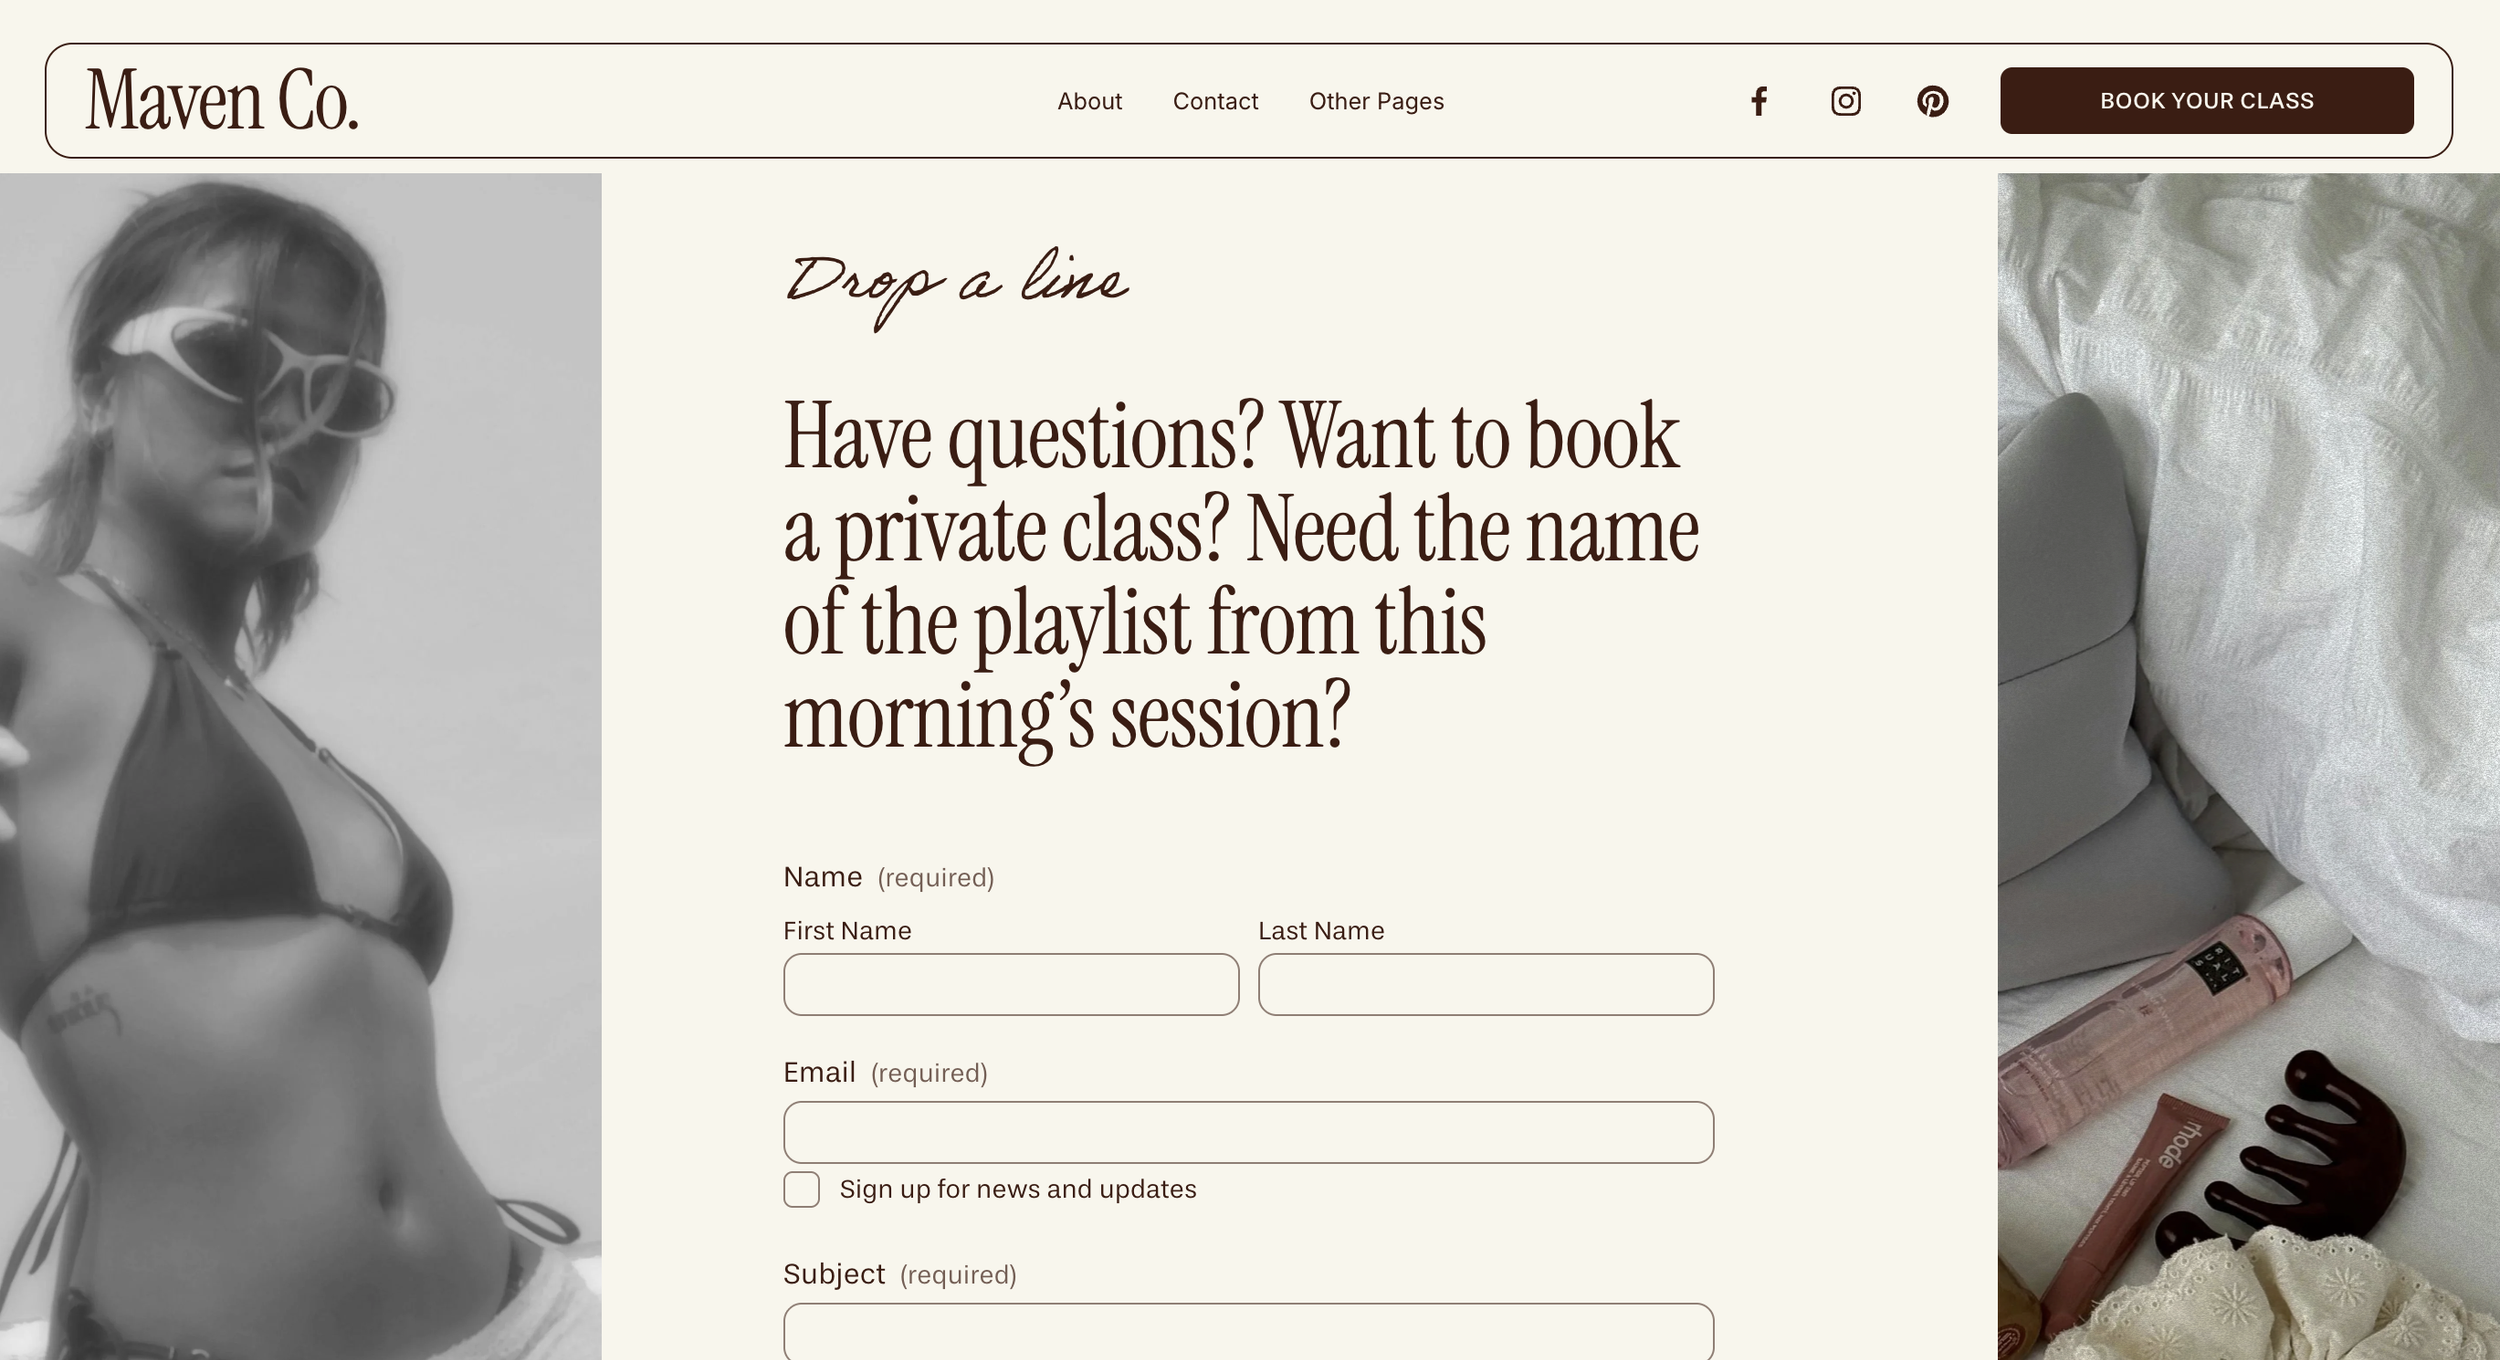
Your template comes with a contact form already built in, but if you’d like to add additional forms:
Open any page and click Edit.
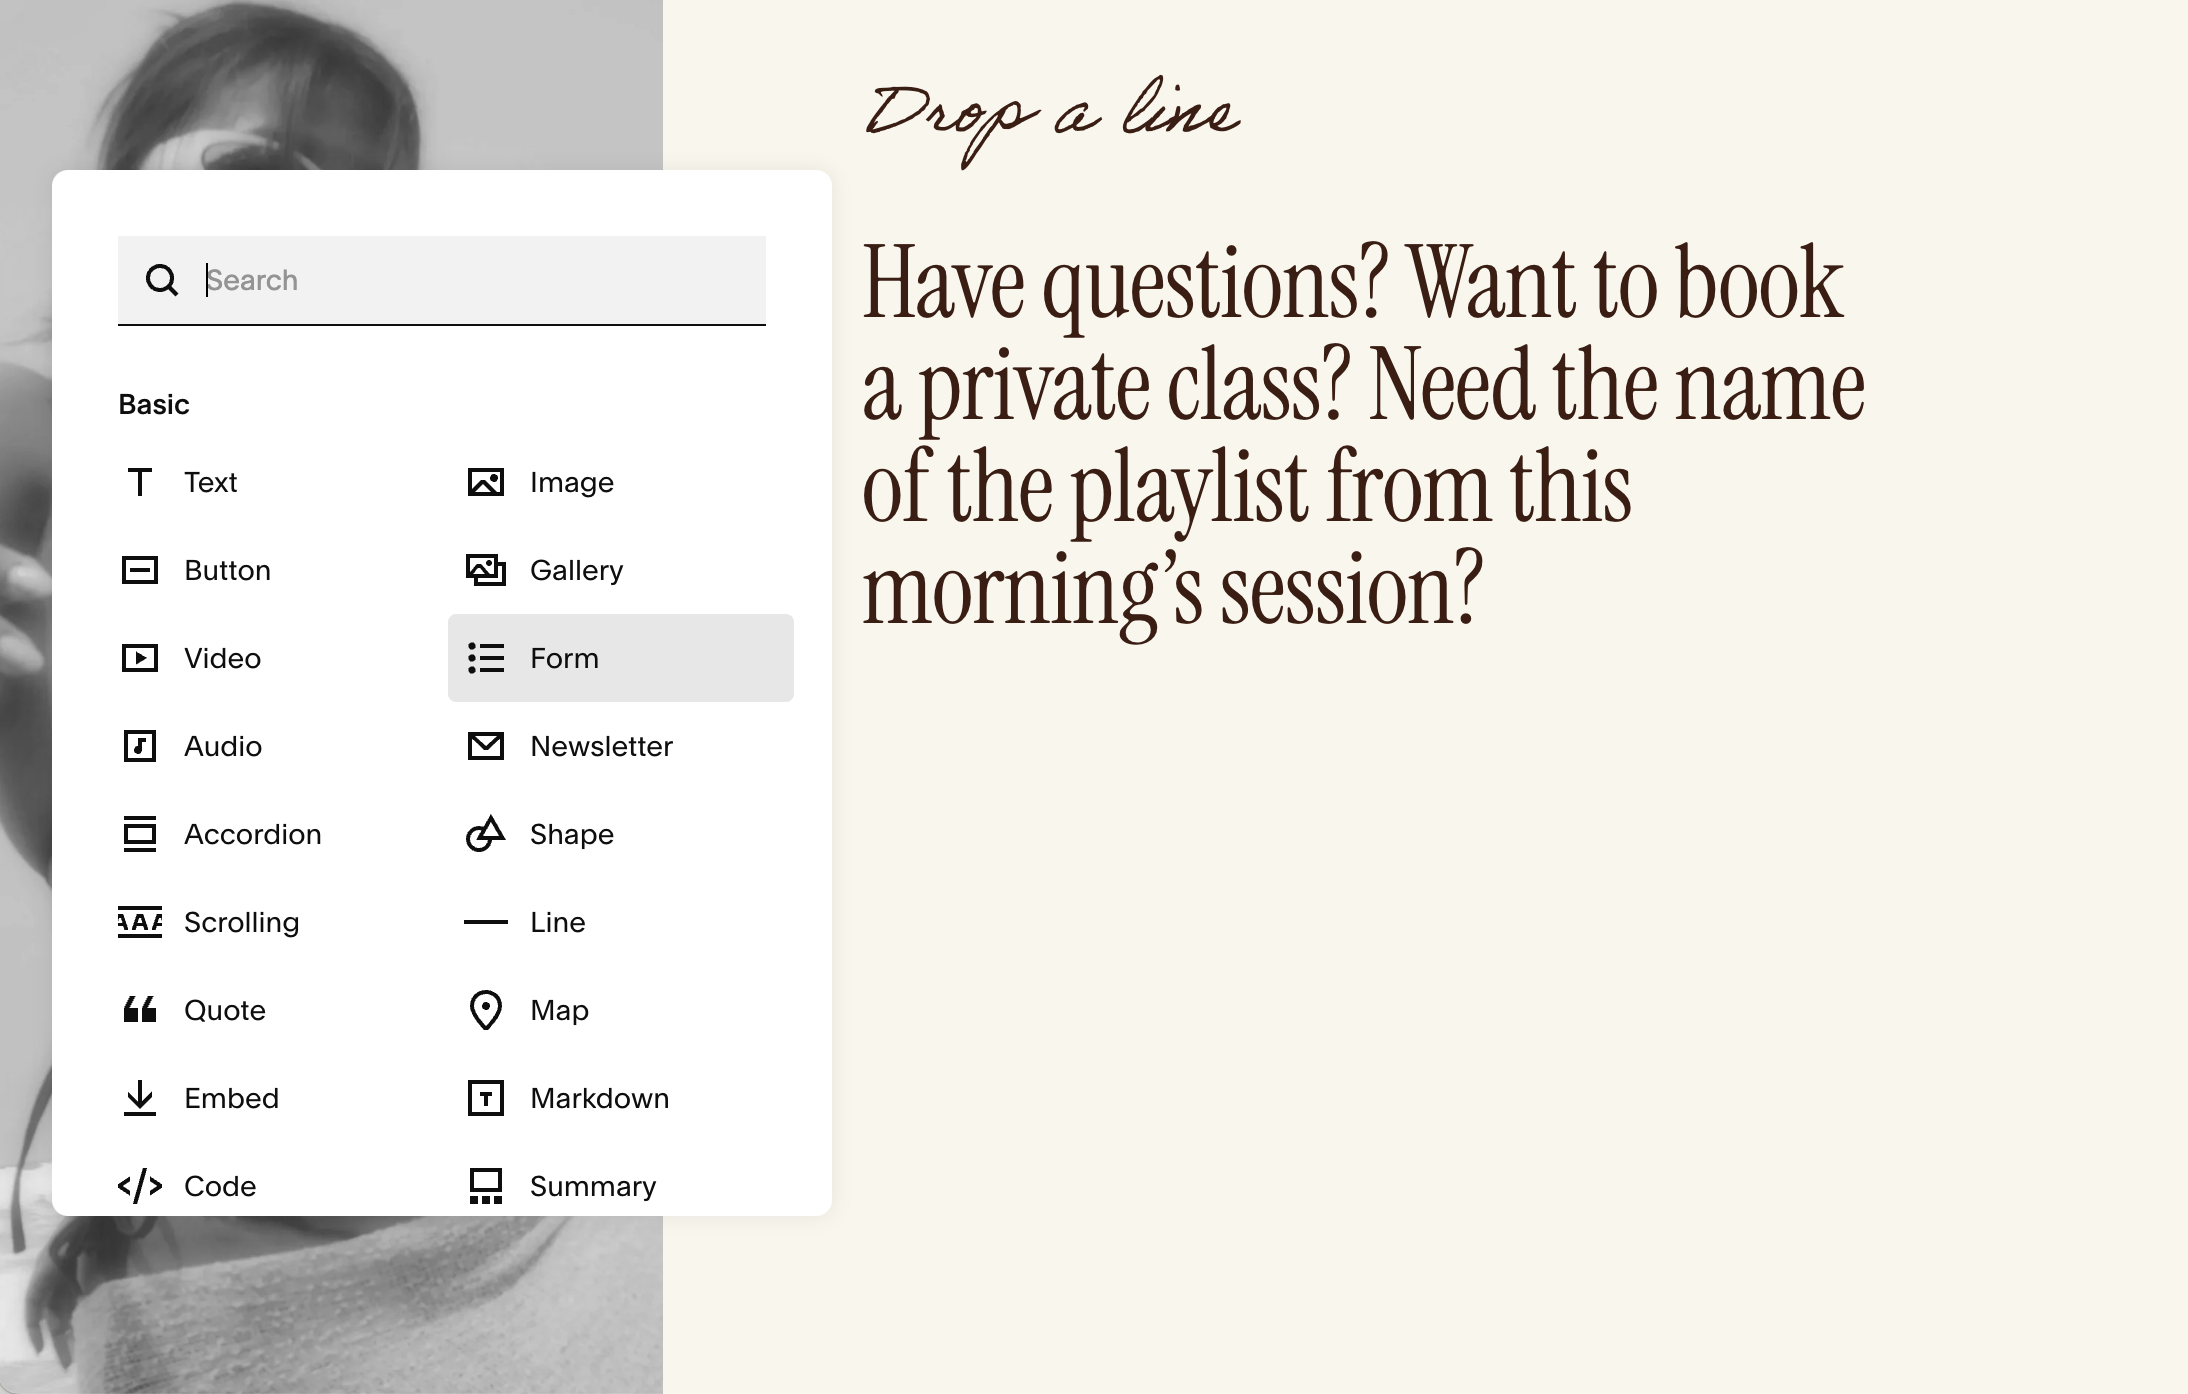
Click an insert point (+) and choose Form.
Squarespace starts you with a few default fields (Name, Email, Message) and sends responses to your login email by default. You can add storage destinations in a moment.
Edit Your Form Fields:
To edit your form field, click the pencil icon on the form to open its settings.
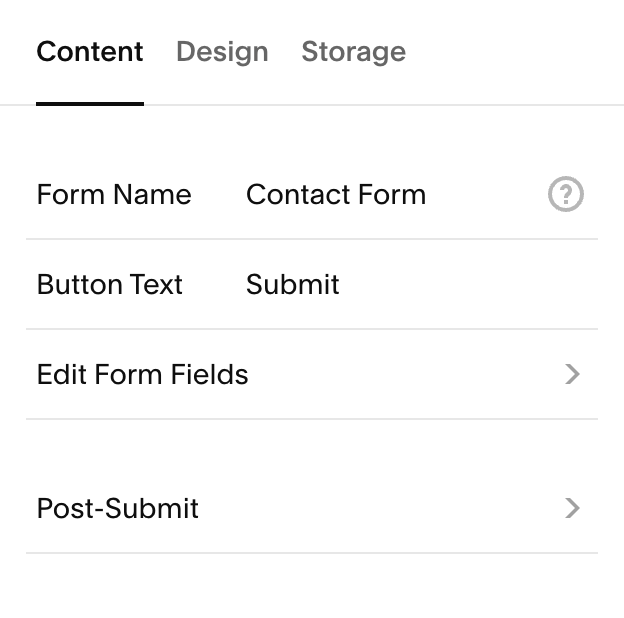
Under ‘Content’ you can Rename the form (for your reference), and change the button text (e.g., “Send” or “Request Quote”)
To Change Form Content:
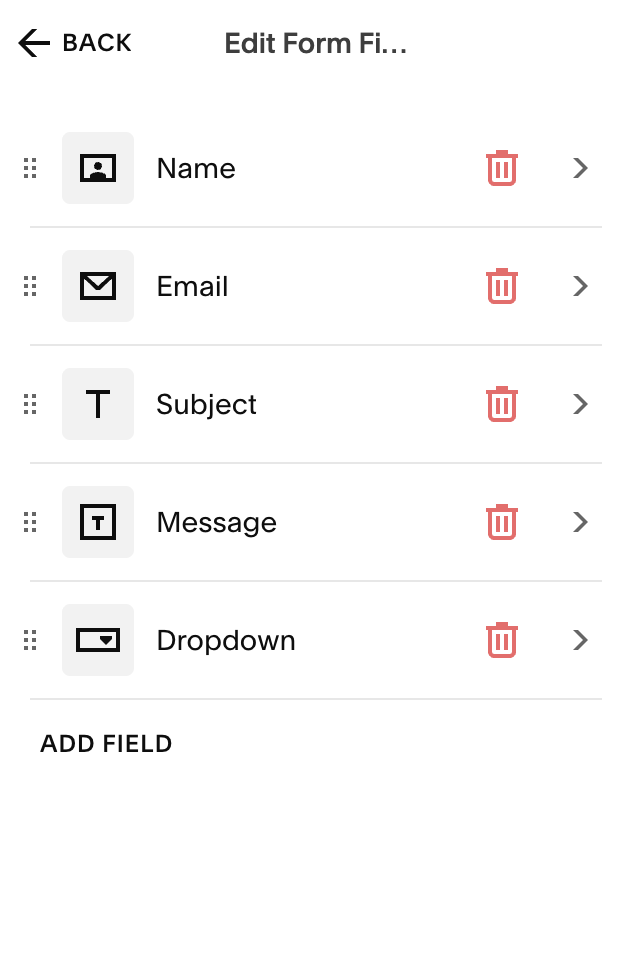
In the form editor, go to Content → Edit Form Fields. From here you can:
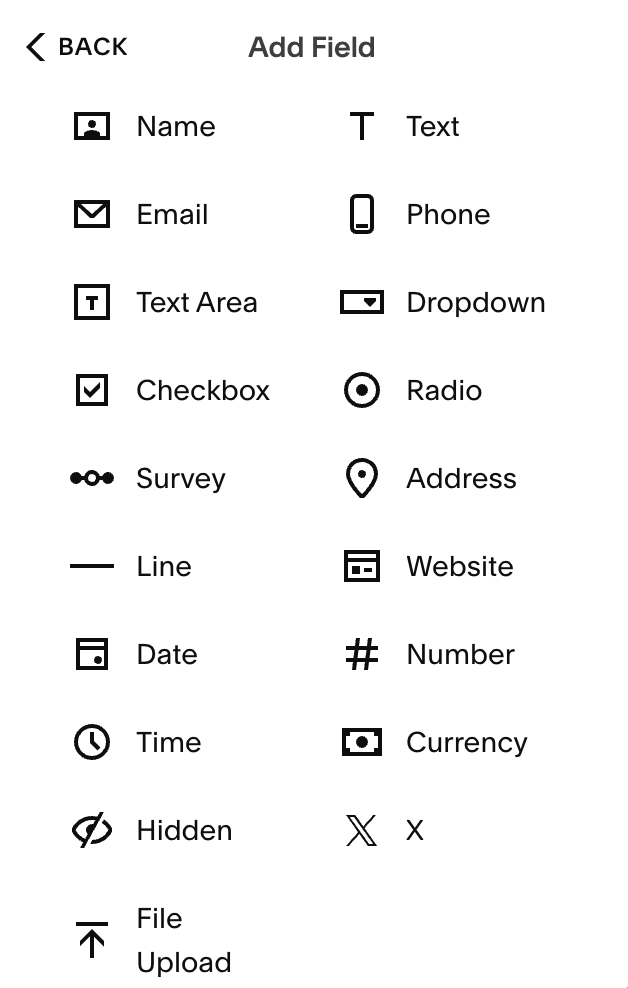
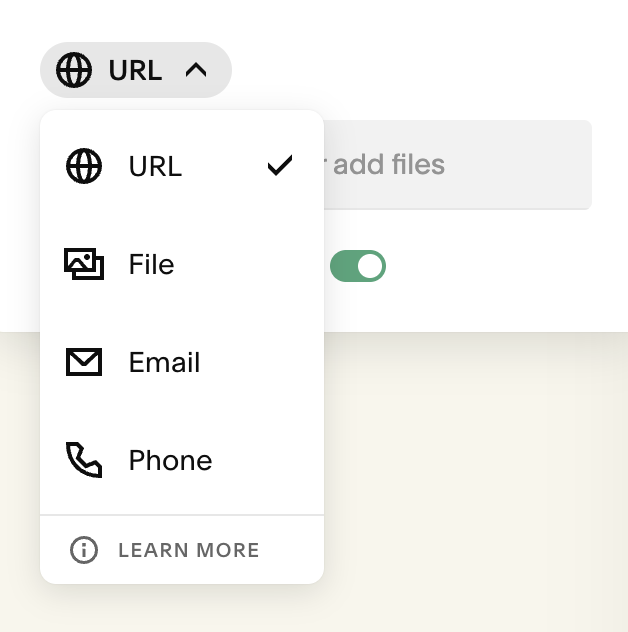
Add fields: Click ‘Add Field’ and pick a type (Text, Email, Phone, Address, Select/Dropdown, Radio, Checkbox, Date, Time, File Upload, etc.).
Edit a field: click it to set the label, description, whether it’s Required, and (for choice fields) the options.
Reorder fields by clicking the 6 dots on the left to drag and drop, or delete fields by clicking the trash icon on the right.
(Note: Squarespace recommends having under 30 fields for speed and usability (30 is also the limit when connecting to Mailchimp.)
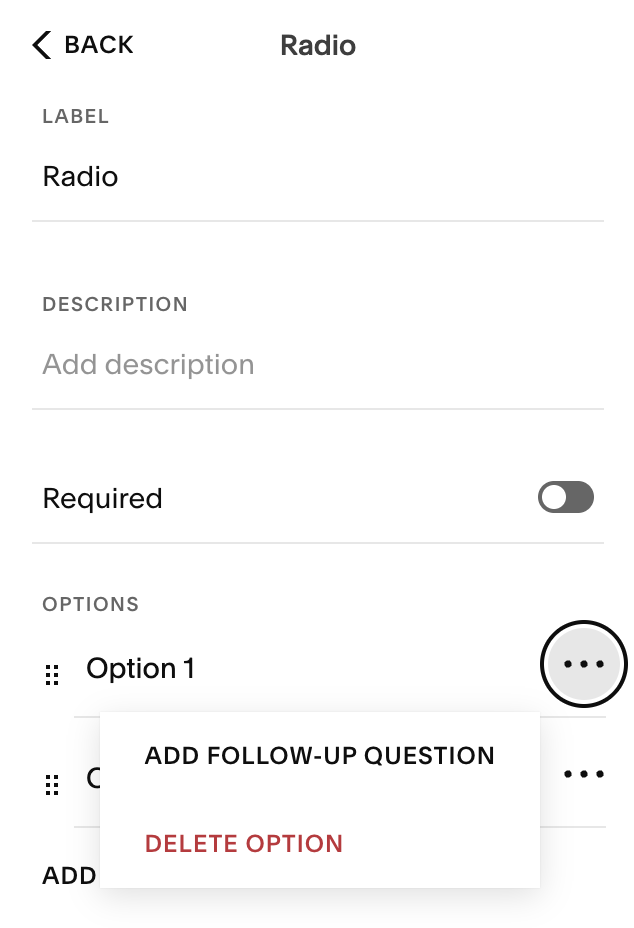
Adding Conditional (Follow-Up) Questions:
You can also show extra questions only when a specific answer is selected (great for dropdowns, radios, or checkboxes).
In Edit Form Fields, add your multiple-choice field (radio, checkbox, dropdown, survey)→ click the … next to an option → Add follow-up question → choose the field type and customize as desired.
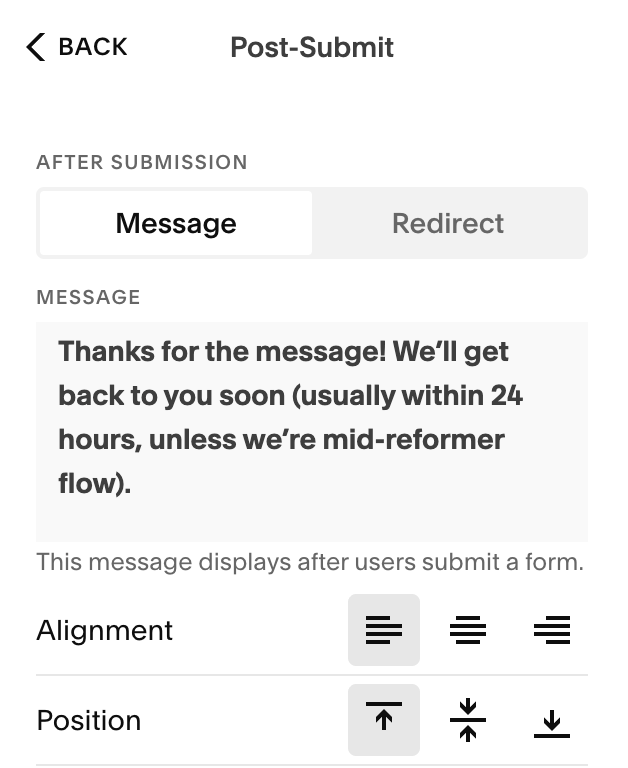
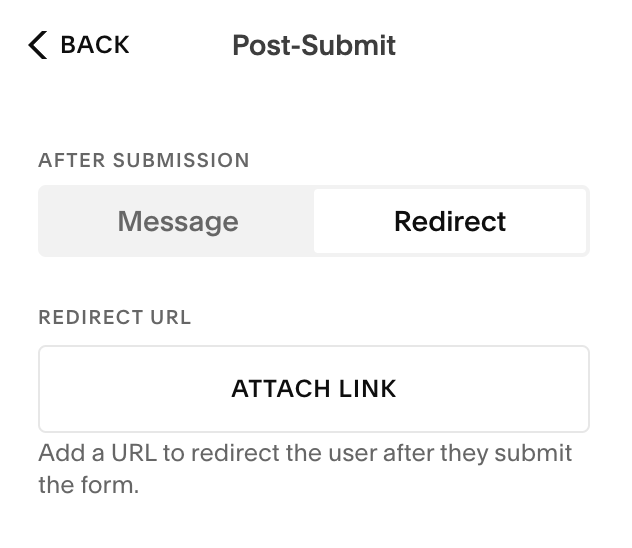
Choose What Happens After Hitting Submit:
You have several options for what you’d like to happen after someone submits a message through your form. Under Content → Post-Submit you can choose from the following:
Message: Show a simple “Thanks” message and choose the alignment or your text (you can also add basic HTML if needed).
Redirect: Send users to a thank-you page, a specific URL, or a file download. Test redirects while logged out or in Incognito.
Email (automation): If you use Squarespace Email Campaigns, you can enable an automation that emails people after they submit (handy for instant confirmations).
Post Submit Message:
Redirect:
→
Connect Storage:
Open the Storage tab in the form editor. You can keep the default Email delivery and also add other destinations:
Email (default): Sends a copy of each submission to your login email (you can add additional addresses).
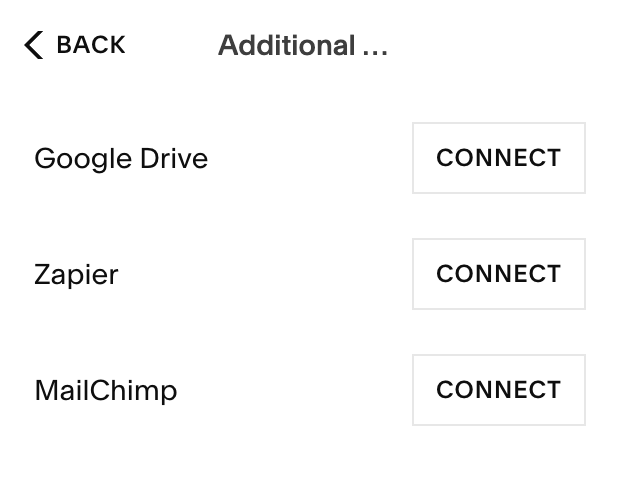
Google Drive (Sheets): Saves each submission as a row in a spreadsheet—great for sorting and exporting.
Zapier: Sends data to thousands of apps (CRMs, project tools, Slack, etc.).
Mailchimp: Adds submitters to a Mailchimp audience (subject to field/consent rules).
Squarespace Contacts & Lists: With a required Email field, submitters appear in your Contacts → Form Submitters; if Email Signup is enabled, confirmed opt-ins appear as Subscribers. You can also connect a Squarespace Email Campaigns mailing list.
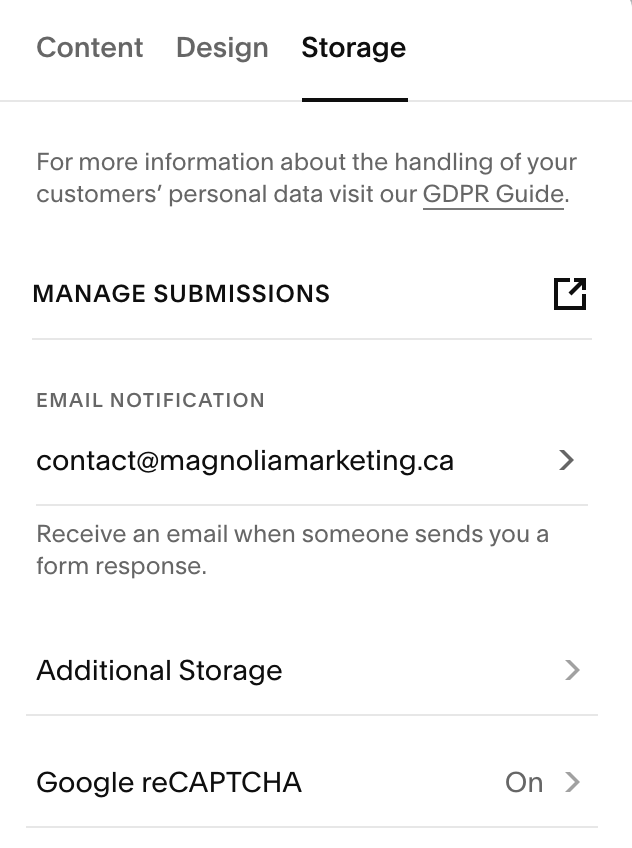
File Uploads & Spam Protection (reCAPTCHA):
If you add a File Upload field, you must set up Google reCAPTCHA in the Storage tab. This helps reduce spam and enables uploads. (Common limits include a max number of files per submission and per-file size; keep uploads small to ensure reliability.)

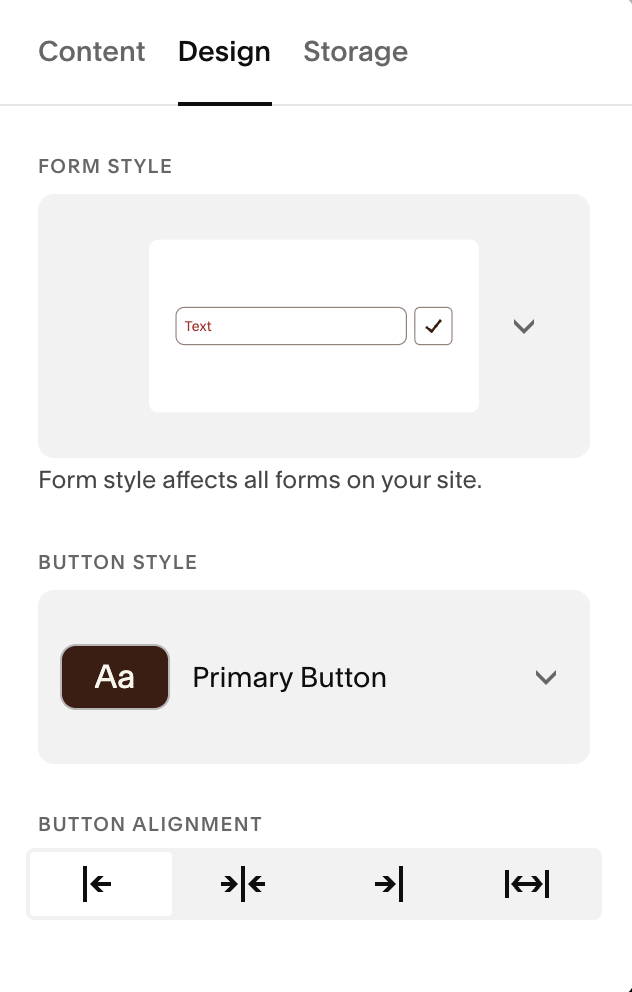
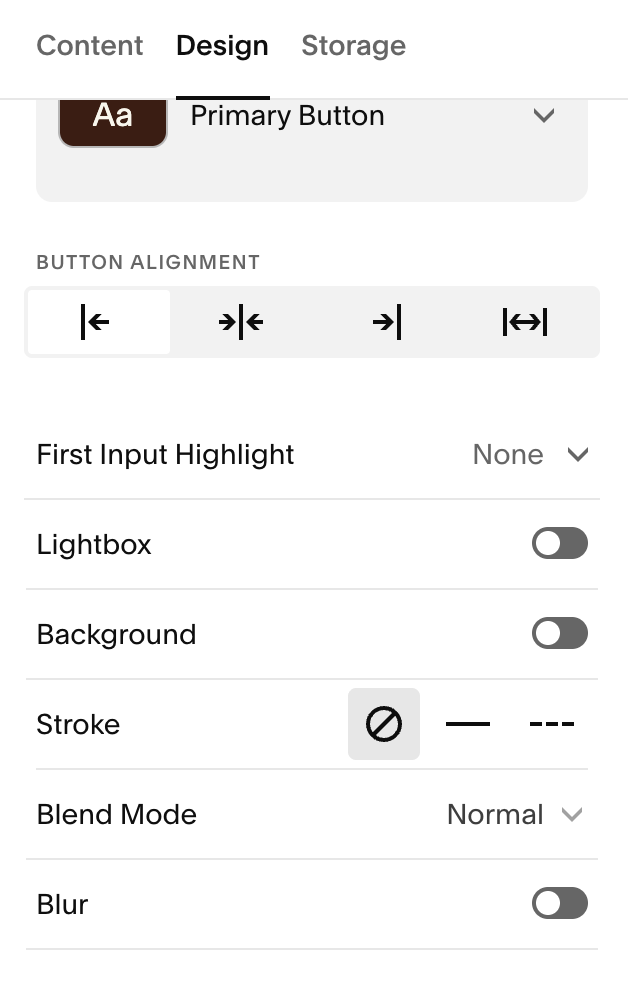
Form Design:
To make quick style edits to your form, open Design in the form editor for per-form layout options:
Button alignment (left/center/right)
First Input Highlight animation (draws attention to the first field)
Background toggle (adds a block background color)
Lightbox (open the form in a pop-up via an “Open” button)
Stroke/Blend Mode/Blur (extra visual effects; Stroke is also available in classic sections)
For global edits, use Site Styles → Form so every form looks consistent. For a detailed guide on this you can watch the ‘Styling Forms’ section in this course.
Style Your Form Site-Wide:
For global edits, use Site Styles → Form so every form looks consistent.
Form blocks inherit these styles (text, inputs, checkboxes, and the submit button), keeping all forms consistent across your site.
For a detailed guide, you can view the lesson on Styling Contact Forms:
View Submissions & Basic Analytics:
With a required Email field, submitters appear in your site’s Contacts.
If Email Signup is on (and confirmed), they’ll also appear under Subscribers. You can Track performance in Analytics → Conversions to see how often visitors submit forms after viewing them.
Quick Troubleshooting:
I’m not getting submissions: Open the form → Storage and confirm destinations (Email, Google Drive, etc.) are connected; send a test. Ensure the Email field is required if you want Contacts to capture submitters.
Uploads aren’t working: Make sure reCAPTCHA is enabled in Storage and that your file size/quantity is reasonable.
Text is hard to read: Adjust your Color theme (overlay/contrast) or move the form to a higher-contrast section.
Form is too long: Reduce fields or split into multiple forms; aim for under 30 fields total.