Website Pages
The Pages panel is where you build the structure of your entire site. It’s where you add new pages, organize them into folders or dropdowns, and manage what shows up in your navigation.
Keeping your Pages panel organized helps your visitors navigate easily and makes your site easier to update as you grow.
These Are Your Key Sections:
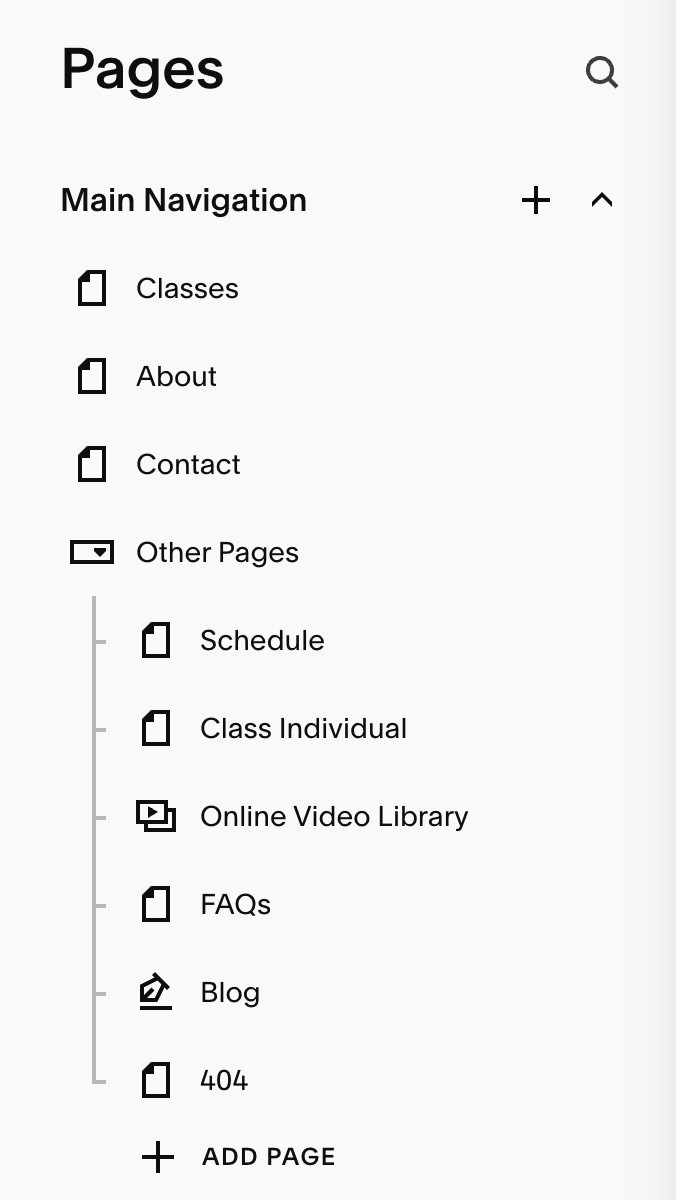
Main Navigation:
These are all the pages that will show up in your main navigation. They are the pages visible to your website visitors (as shown in the Alé Studio menu below)

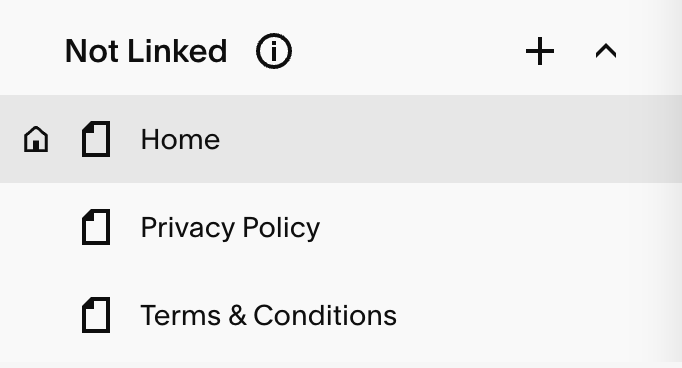
Not Linked:
The Not Linked section is for pages you want live but hidden from your menu (like thank you pages or terms & conditions)
Moving Pages from Linked to Not Linked:
You can easily move pages back and forth between linked and not linked by dragging and dropping them.
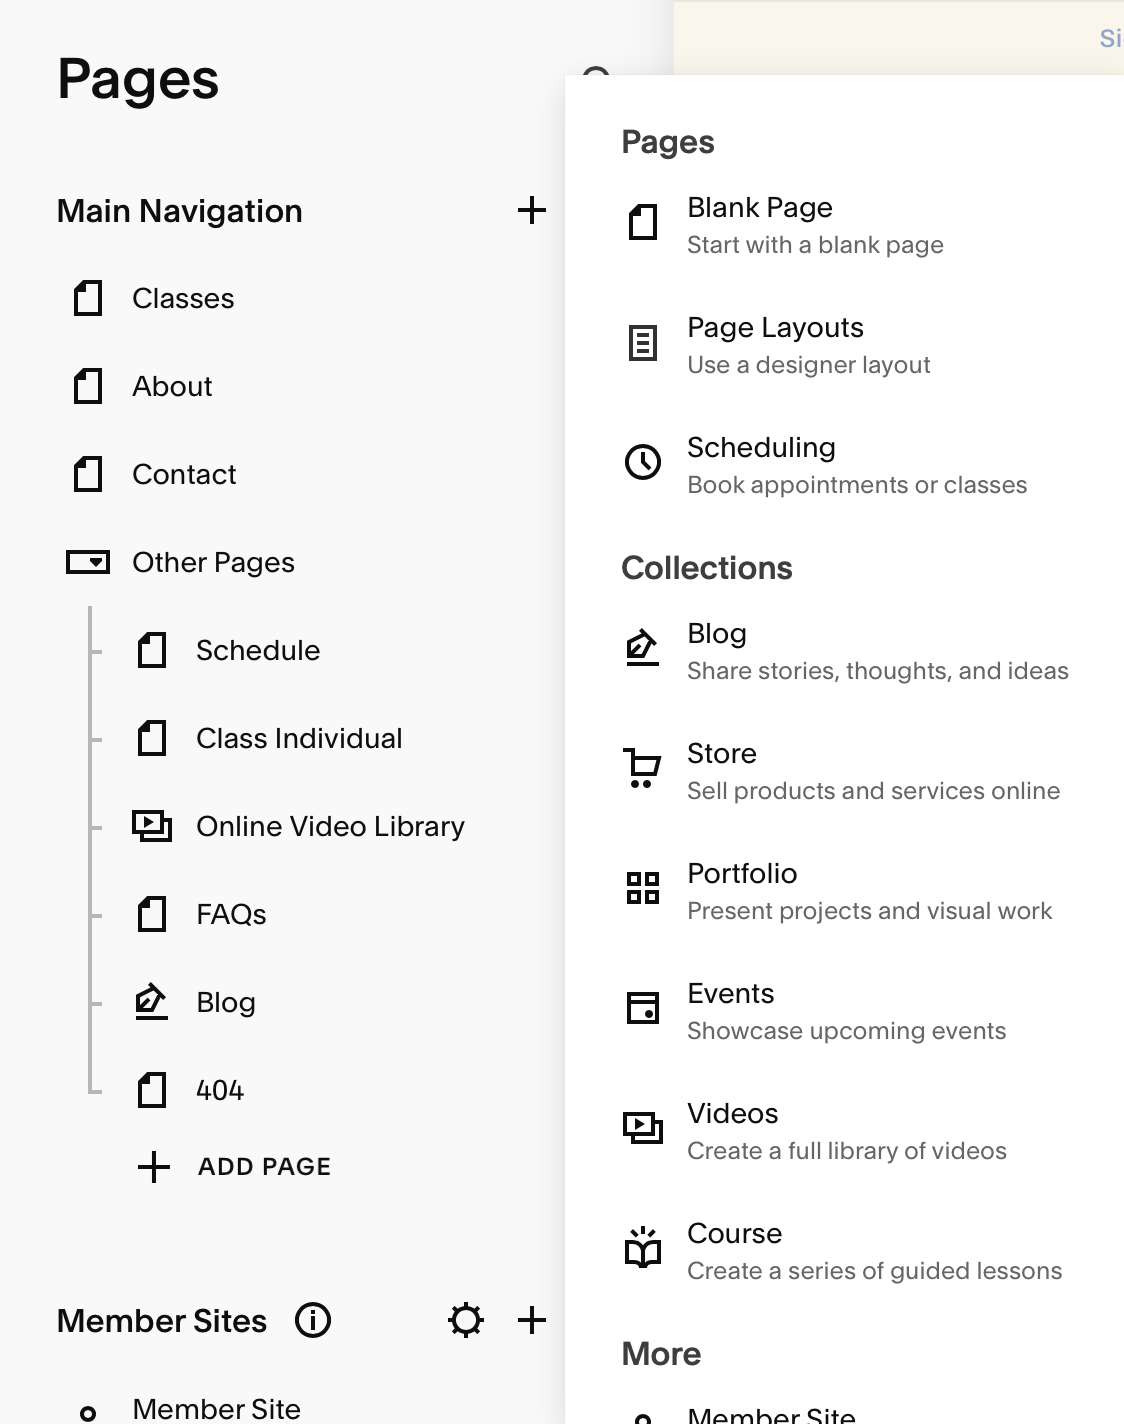
Adding New Pages:
You can add pages to either section by clicking the "+" button next to the section title (Linked or Not Linked). A pop-up will appear with several page types to choose from.
You can choose a blank page if you want to start from scratch (or used your own saved sections) or choose from several pre-built layouts for things like blogs, stores, portfolios, courses, and more!
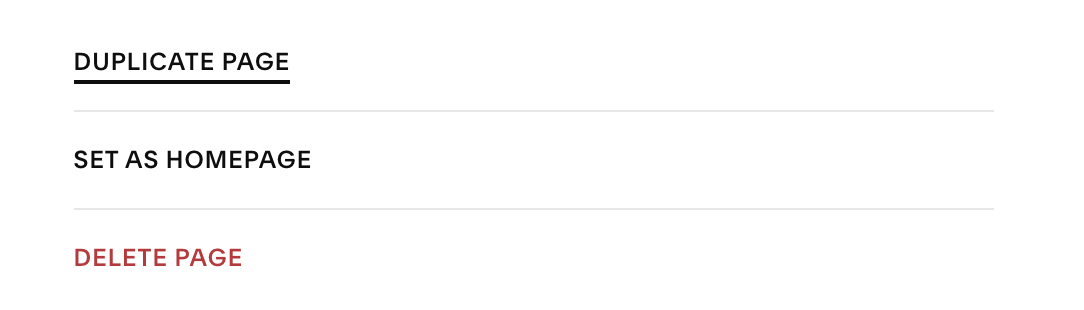
To Duplicate or Delete:
Click the gear icon next to the page you want to duplicate or delete
Scroll to the bottom of the General panel
Select Duplicate Page to make a copy or Delete Page to remove it
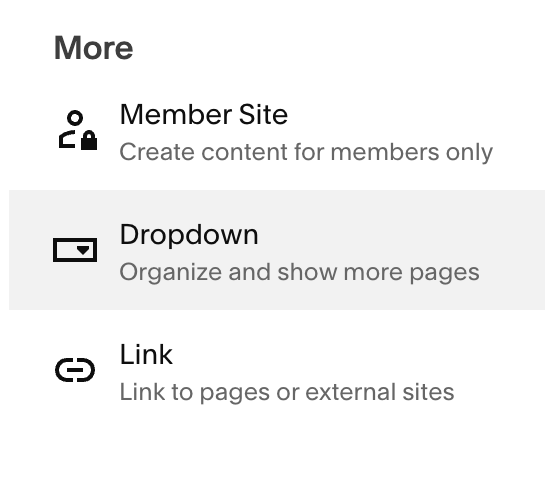
To Organize Pages into Dropdown Menus:
Click the plus icon to add a new page
Scroll to the bottom to the More category
Select Dropdown
Name your dropdown like you would any regular page (e.g. About)
Drag any pages you want to display in your dropdown
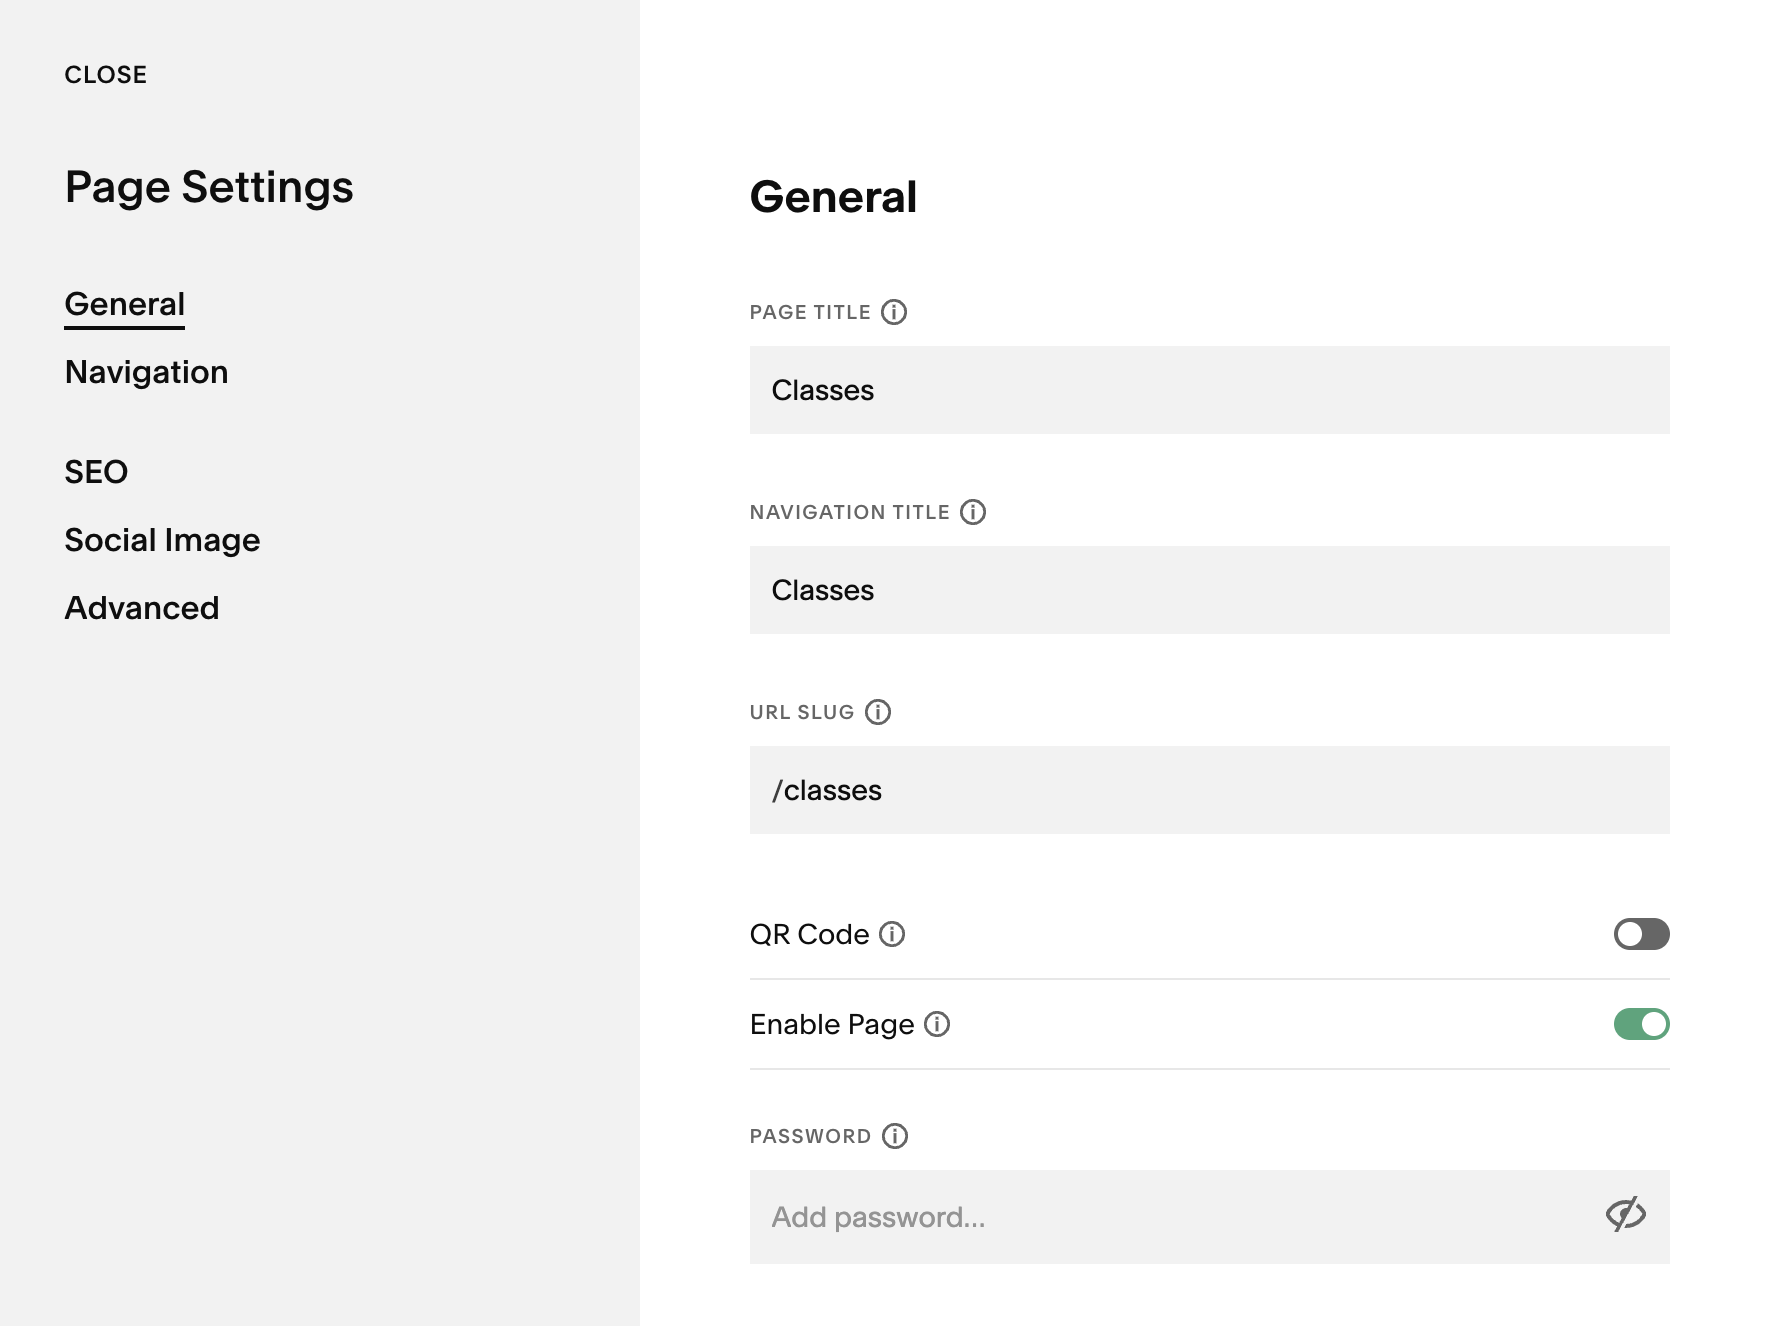
Page Settings:
When you click the gear icon next to any page in the Pages panel, you’ll open that page’s settings. Here’s what each tab does:
General – Update the page title and URL slug, enable or disable the page, password-protect it, duplicate it, or set it as your homepage.
Navigation – Choose whether to show or hide the site header and footer on that specific page.
SEO – Add your SEO title and meta description to help search engines understand your page content.
Social Image – Upload a custom image that appears when the page is shared on social platforms.
Advanced – Add custom header code (like scripts or pixels) if needed.
Keep in mind: some pages have extra settings. For example, Blog pages include additional options like setting the number of posts displayed and managing tags and categories!
You’ll learn more about Page settings in the next module. You can also consult the Squarespace guide below:
Squarespace Guide: Page Settings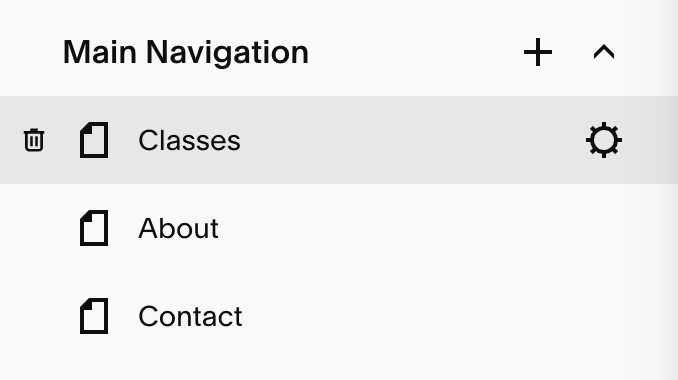
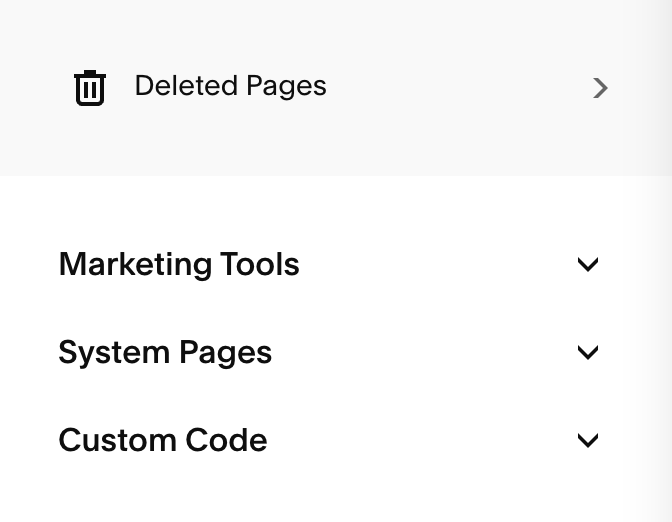
Additional Sections:
At the bottom of your pages panel, you’ll see section where you’ll have access to some additional settings, including:
Deleted Pages: this is where you can restore recently deleted pages. Pages remain here for 30 days before they are automatically removed by the system.
System Pages: This is where you can assign your 404 page (your template comes with this already installed!), lock screen, and checkout page if you're selling products or services.
Marketing Tools: This is where you can access your announcement bar, mobile info bar, and pop-ups for promotions or email signups.
Custom Code: This is where you’ll access the CSS and code injection for your website if you have any custom code you’re adding to your site.