Launching Your Site

When you're ready to take your site live, follow these simple steps to publish and select your Squarespace plan:
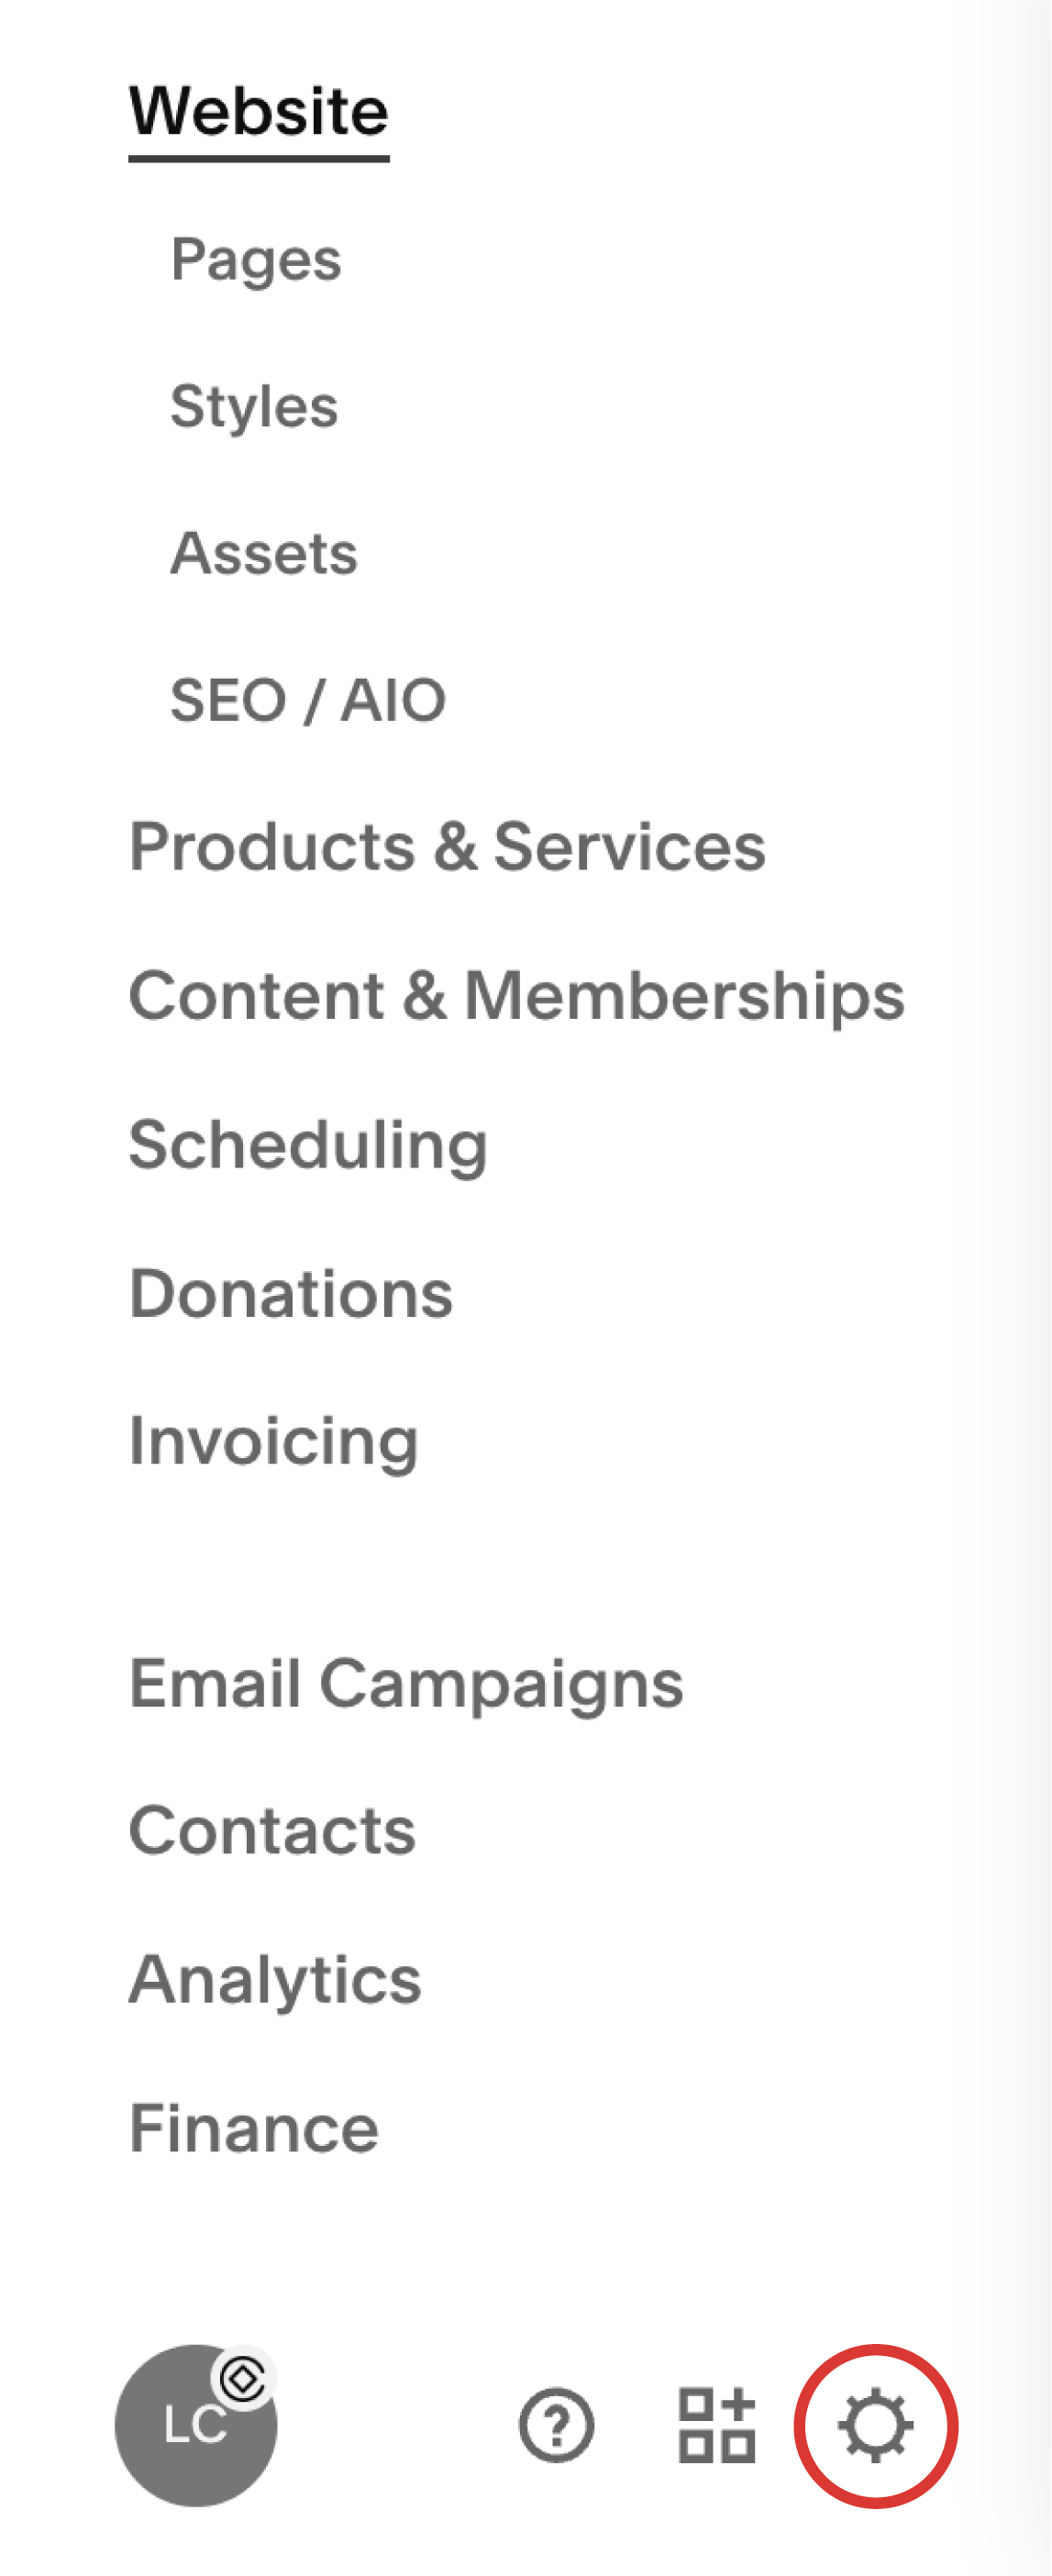
Open Your Settings Panel:
From your main dashboard, click the gear icon in the lower-left corner to open the Settings menu.
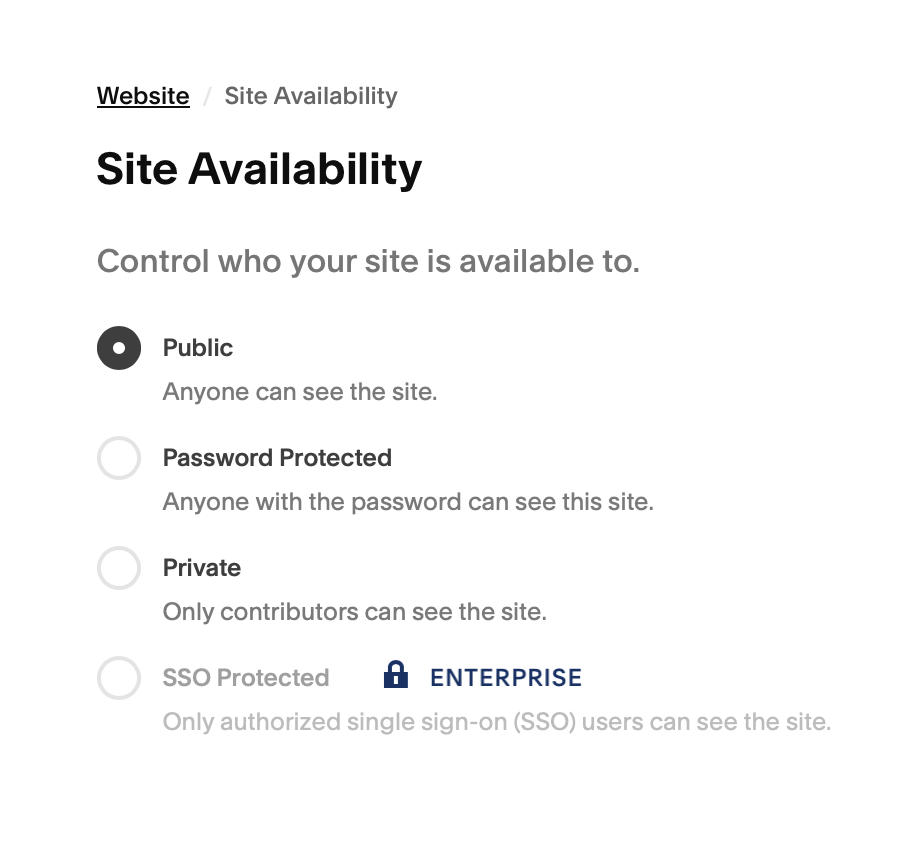
Go to 'Site Availability':
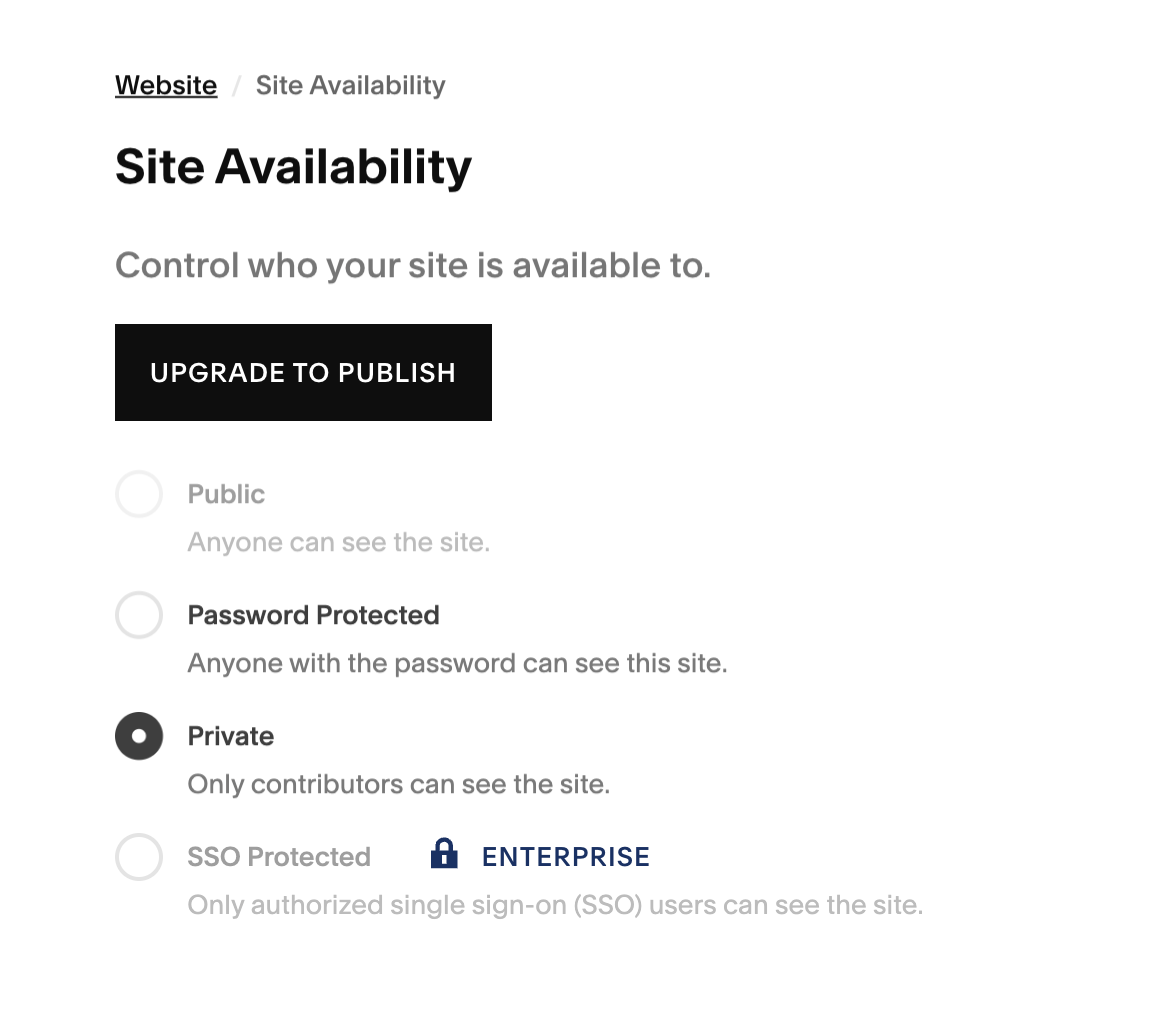
In the Settings menu, click Website → Site Availability. You'll see options to keep your site private, make it password-protected, or publish it to the public.
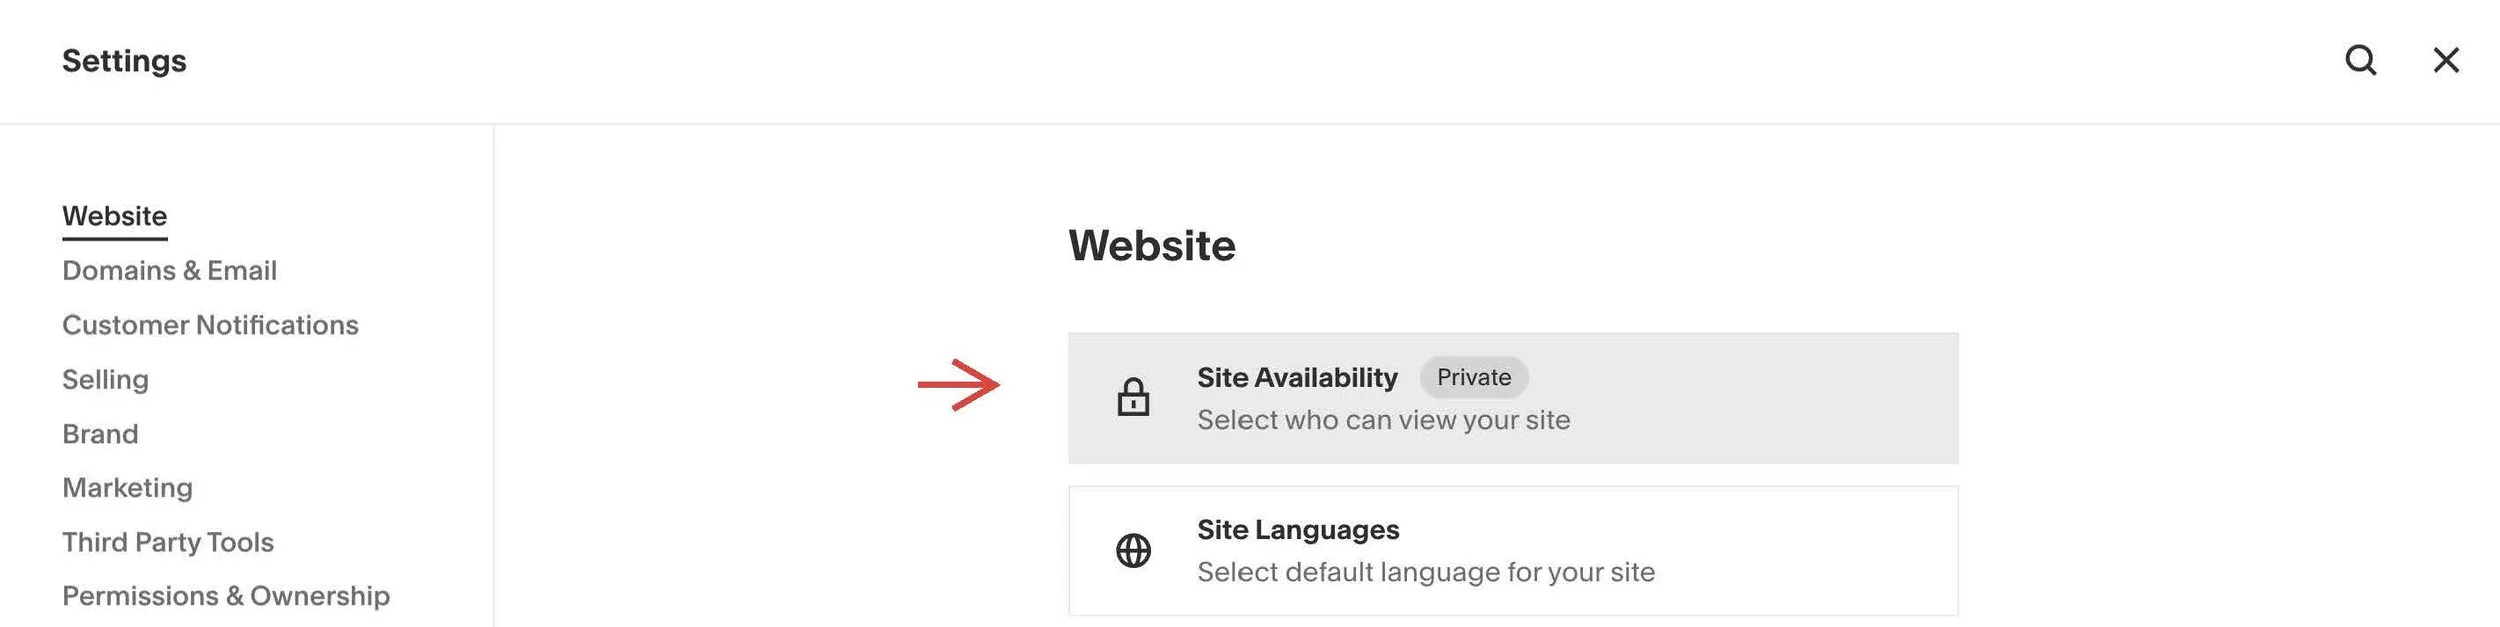
Click 'Upgrade to Publish':
If you haven’t selected a plan yet, you’ll see a button that says Upgrade to Publish. Click this to start the upgrade process.
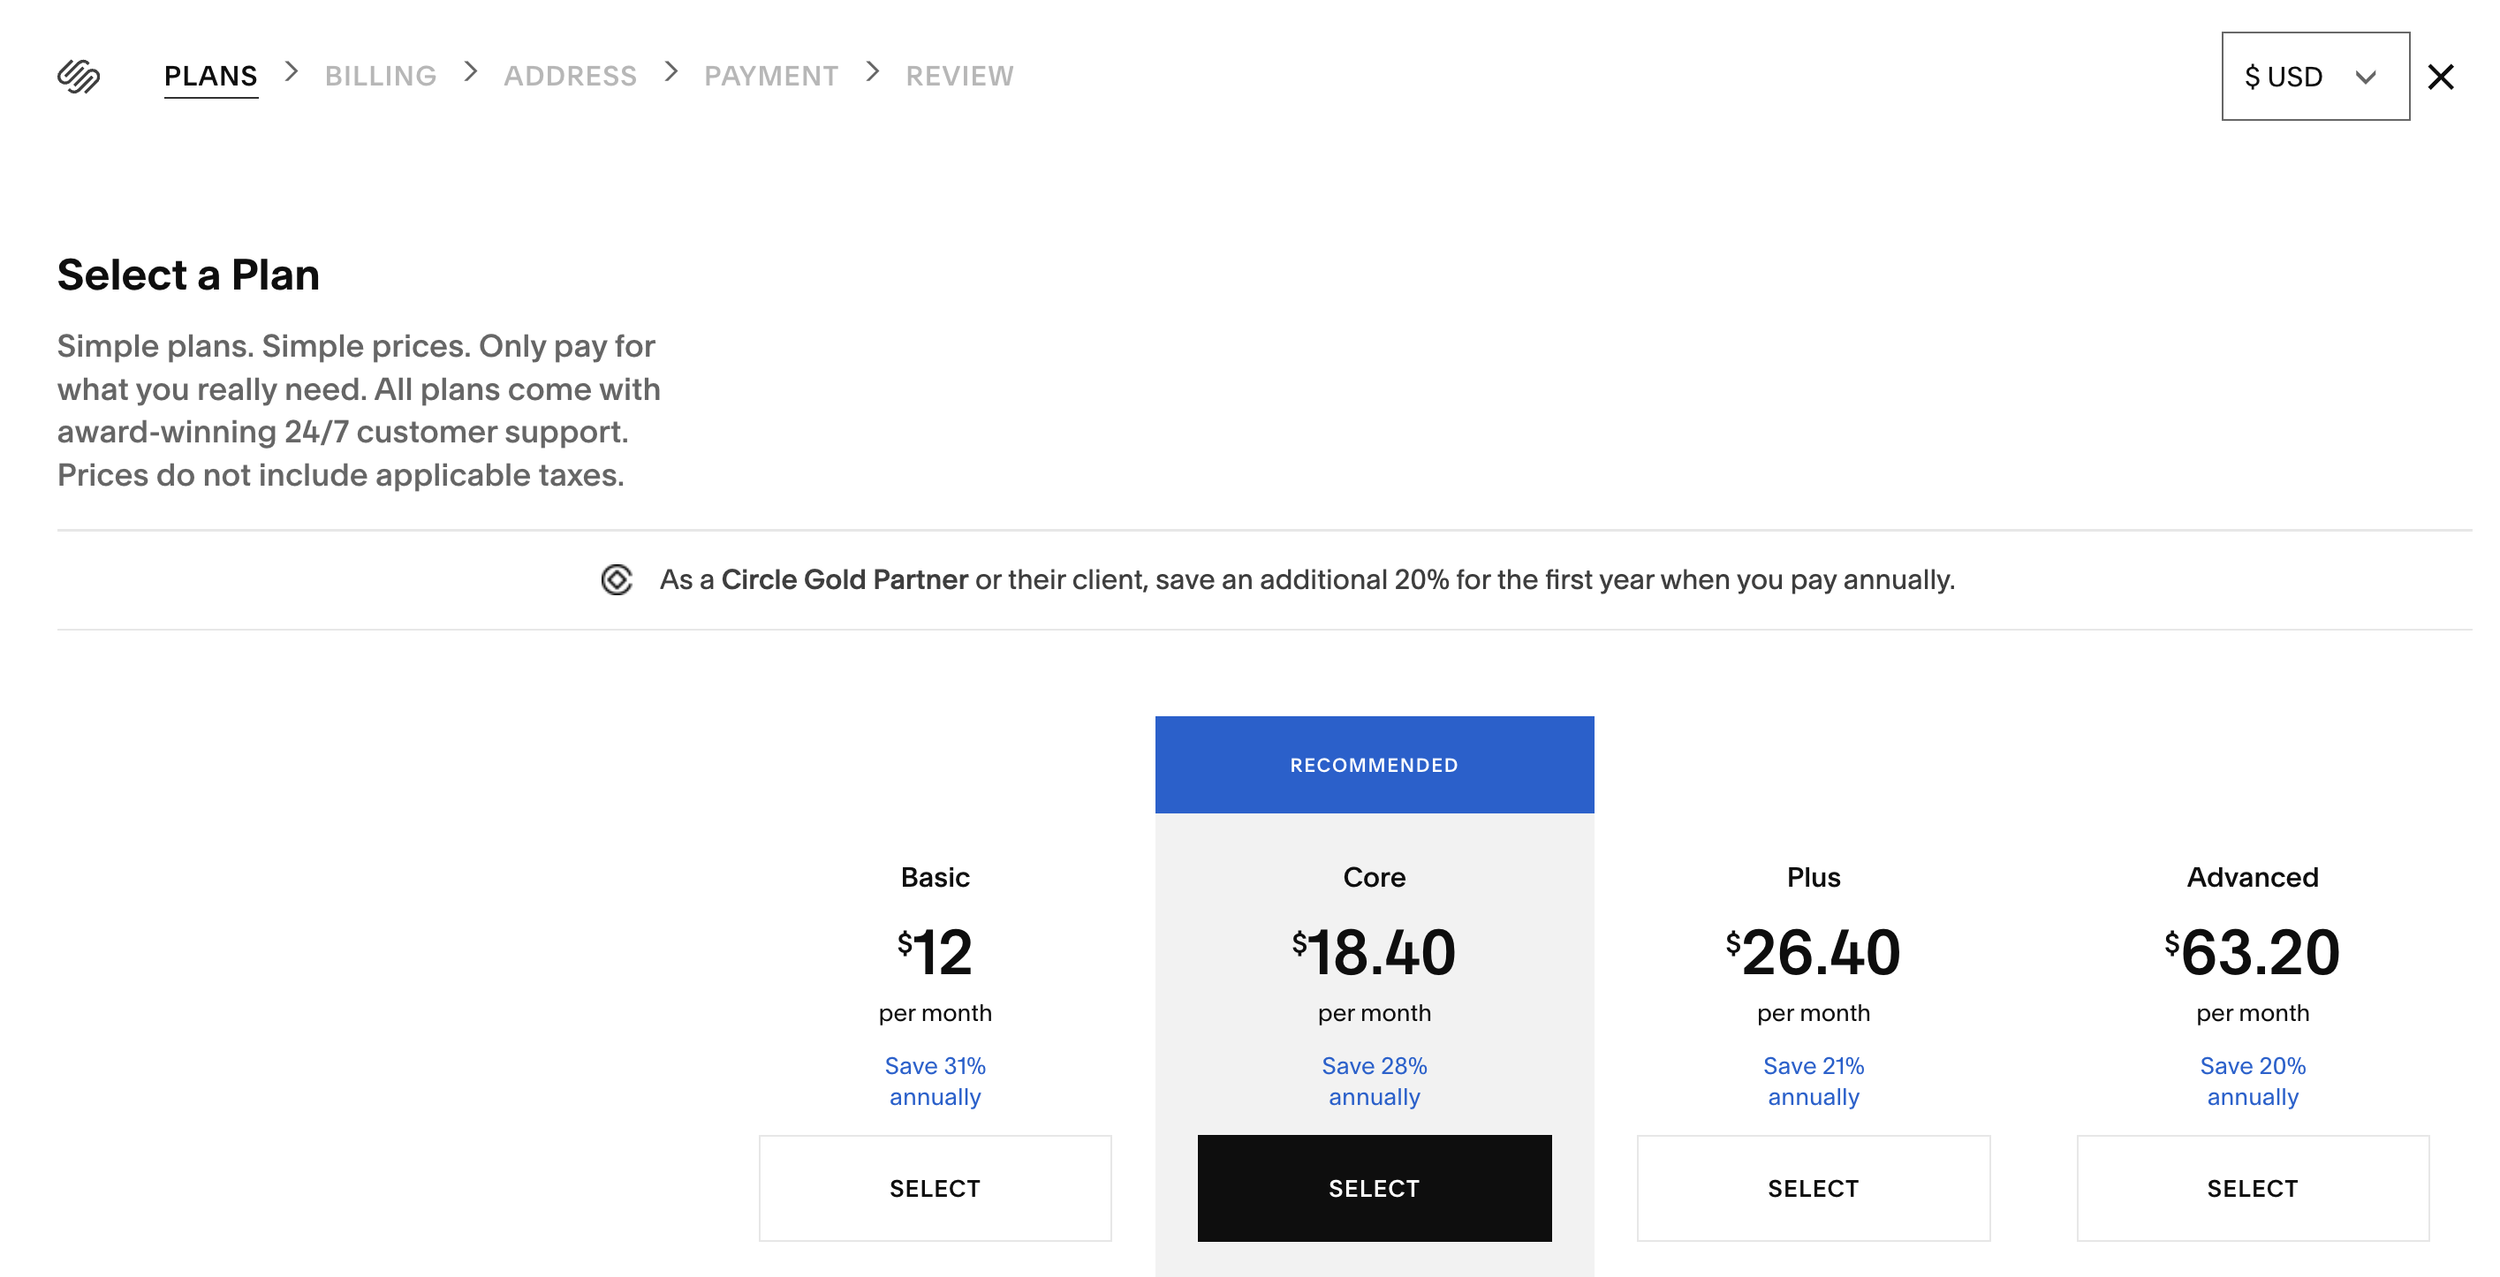
Choose Your Plan:
You’ll be prompted to choose from the available plans: Basic, Core, Plus, or Advanced. Since this template uses custom code, choose Core or higher.
Confirm Your Selection:
Once you’ve reviewed your plan and selected a billing option, click Confirm Selection to finalize your subscription.
Make Your Site Public!:
Return to Settings → Site Availability, and now you'll be able to select Public to make your site visible to everyone.
And That’s It!
Your site is now live, and visible to the world. If you ever need to change your plan, you can do it anytime in Settings → Billing & Account.
Oh, and one last thing…
Be sure to spend a little time celebrating this milestone! You’ve put so much hard work and care into launching your website and that’s something to be so proud of ♥︎