Blogging
Once you’ve finished writing and designing your blog post, you can choose to publish it right away, schedule it for later, or remove it from your site entirely. This guide walks you through both immediate publishing and deleting posts you no longer need.
Publishing a Blog Post:
Enter Edit mode on the post you want to publish.
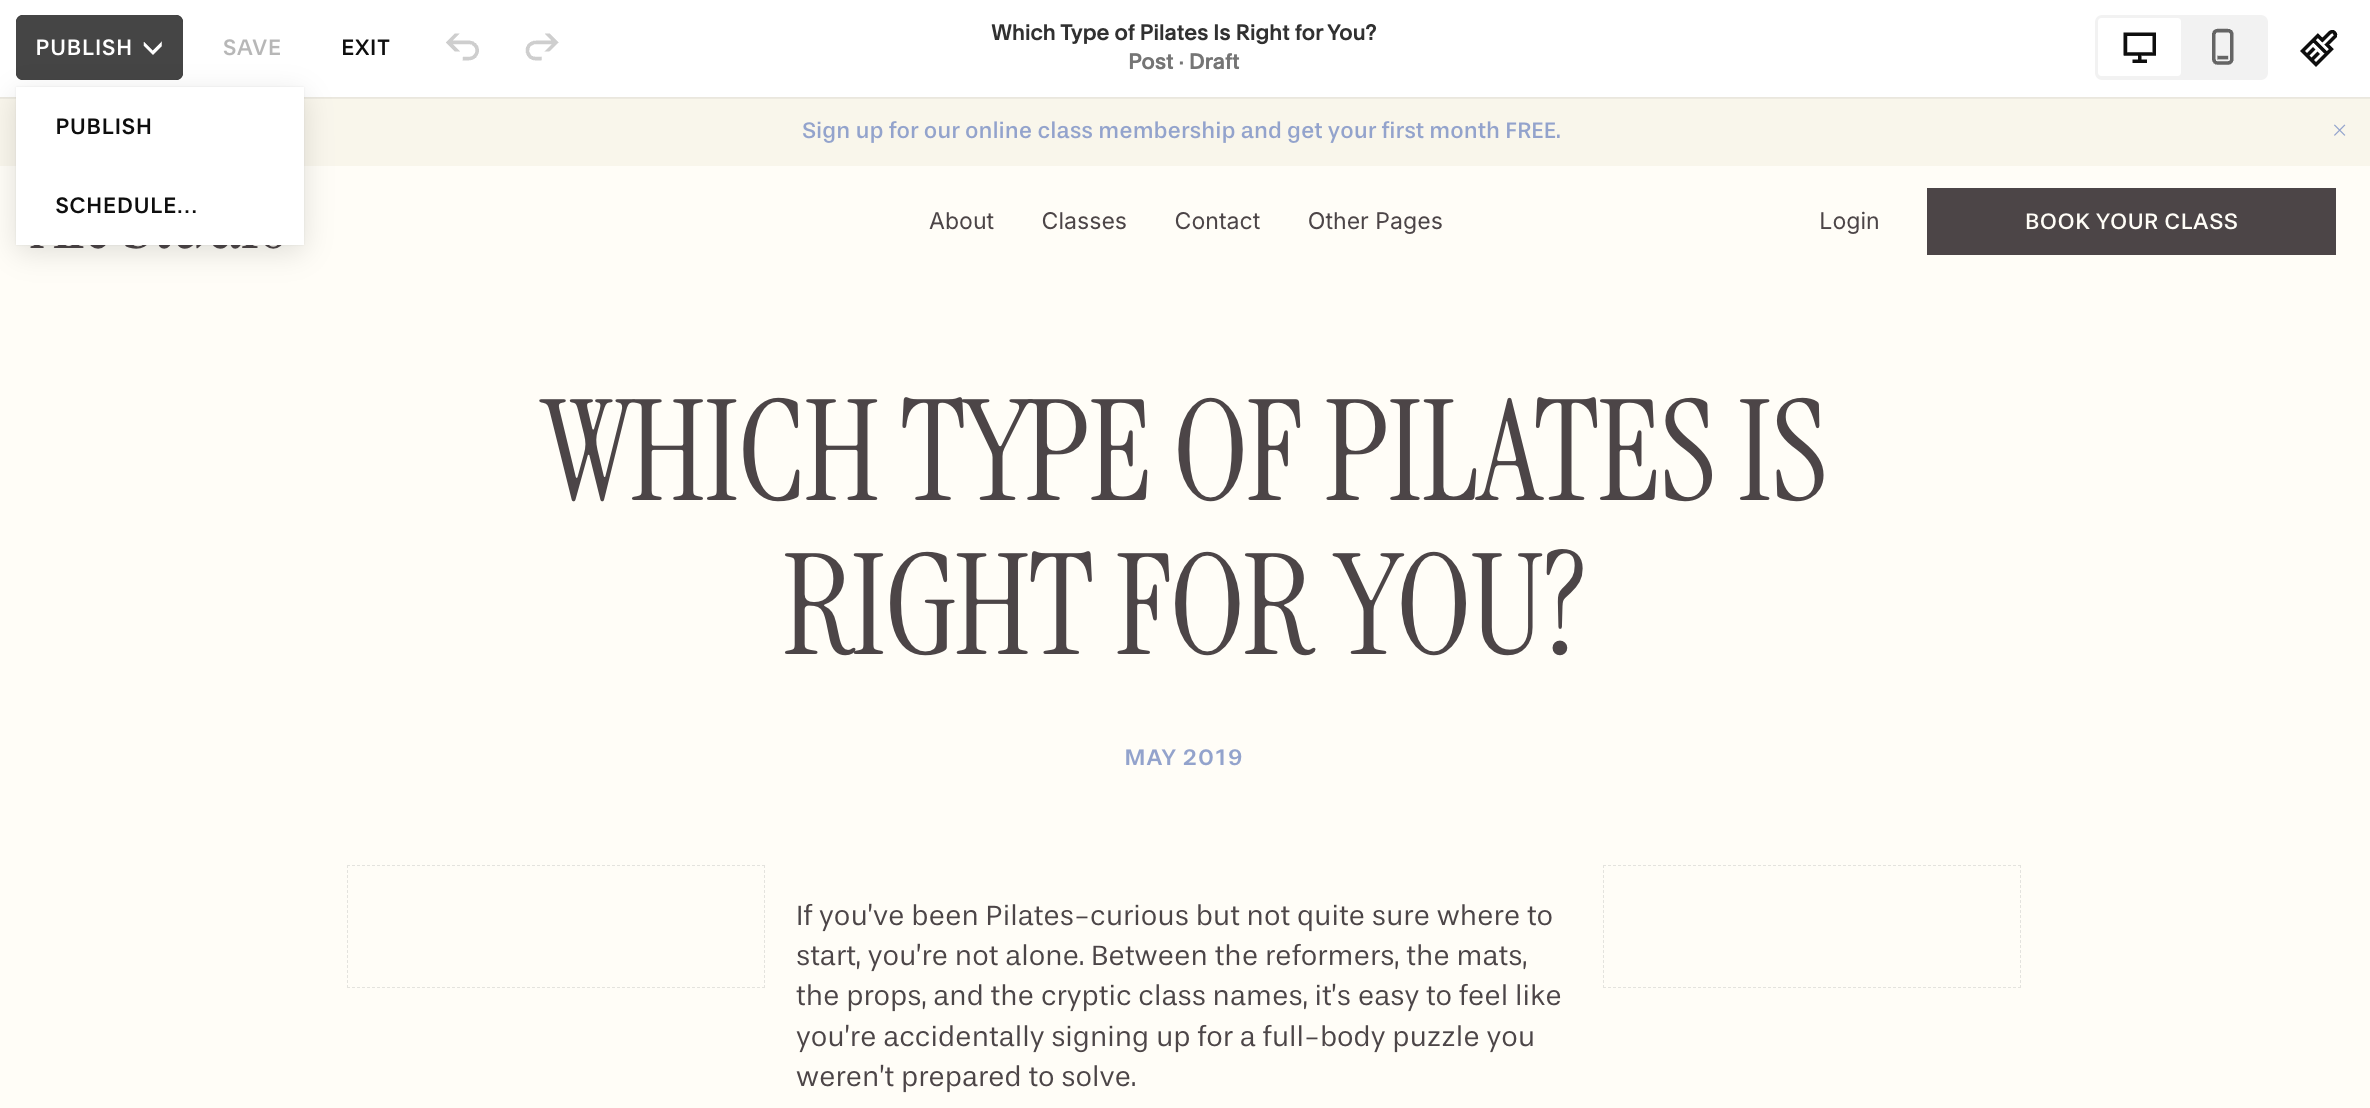
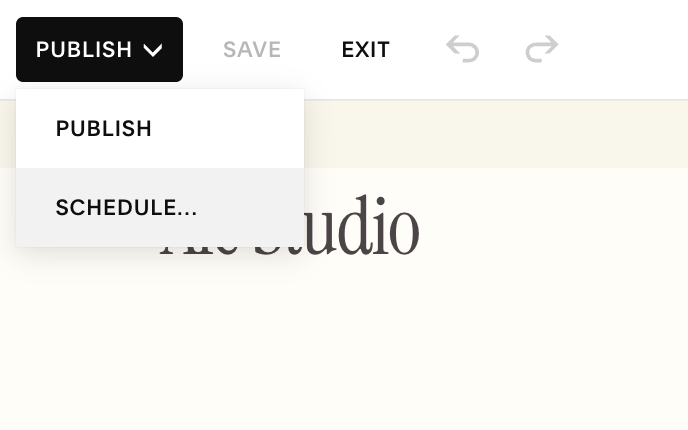
Click the ‘Publish’ button in the top right corner of your window.
Select Publish from the dropdown menu.
This will send your post live on your blog!
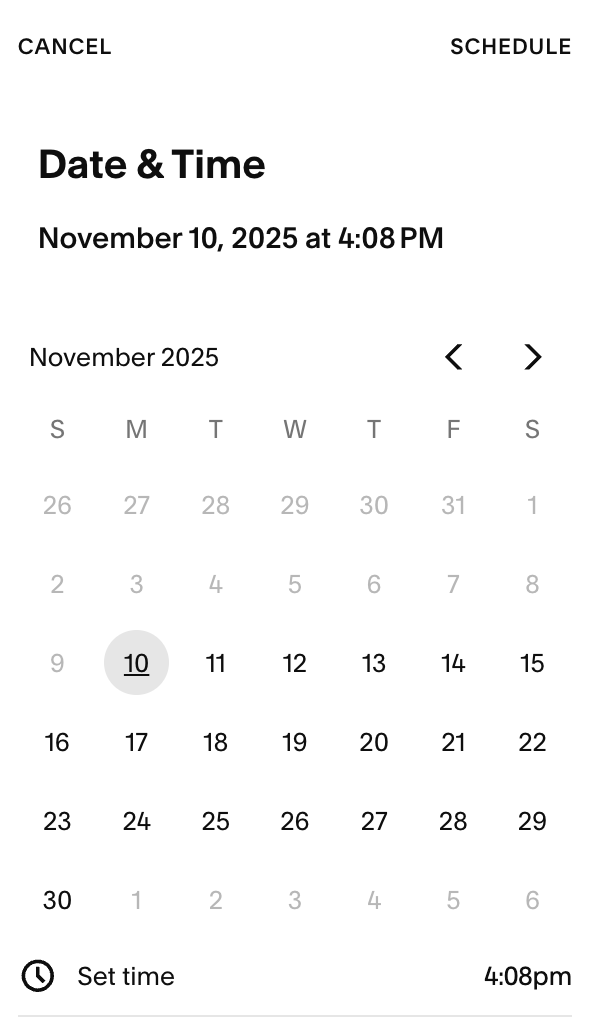
How to Schedule a Blog Post:
Scheduling blog posts ahead of time helps you stay consistent, save time, and roll out content when you’re not online. On Squarespace 7.1, you can set a future publication date and time, change dates on existing posts, or unpublish posts for edits without them going live.
To start:In your Pages panel, open the Blog page and select ‘+’' icon (or open an existing draft).
Once you’ve added your content, look for the Status dropdown or the publication area.
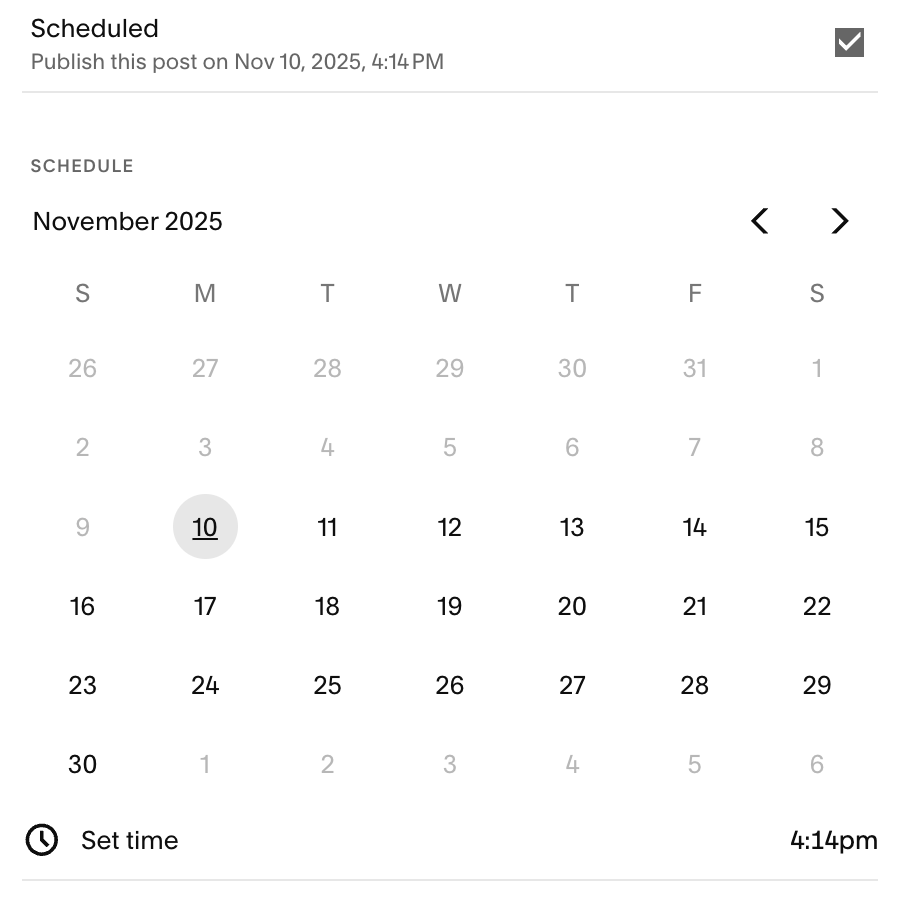
Choose Scheduled instead of Published.
Select the date on the calendar and use the time slider to pick the hour and minute.
Save your changes: your post will now go live automatically at that date/time
How to Change a Blog Post’s Publish Date or Time:
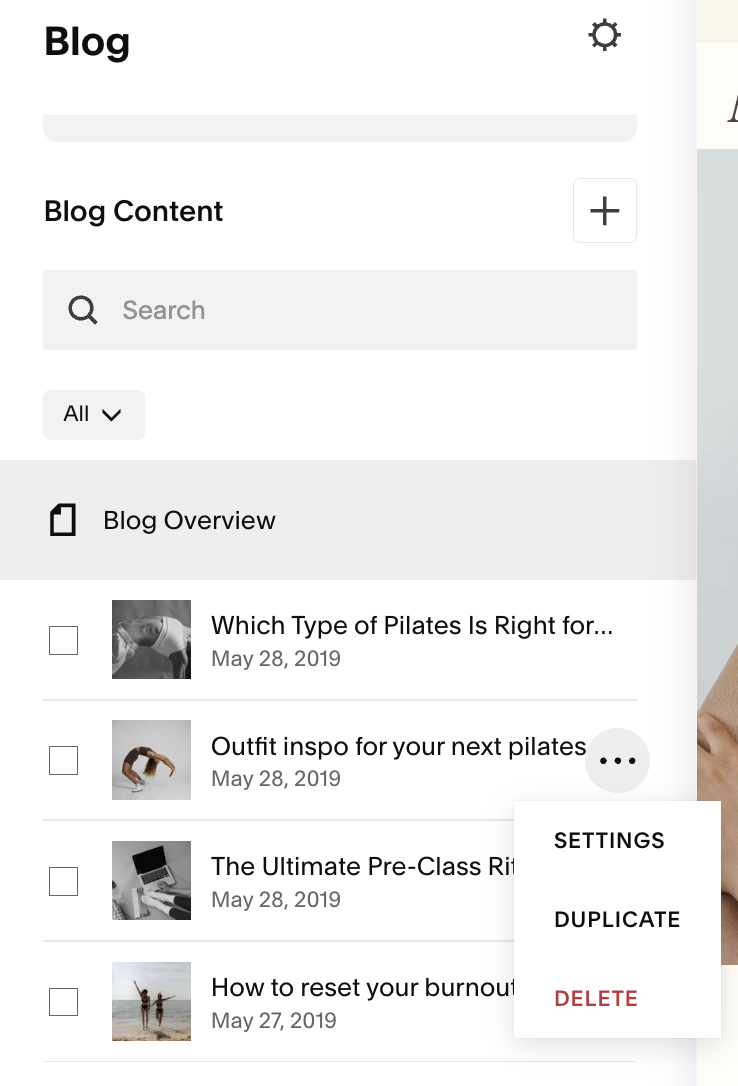
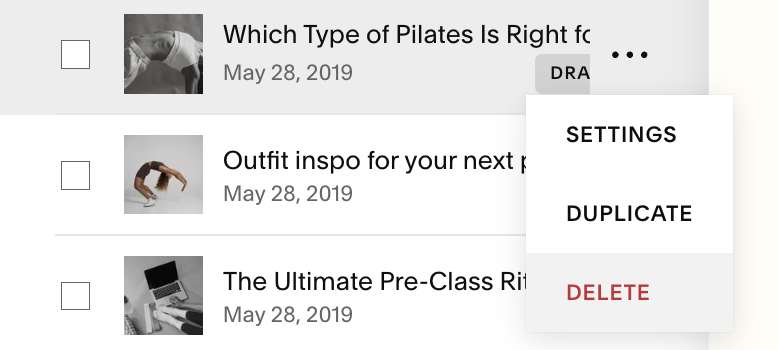
In the Pages panel, hover over your post and click the ••• (three dots) menu.
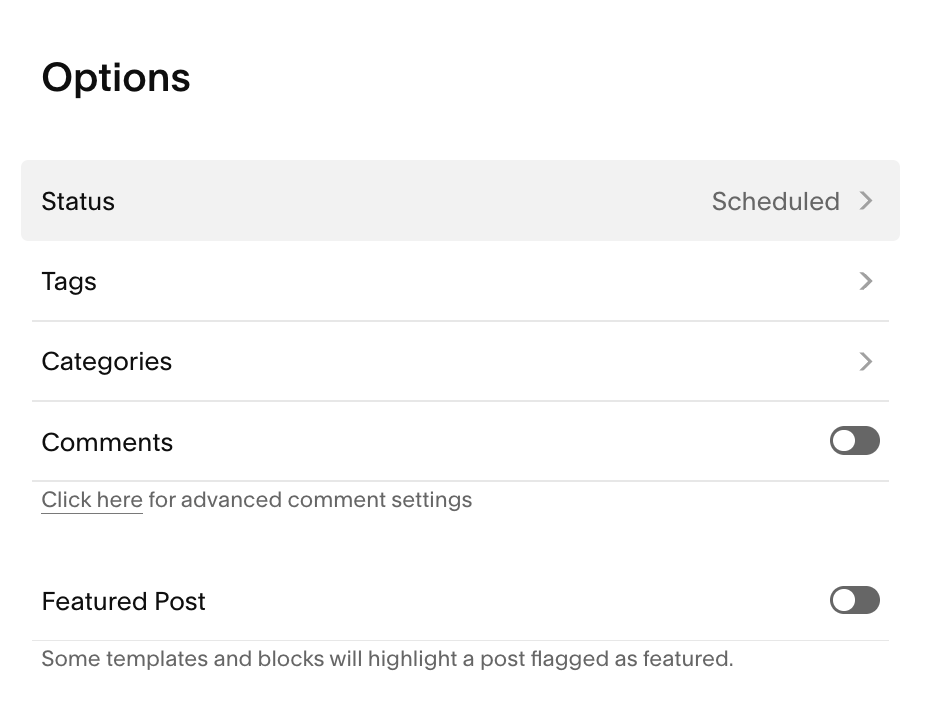
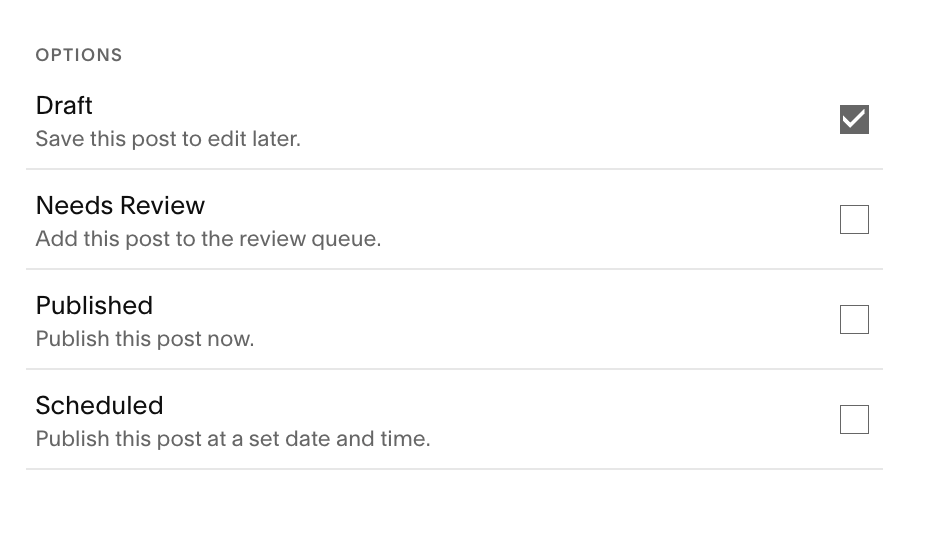
Select Settings (or Post Settings) and go to the Options tab.
Under Status, switch to Published (or Scheduled).
Update the date on the calendar and adjust the time using the slider.
Click Save
Tips for Using Scheduling Successfully:
Write and schedule multiple posts at once to avoid last-minute scrambles.
Confirm your time zone is correct in Site Settings so posts go live at the expected local time.
Double-check the scheduled date/time after saving
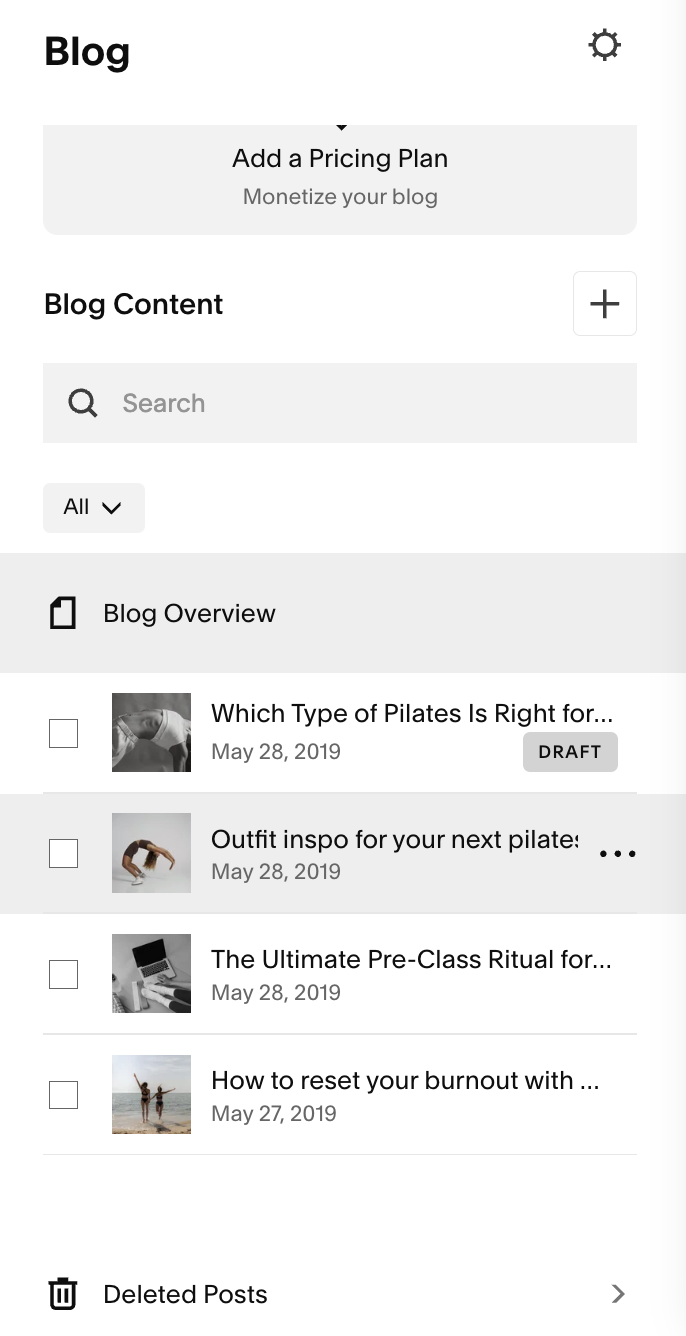
Use the list view of posts to quickly see which ones are Published, Scheduled, or Draft.
How to Unpublish or Take a Post Offline:
Go to the blog post and open its settings.
Change its Status from “Published” to Draft (or another status like “Needs Review,” if available).
Save your changes: the post will no longer appear live on your site.
Deleting a Blog Post:
If you’d like to remove a post from your blog and your website entirely:
Hover over the post title in your Blog Panel.
Click ••• (More) menu and select Delete from the dropdown menu
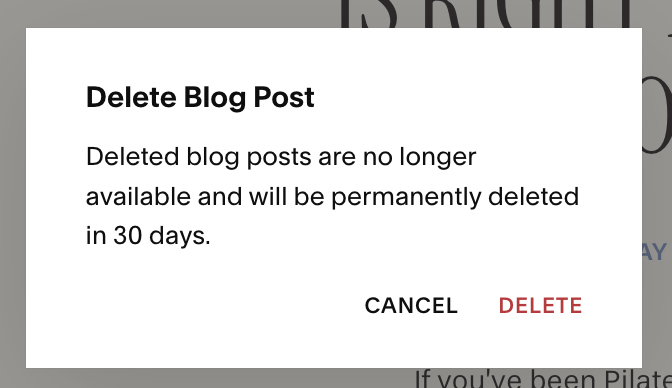
Squarespace will ask you to confirm: click Delete again to permanently remove the post.
Retrieving a Deleted Post:
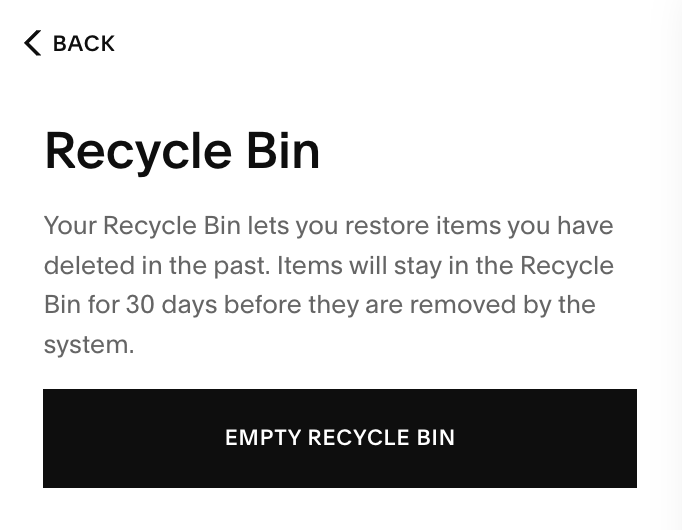
If you accidentally delete a post or change your mind you can access any deleted blog posts in your Recycle Bin. To access this:
Click ‘Deleted Posts’ at the bottom of your Blog panel
Select the post you want to restore and click the ••• (More) menu
Choose ‘Restore’ from the dropdown
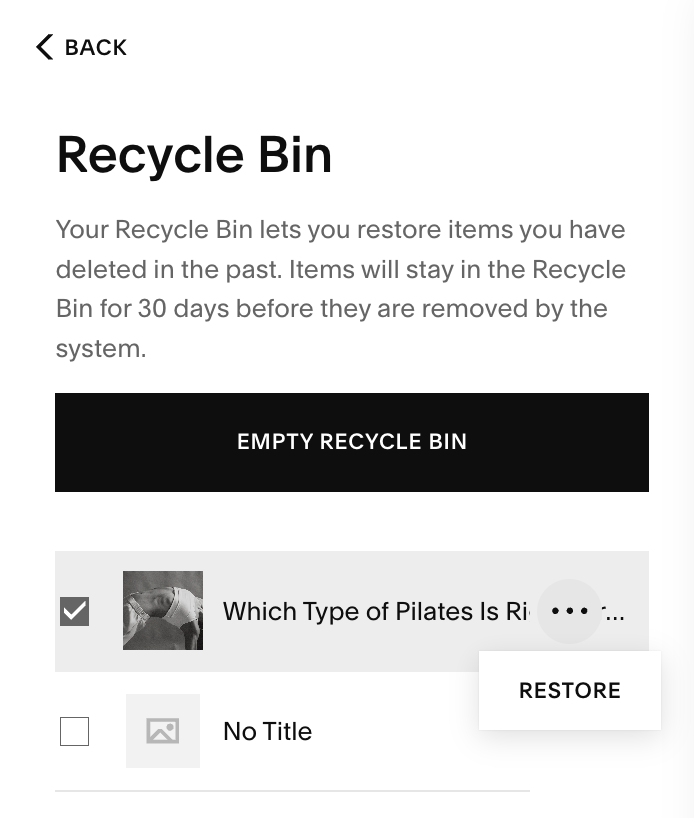
Note: Deleted blog posts will stay in your recycle bin for 30 days before being permanently deleted. If you’d like to empty the bin, click the ‘Empty Recycle Bin’ button in your Deleted Posts section.